# Create a Floor
## Create a Floor
A floor is created like a regular asset via the "Create Asset" menu.
However, several special features must be considered:
1. "Floor" must be selected as the asset type
2. A floor plan must be assigned
3. The floor must be subordinated to a building
Both of these special features are explained in the following documentation.
{% hint style="info" %}
Correctly configured floors are always marked with the **\[U] symbol**.
{% endhint %}
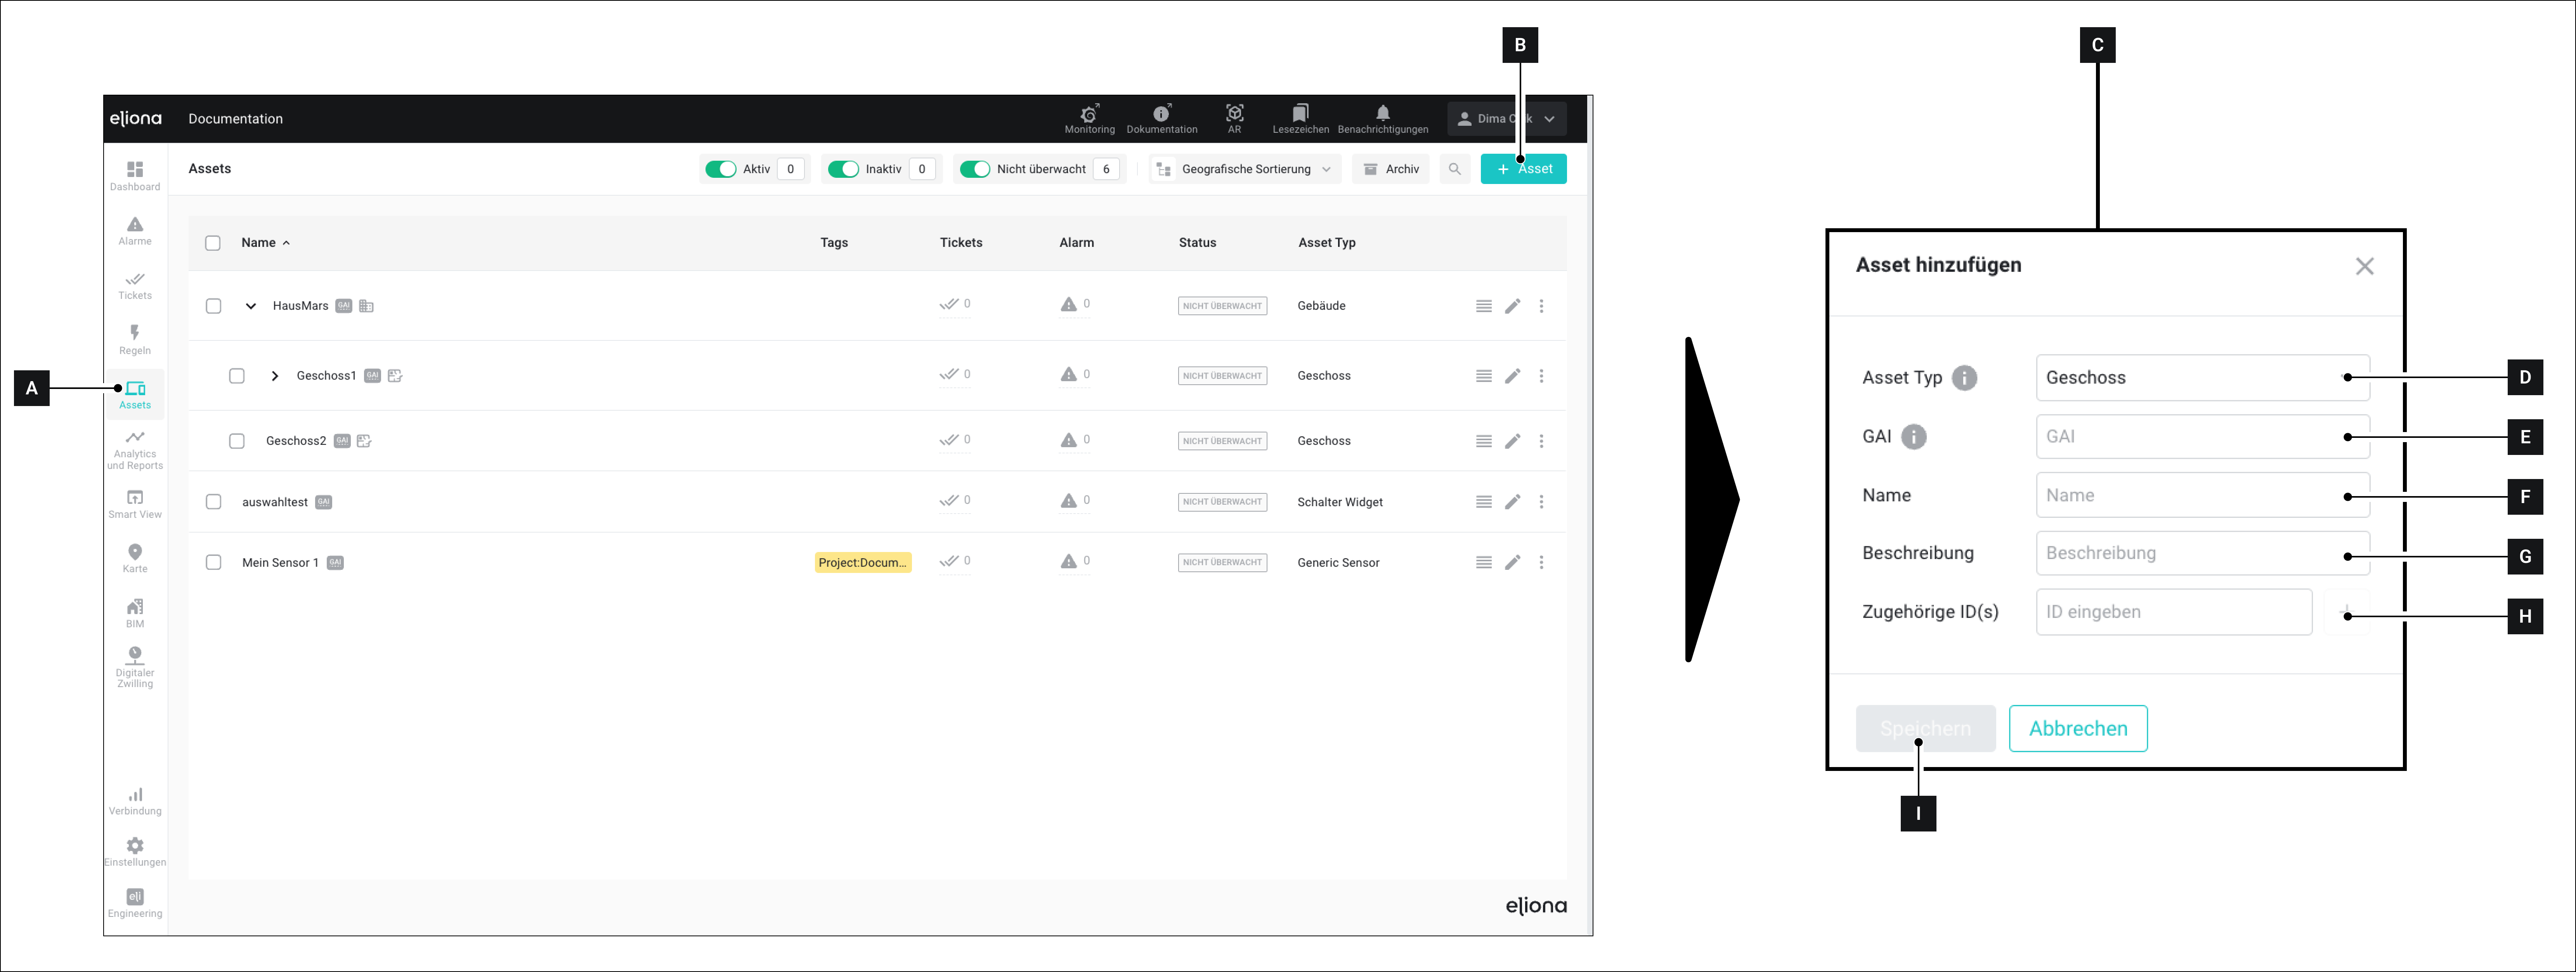
### Create a "Floor" Asset
1. Open the menu item **Assets \[A]**
2. Click on **\[B]**
▷ The **Add Asset \[C]** window opens
3. Under **Asset Type \[C]:** Select the type "Floor"
4. Assign a GAI **\[D]**
5. Give the asset a name **\[E]**
6. (Optional): Add a description to the asset **\[F]**
7. (Optional): Enter one or more IDs of the asset **\[G]**
8. (Optional): Give the asset one or more tags
9. Click on **Save \[I]**
▷ The asset is created
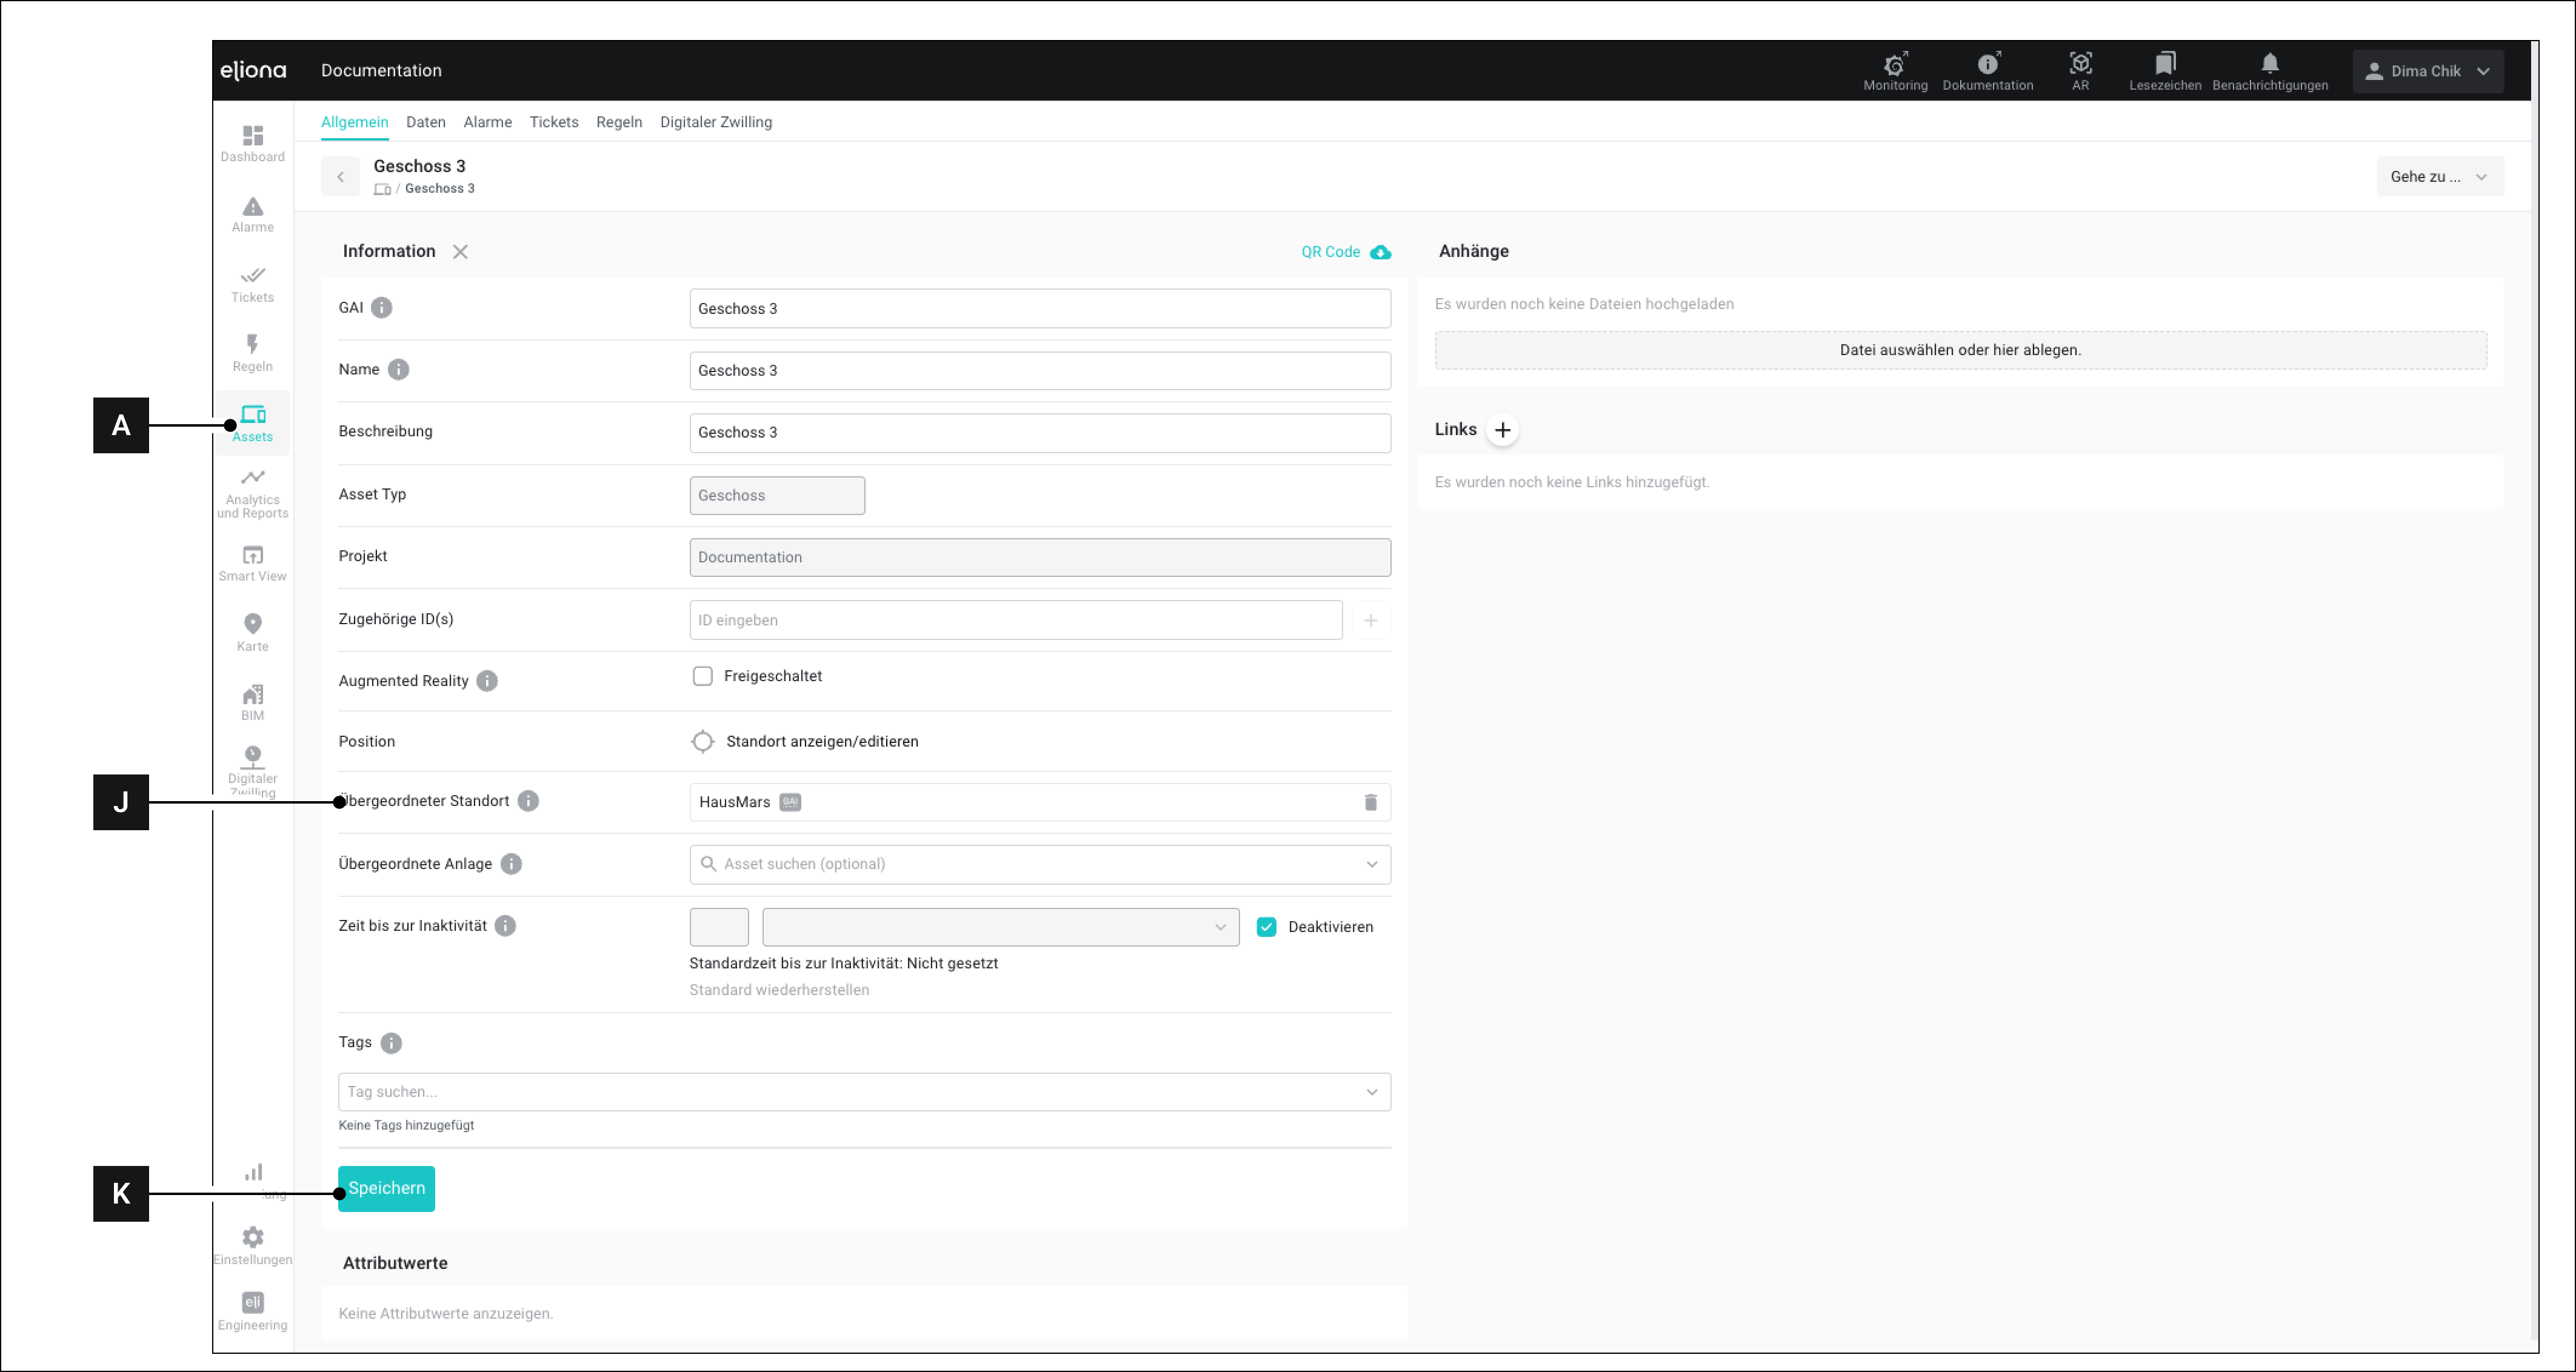
### Assign a Floor to a Building
1. Open the menu item **Assets \[A]**
2. Navigate to an asset with the type "Floor"
3. In the item **Parent Location \[J]** – Select an asset to which you want to assign the floor.
◈ This parent asset is usually a building.
4. Click on **Save \[K]**
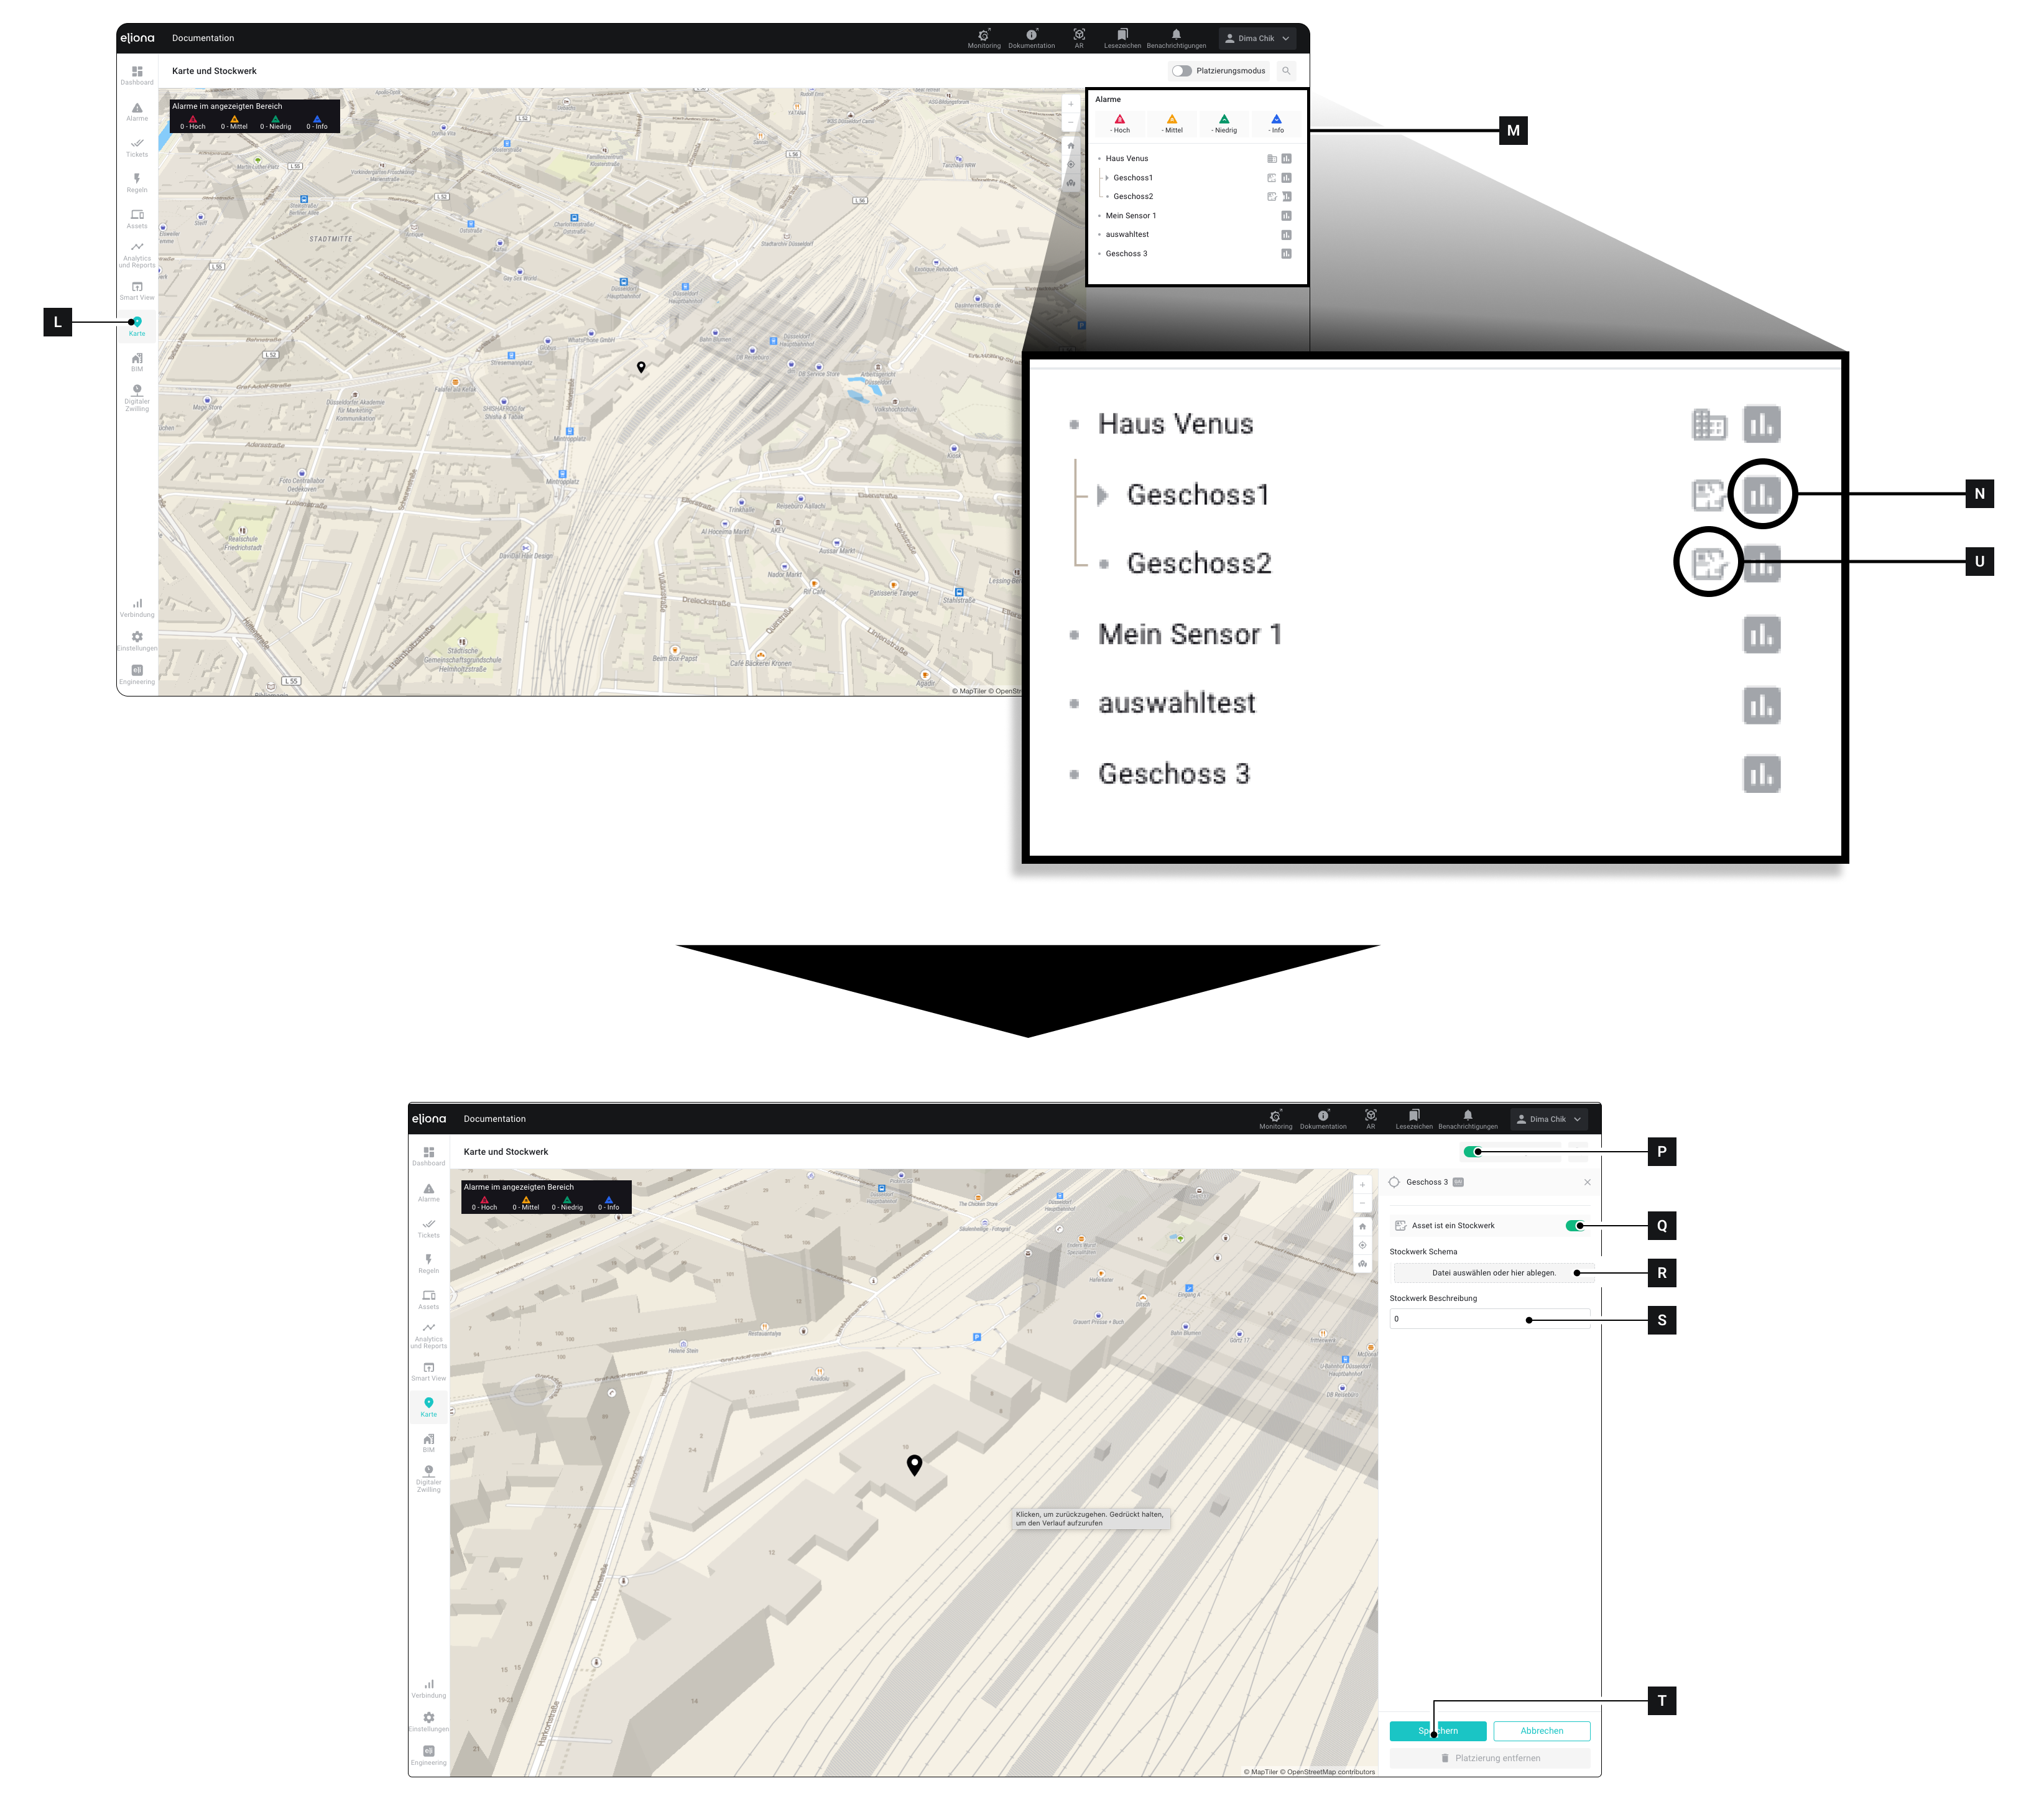
### Add a Floor Plan
* Open the **Map \[L]** menu
* In the **sidebar \[M]:** Expand the asset to which the floor you want to add the floor plan to is assigned. ▷ You will see all assets that are assigned to this asset. This can include one or more floors.
* For the asset to which you want to add a floor plan: Click on the **\[N]** icon. ⚠ **Caution** DO NOT click on the name of the asset!
▷ The details open
* Activate the **Placement Mode \[P]**
* Activate the switch **Asset is a floor \[Q]**
* Under **Floor Schema \[R]**, upload a floor plan
* Under **Floor Description \[S]**, select the number of the floor.
* Click on **Save \[T]**
▷ The floor is created.
▷ The floor is marked with an **Icon \[U]**.
▷ In the **Assets \[A]** menu, the floor now appears under the parent asset
{% hint style="success" %}
After you have completed the steps in this chapter, the asset will be marked with the **\[U] symbol**.
Only assets that are marked with the **\[U] symbol** are correctly configured floors.
{% endhint %}
{% hint style="warning" %}
If the asset is not marked with the **\[U] symbol**, you cannot perform the steps in the next chapter.
{% endhint %}