> For the complete documentation index, see [llms.txt](https://docs.buildings.ability.abb/collection/llms.txt). Markdown versions of documentation pages are available by appending `.md` to page URLs; this page is available as [Markdown](https://docs.buildings.ability.abb/collection/english-v14/documentation/digitaler-zwilling.md).
# Digital Twin
## About the Digital Twin
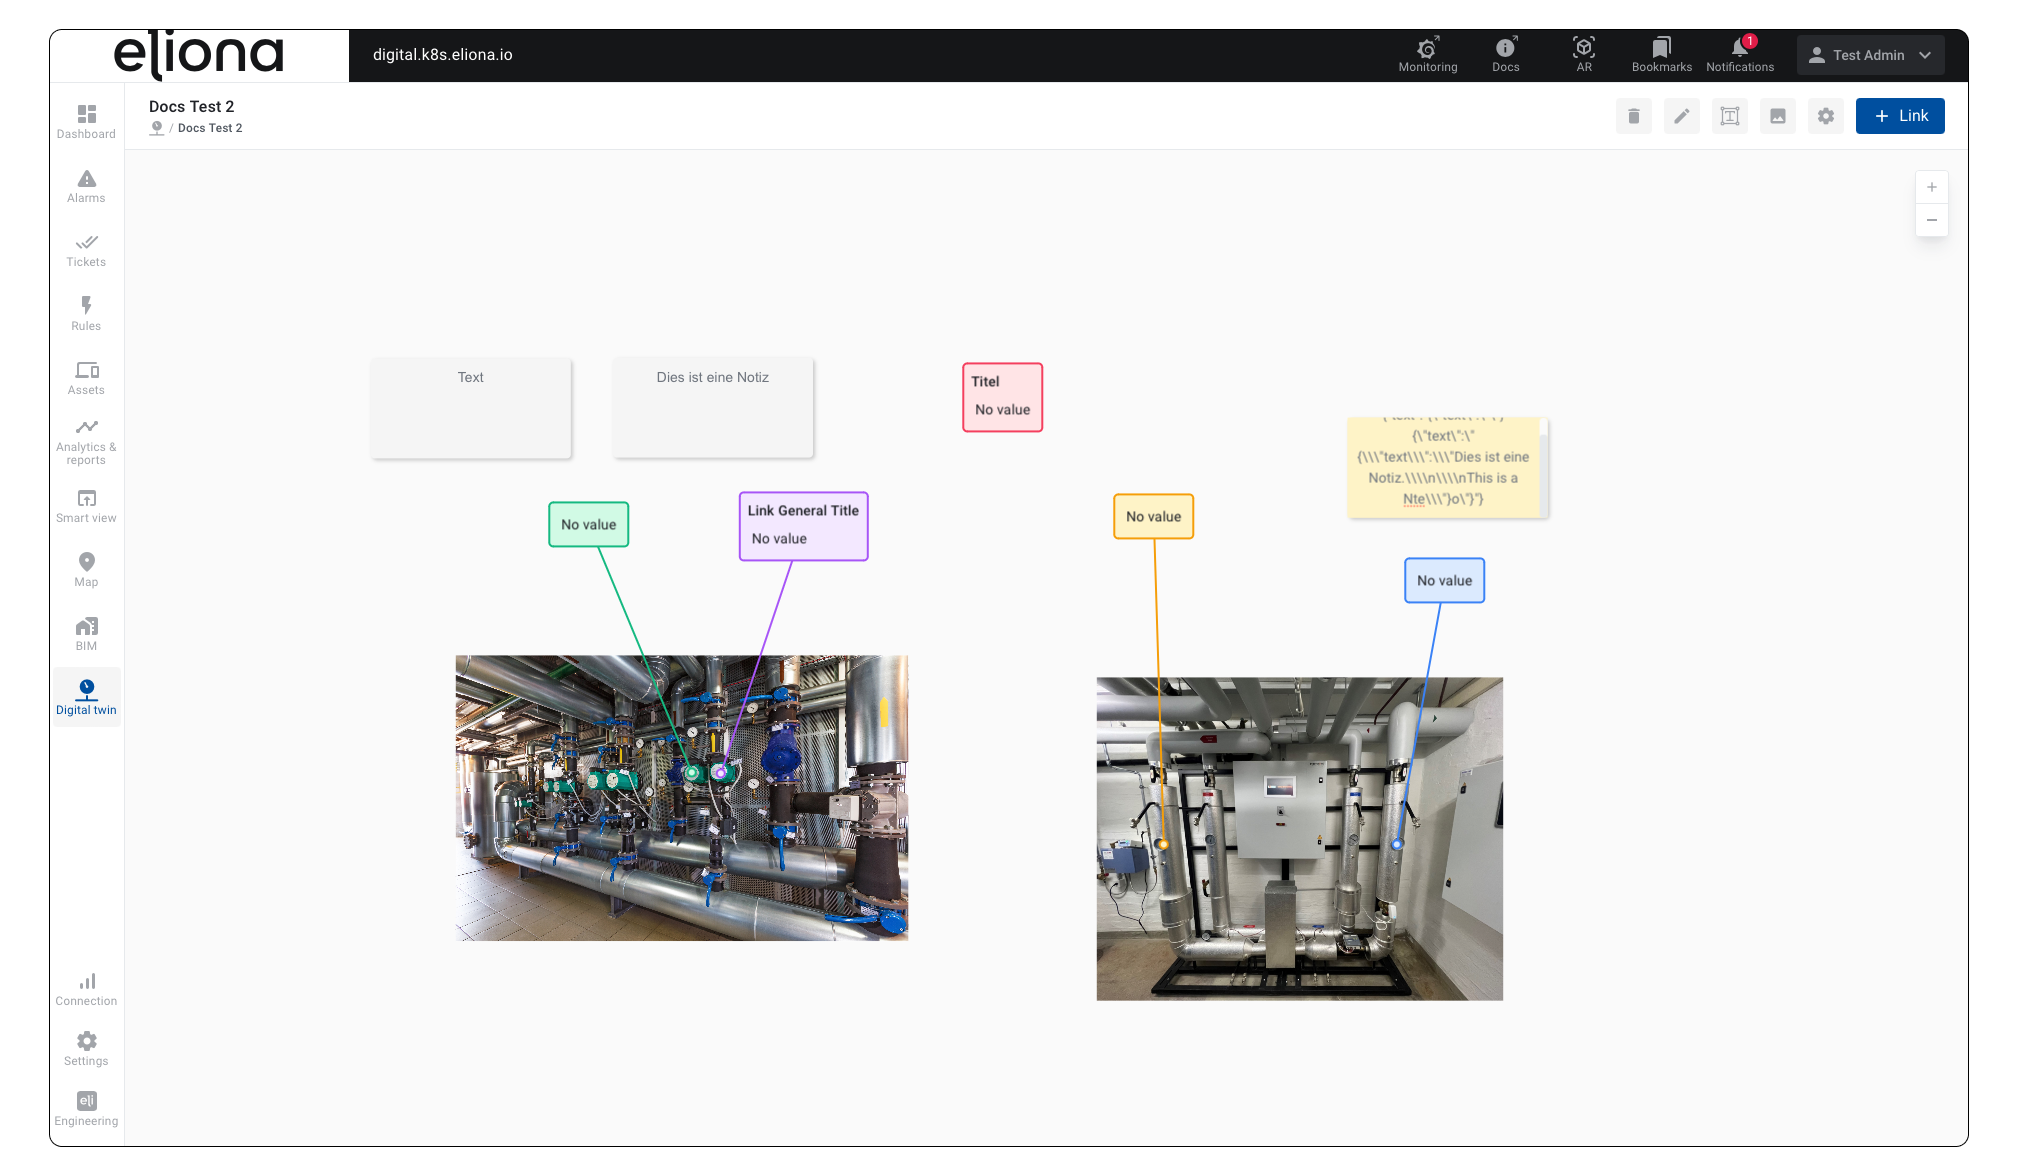
In eliona, a Digital Twin is the representation of a device that is interactively linked to one or more assets. The representation can be a photo, but also a technical drawing.
Data sent by the assets are displayed in the representation via so-called links. This allows systems to be read remotely.
Data can also be written via the assets connected to the Digital Twin. Therefore it is possible to make settings on the system directly via the Digital Twin.
In Eliona, a Digital Twin consists of one or more images that can be freely arranged on a canvas.
## Controls of a Digital Twin
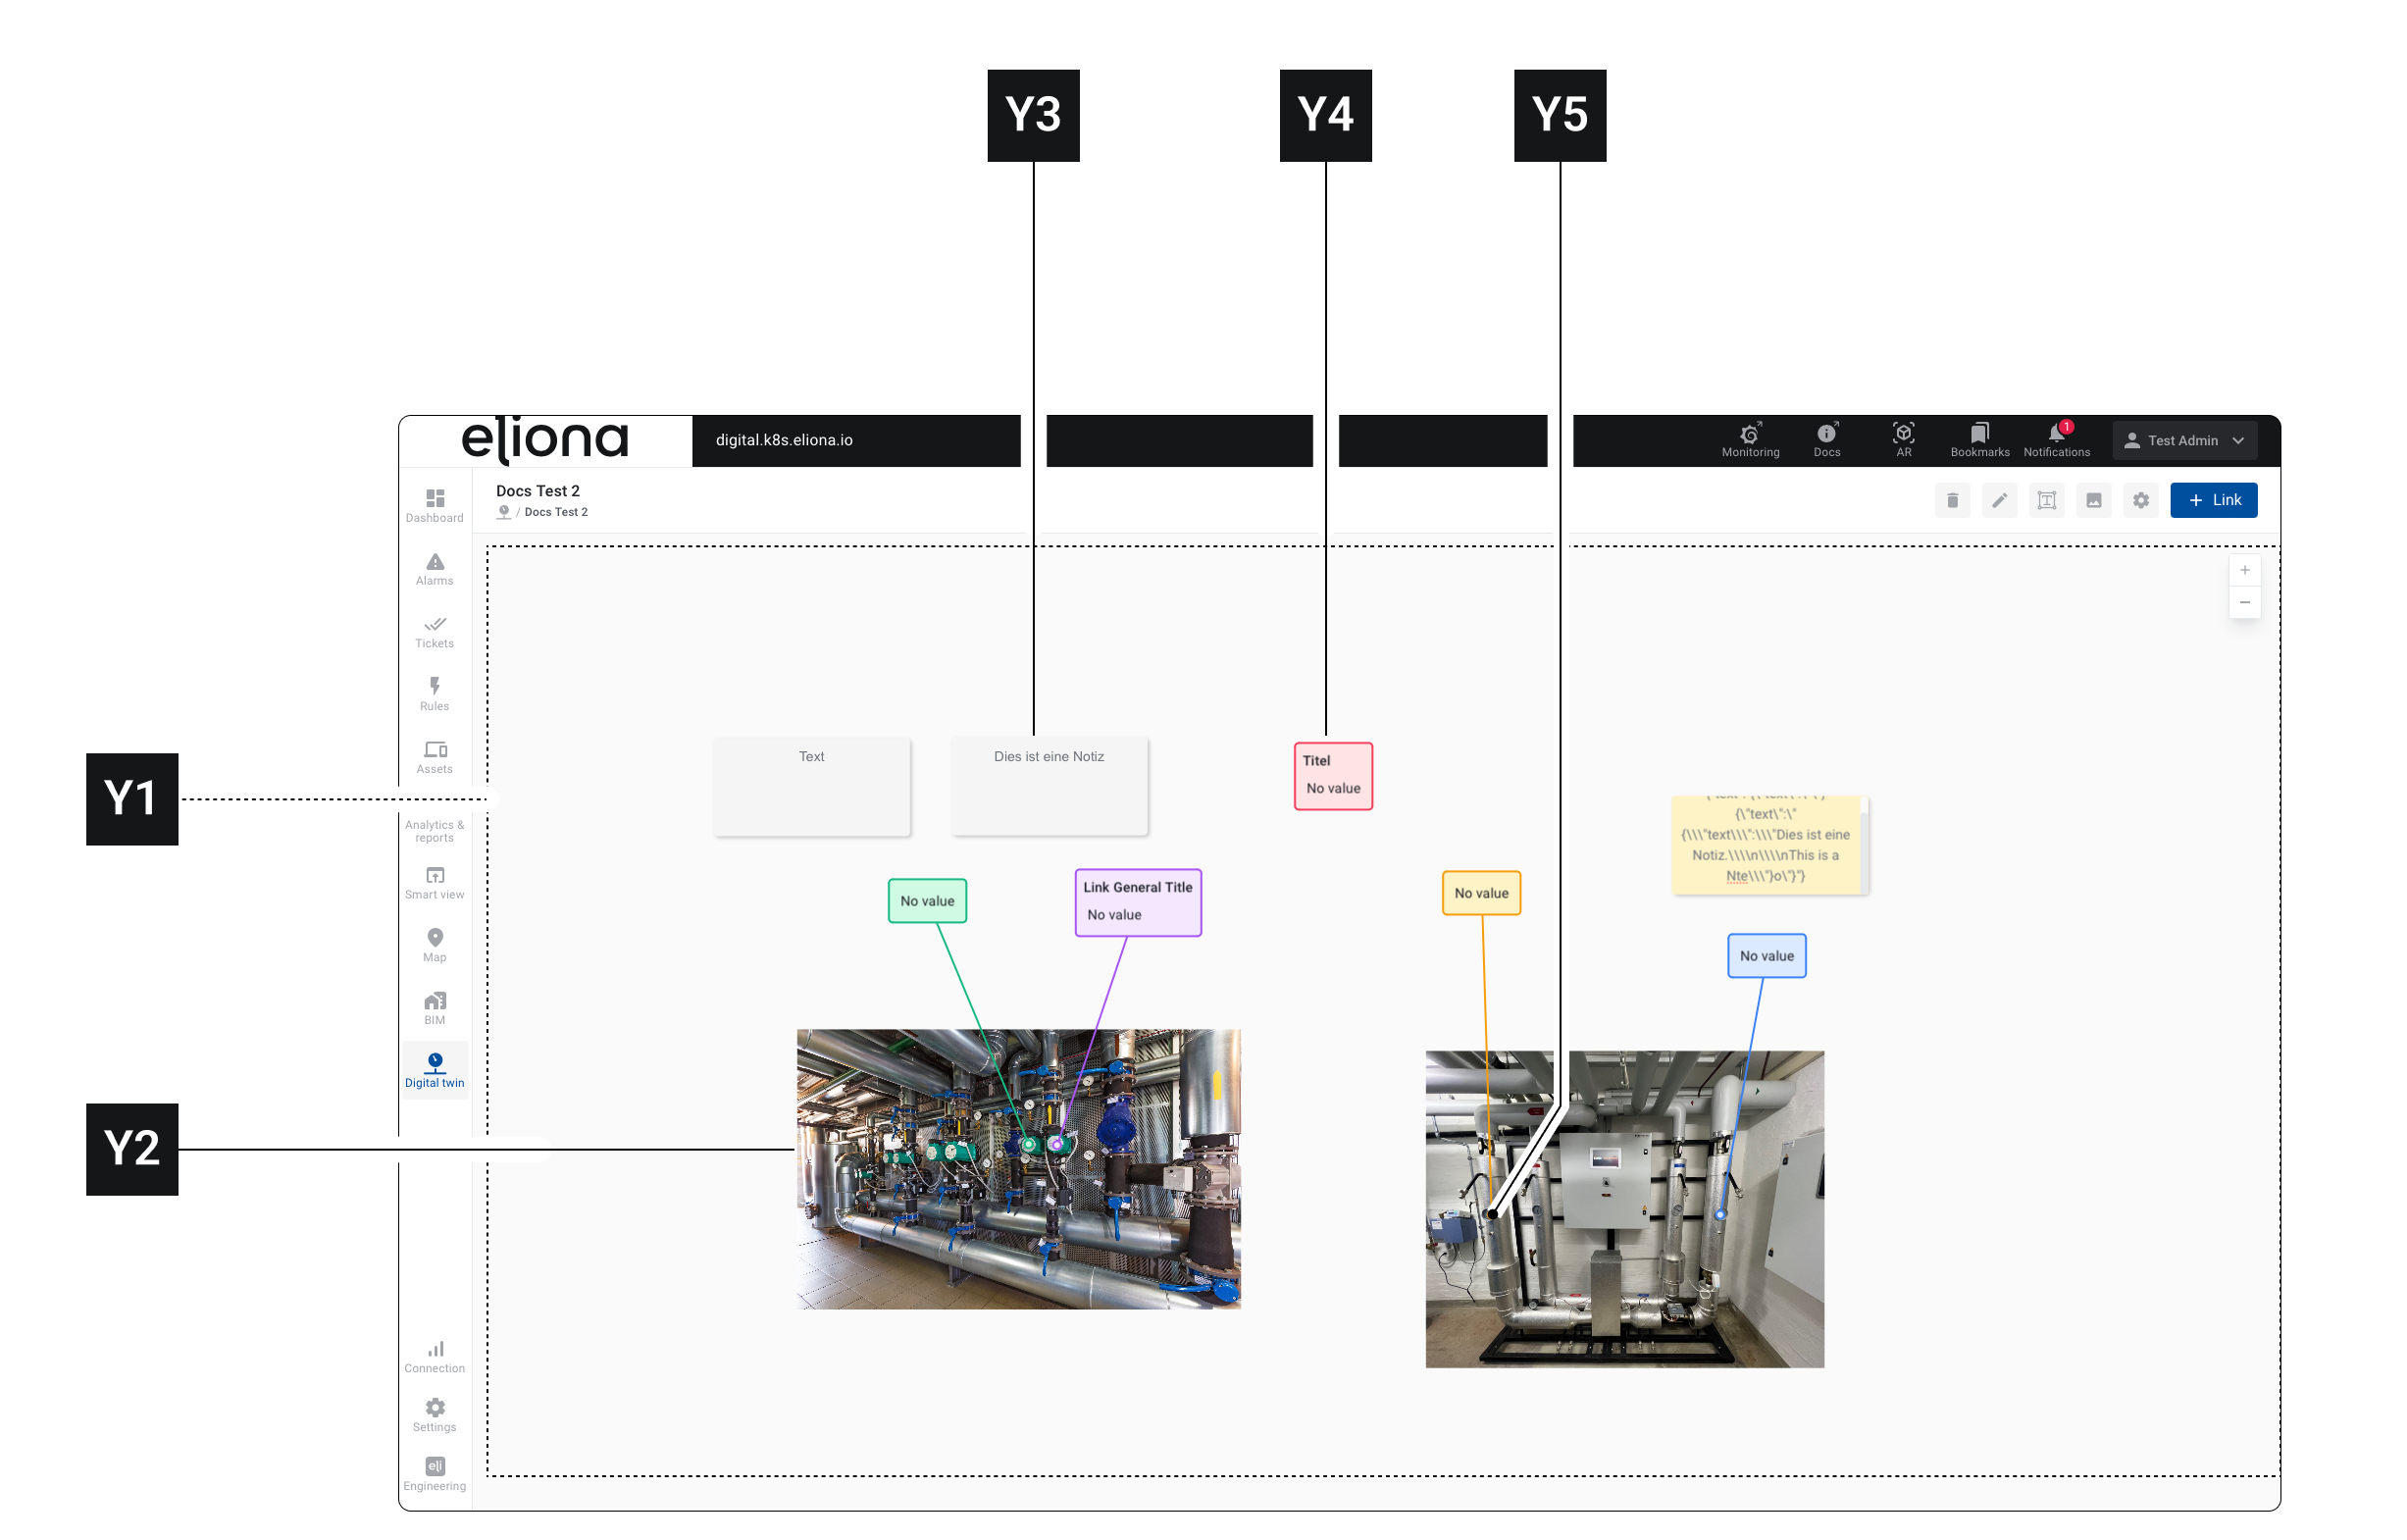
The Digital Twin consists of the following elements:
| Element | Title | Details |
| --------- | ------------------------- | ------------------------------------------------------------------------------------------------------ |
| **\[Y1]** | Canvas | All images and other elements of the Digital Twin are displayed on the canvas. |
| **\[Y2]** | Image | An image of a device. You can upload an unlimited number of images. |
| **\[Y3]** | Note | Text can be entered in a note. |
| **\[Y4]** | Link | Displays a value of an asset |
| **\[Y5]** | Link with reference point | The reference point can be placed over an image to increase the comprehensibility of the Digital Twin. |
## Creating a Digital Twin
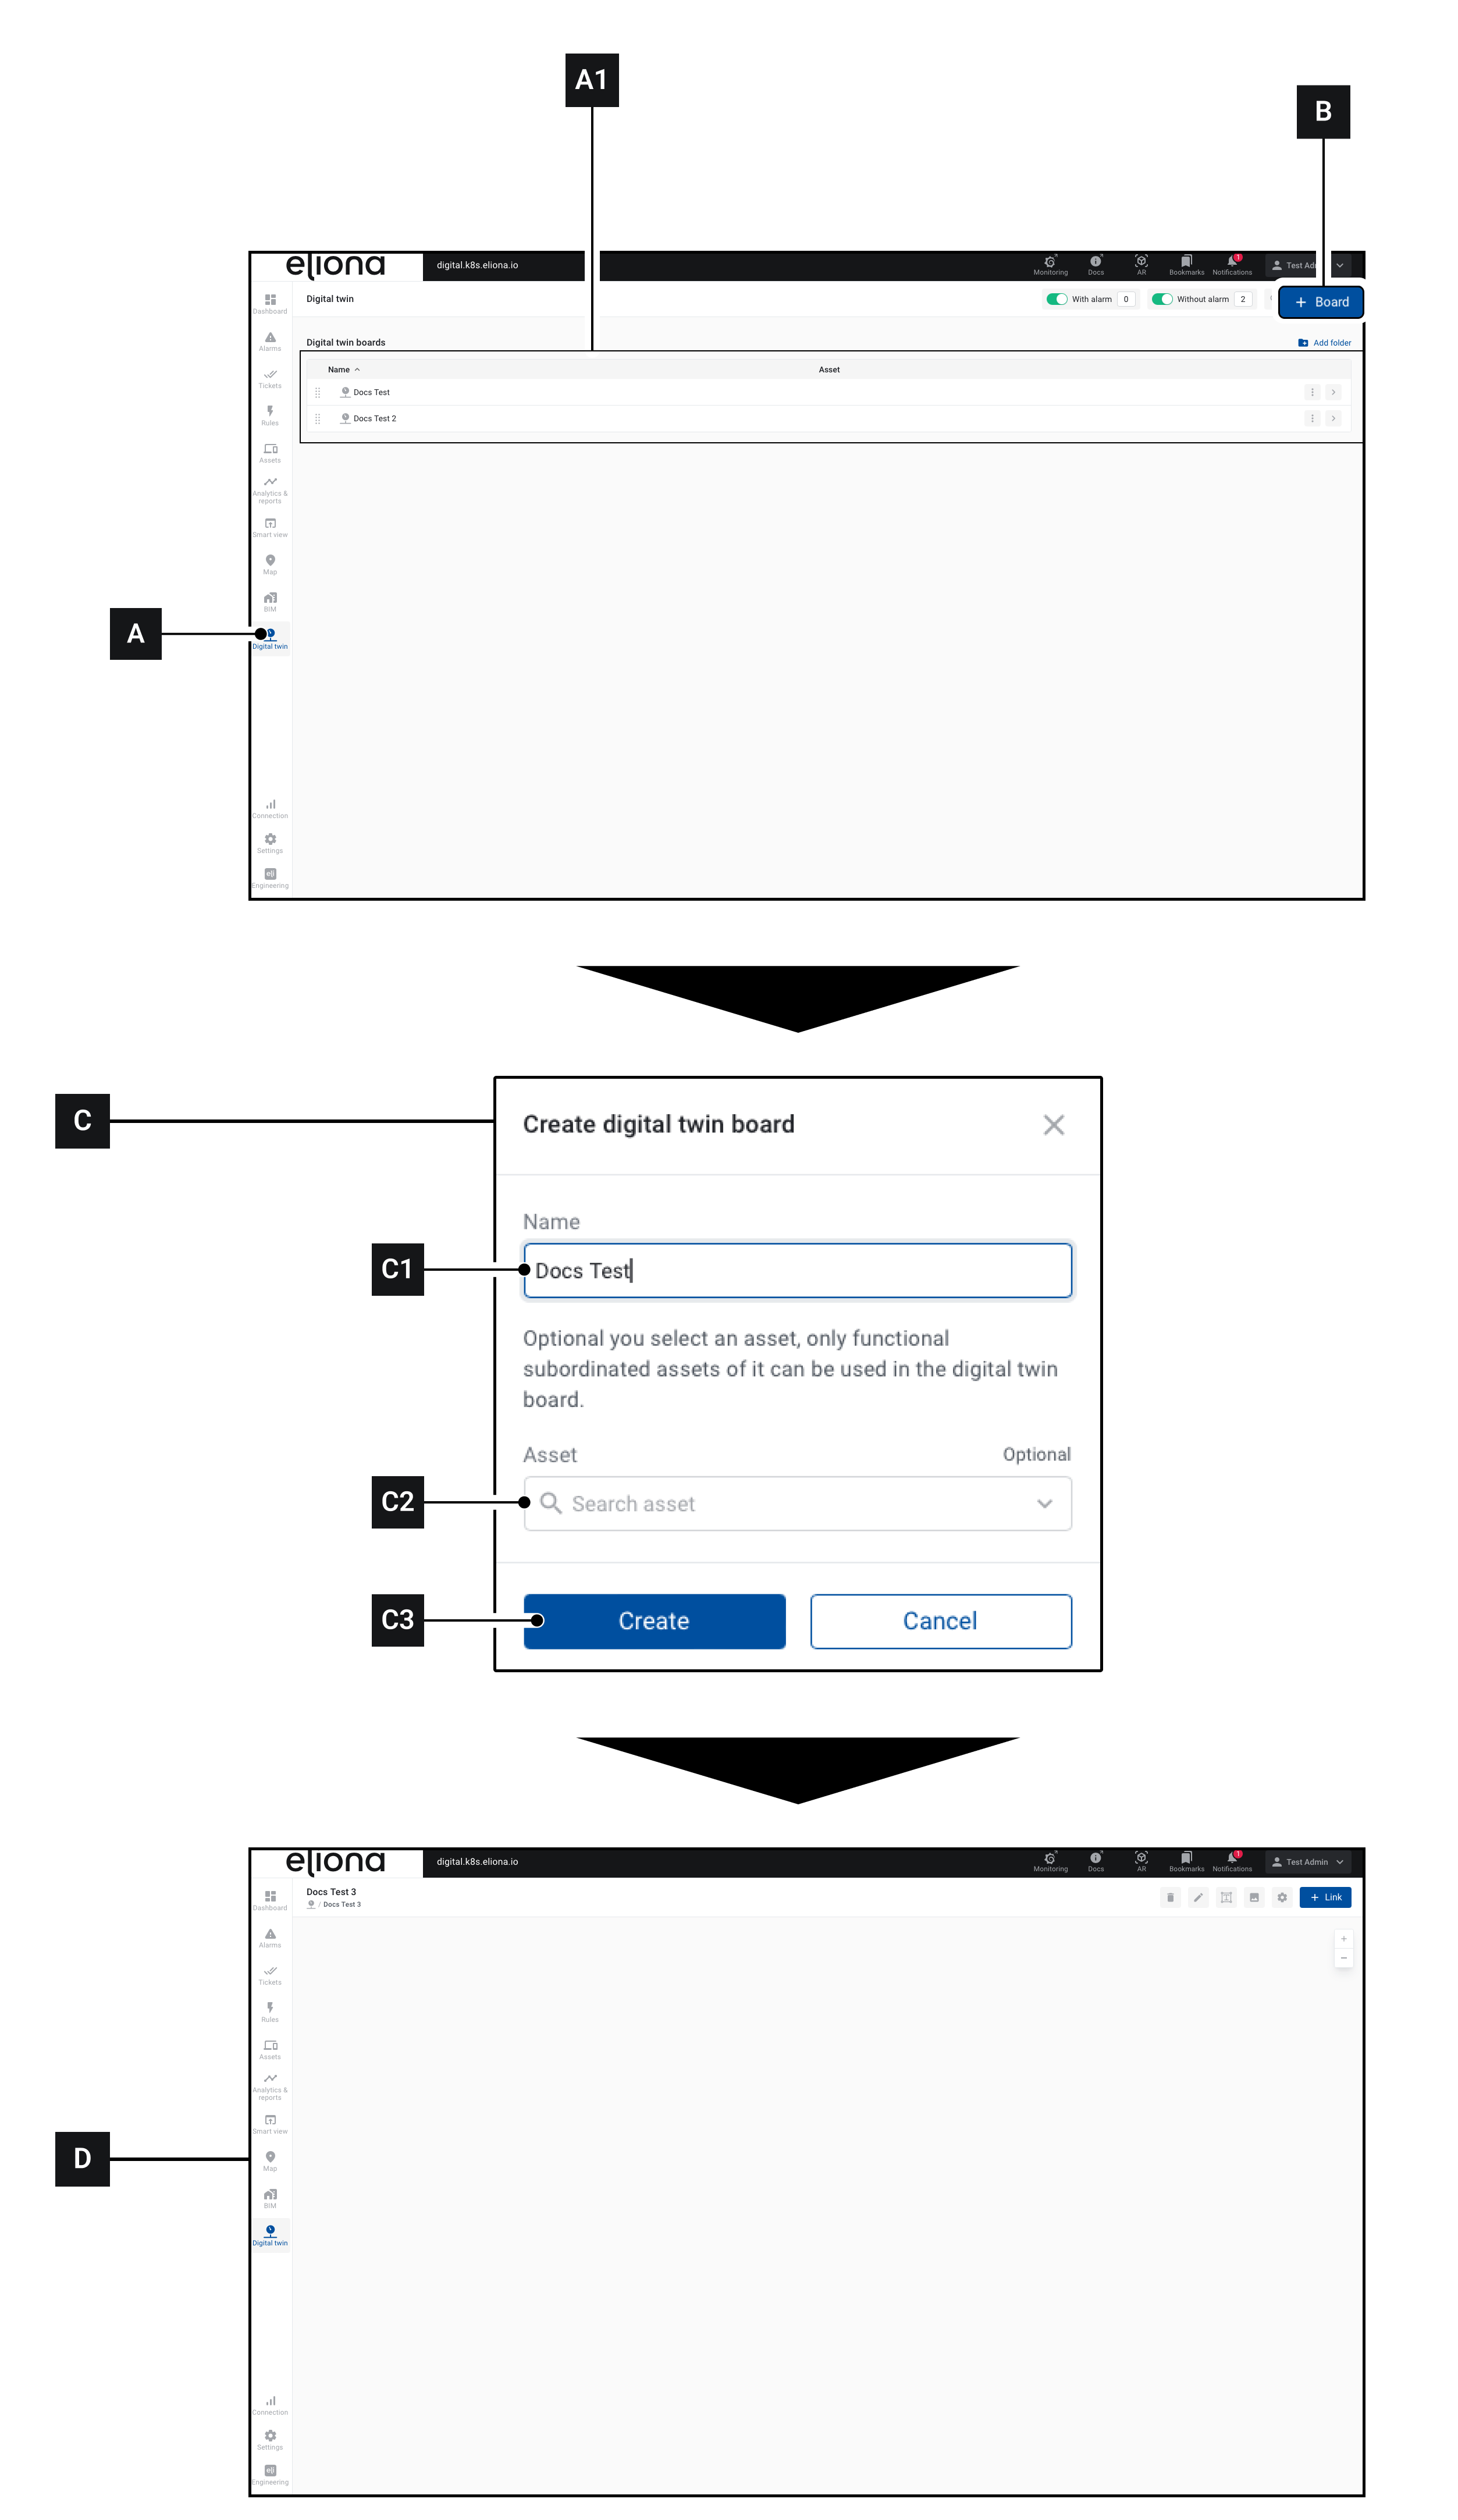
1. Click on Digital Twin **\[A]** ▷ The Digital Twin overview opens **\[A1]**
2. Click on **\[B]** ▷ The window **\[C]** opens
3. Give the Digital Twin in **\[C1]** a name
4. Optional: Enter in **\[A]** specify a parent asset. In this case, only assets subordinate to this parent asset can be used.
5. Click on **\[C3]** ▷ The Digital Twin is created and opened **\[D]**
The created Digital Twin is empty after creation. Continue with the next steps to configure the Digital Twin.
## Add an image
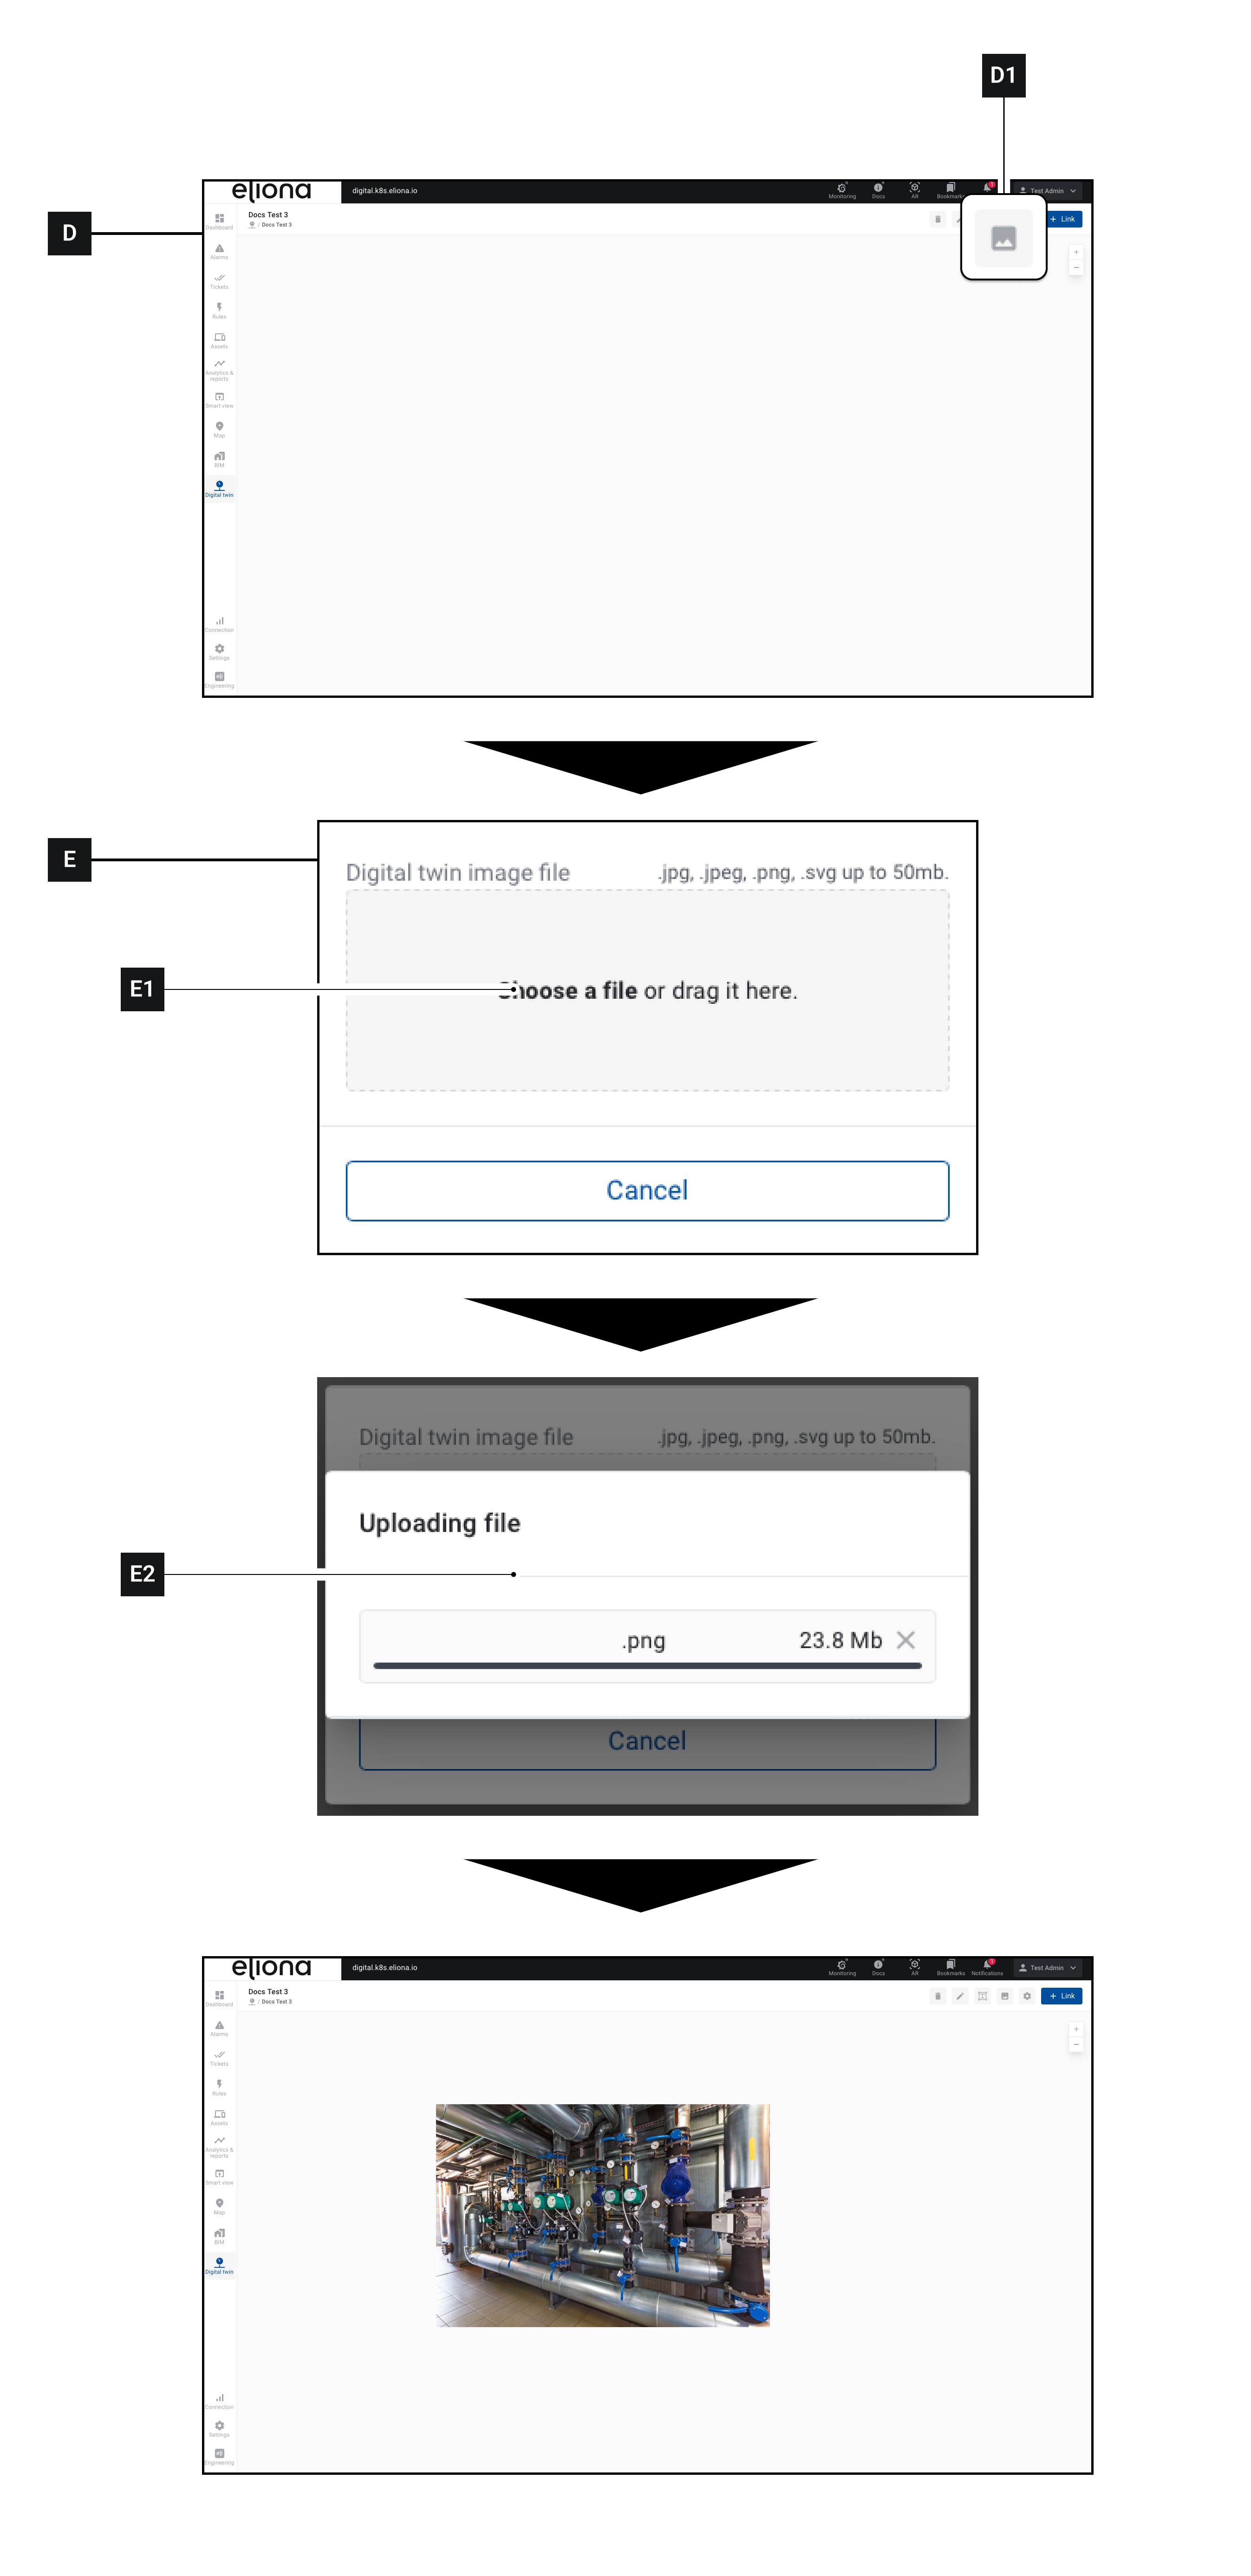
Prerequisite: You are in a Digital Twin **\[D]**
1. Click on **\[D1]**\
▷ The window **\[E]** opens.
2. Click on **\[E1]**, to upload an image or place an image there by [↗ Drag'n'Drop](/collection/english-v14/preface/bedienelemente.md#dragn-drop) .
3. The image is uploaded **\[E2]**
4. The image appears in the Digital Twin
### Add another image
In some cases, it can be useful to display multiple images of the same system. This is e.g. the case when not all controls can be shown in one photo because they are located, for example, on the back of the device.
Repeat the steps from ↗ Add an image to add another image. You can add an unlimited number of images.
## Navigate in the Digital Twin
### Pan canvas
You can move the canvas.
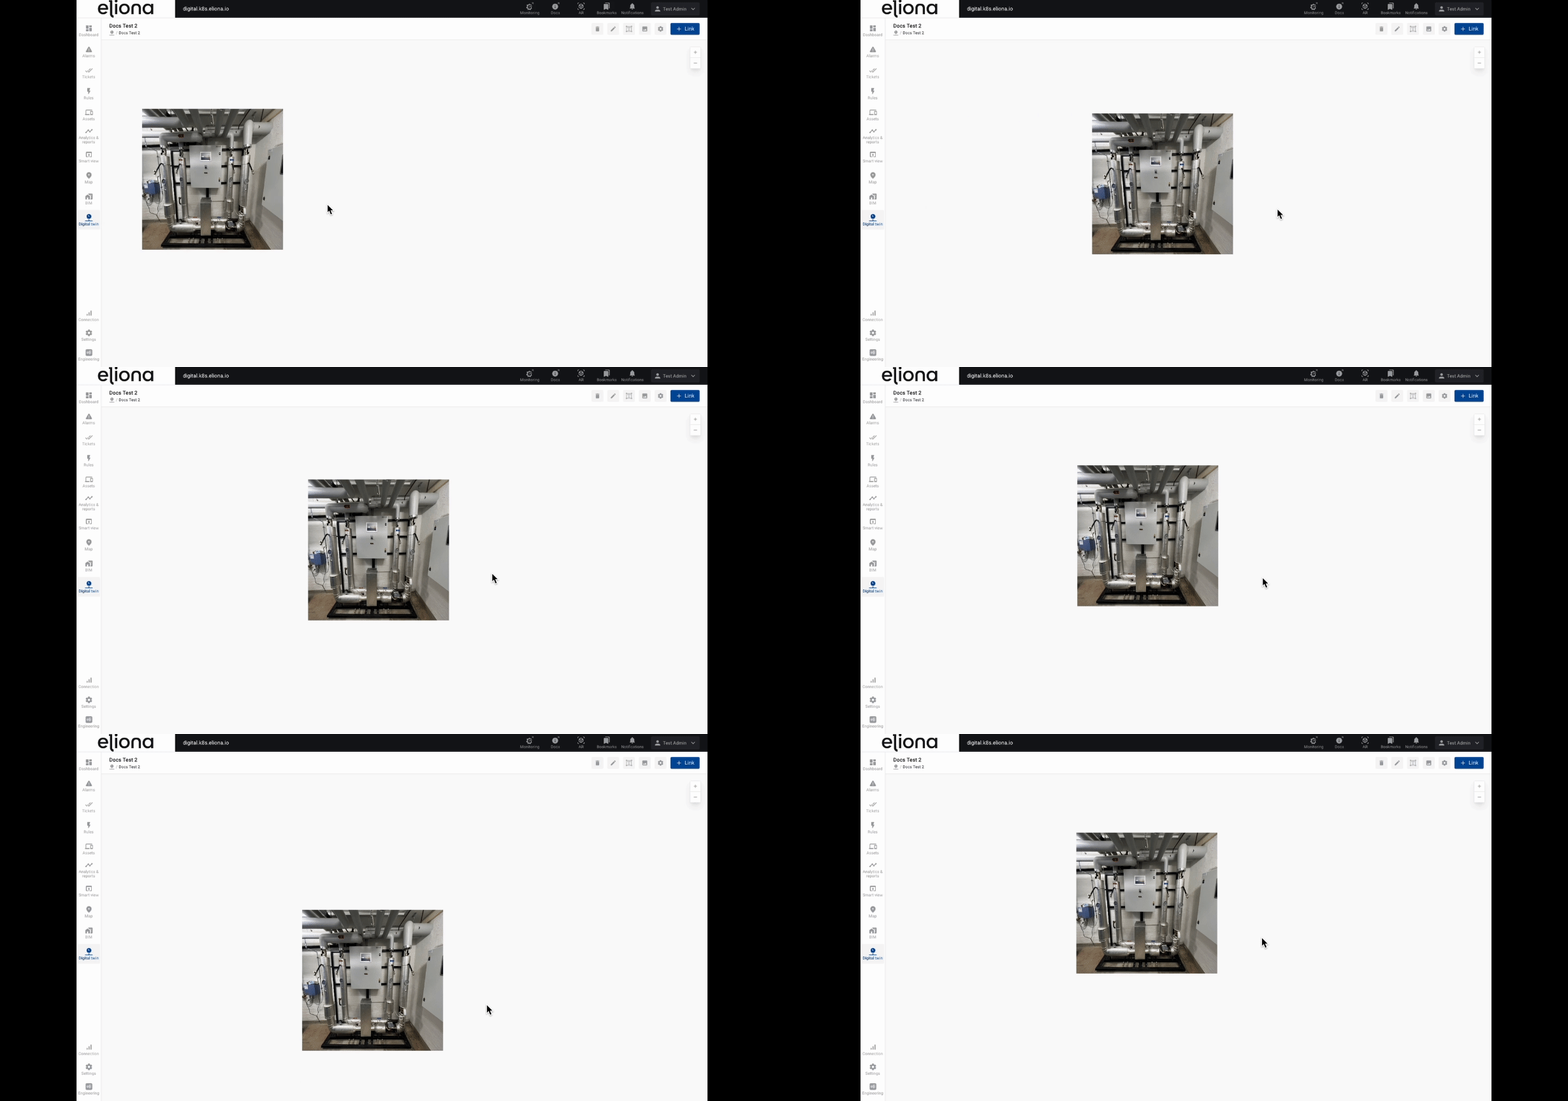
1. Click with the left mouse button in the canvas and pan the canvas by drag'n'drop.
#### Move image
1. Click with the left mouse button on an image and move it on the canvas by drag'n'drop.
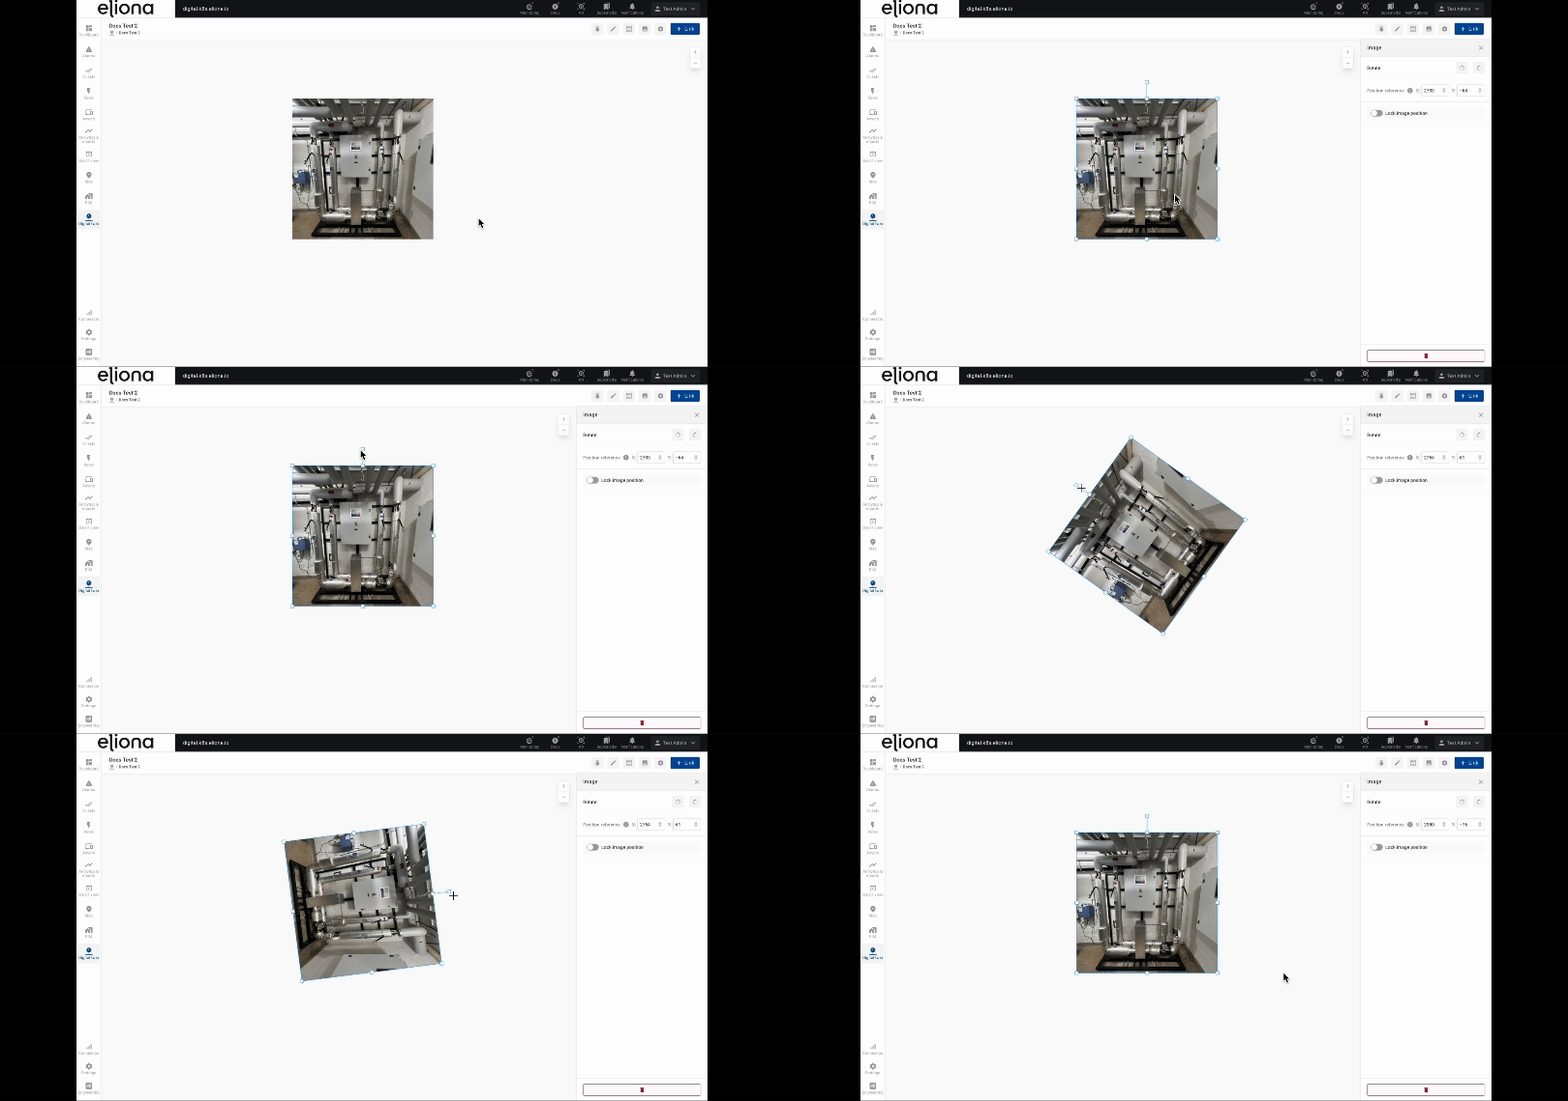
#### Rotate image
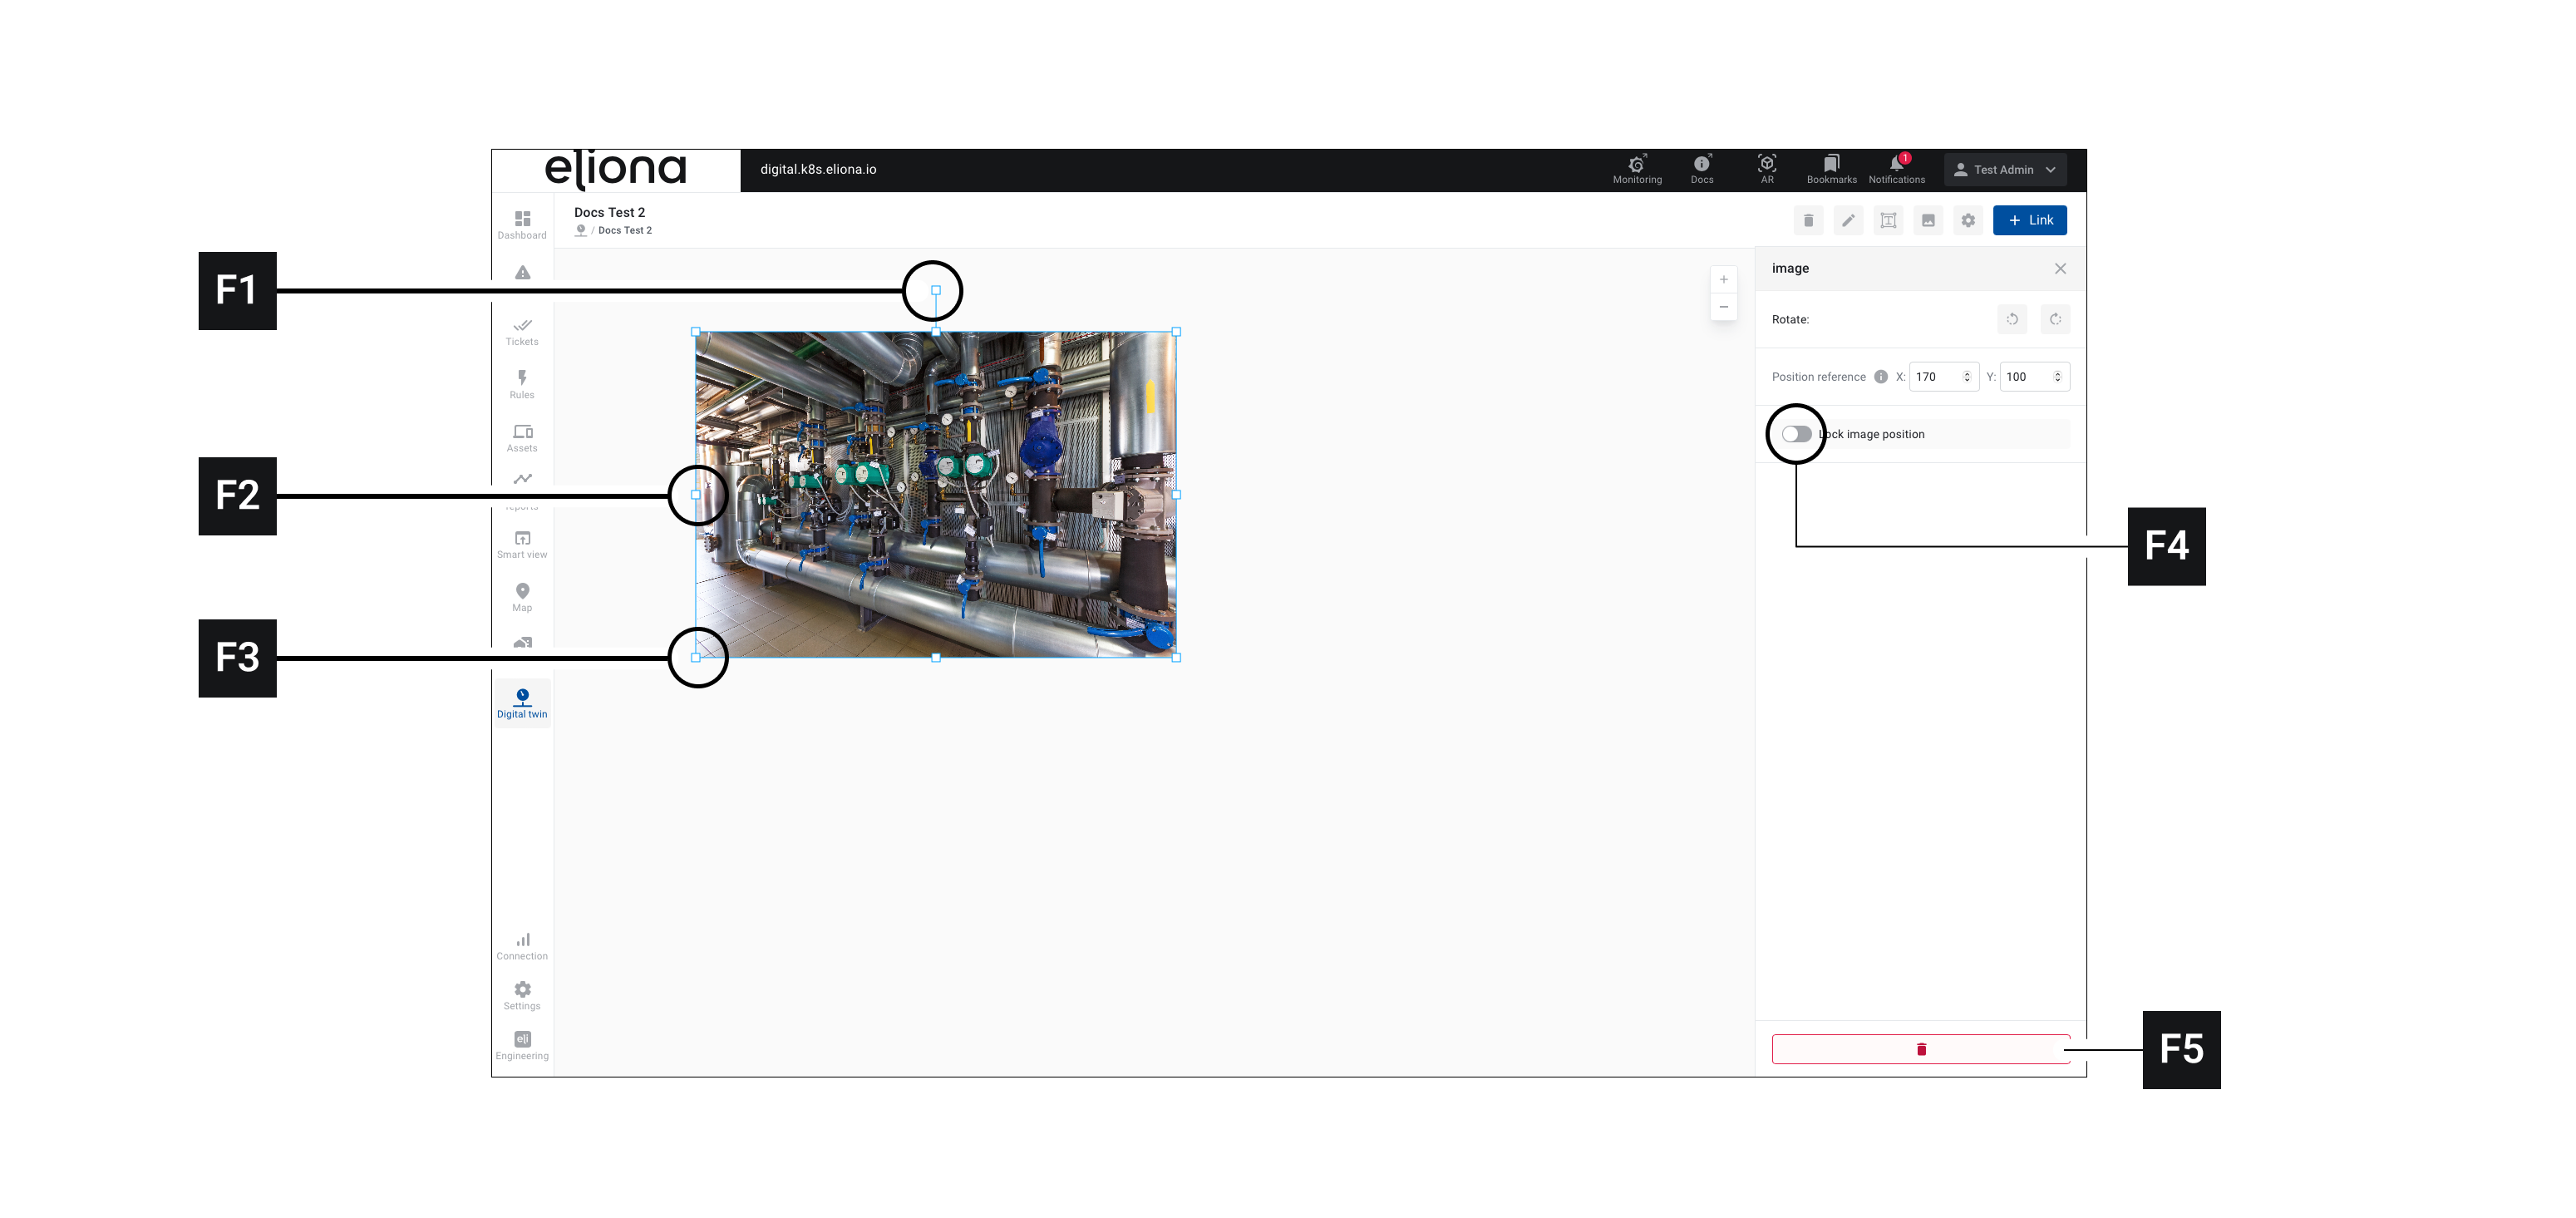
1. Click with the left mouse button on an image. ▷ The image is outlined in blue and several controls appear.
2. Move **\[F2]** by drag and drop to rotate the image.
#### Enlarge/reduce image
1. Click with the left mouse button on an image.\
▷ The image is outlined in blue and several controls appear.
2. Move **\[F3]** by drag and drop to rotate the image.
#### Scale image
1. Click with the left mouse button on an image.\
▷ The image is outlined in blue and several controls appear.
2. Move **\[F4]** by drag and drop to rotate the image.
#### Lock image
You can lock the position of the image on the canvas so that it cannot be moved accidentally.
1. Click with the left mouse button on an image.\
▷ The image is outlined in blue and several controls appear.
2. Click on **\[F5]**, to lock the position of the image.
### Save the current view
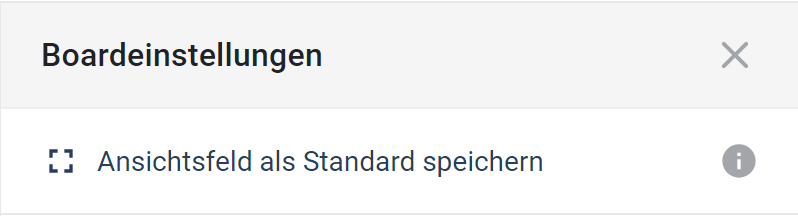
To save the current **canvas view** in your Digital Twin **save**, first click on the gear icon in the upper right corner of the canvas. A window opens
in which you will find the option **"Save viewport as default**". If you click this option, the currently set scale as well as the position of the viewbox are saved. The next time this Digital Twin is opened, it will automatically be loaded in the saved view.
## Link a value
Prerequisite: You are in a Digital Twin **\[D]**
1. Click on **\[D1]**
2. Click in the canvas at the place where the link should appear. ▷ A link **\[D2]** appears.
3. Click with the left mouse button on the link **\[D2]** ▷ The sidebar **\[D3]** opens
4. Click on "Config" **\[A]** ▷ the configuration **\[D3]** is displayed.
5. Select in **\[B]** the asset whose values should be displayed in the link.
6. In **\[C]** you can change the shape of the link.
7. Select in **\[D]** the color in which the link is displayed
8. Optional: Enable **\[E]** to prevent the link from being moved with drag'n'drop using the mouse.
9. Optional: Activate in **\[F]** a reference point. ▷ You can move the reference point in the image by drag'n'drop
10. Optional: Activate with **\[G]** a title for the link.
11. Optional: Activate with **\[H]** to display the status of the asset.
12. Activate **\[I]** to display attribute values of the asset in the link.
▷ In **\[I1]** you can select the attributes that should be visible.
▷ In **\[I2]** you can display labels for the attributes.
▷ To display aggregated data, click on **\[I3]** and activate **\[I4]** and select an aggregation.
13. Optional: Select a **\[J]** the value mapping to colors. Click on the respective attribute and then add the mapping. See also [-> Value mapping in Eliona](/collection/english-v14/academy/werte-mapping-in-eliona.md)
##
---
# Agent Instructions
This documentation is published with GitBook. GitBook is the documentation platform designed so that both humans and AI agents can read, navigate, and reason over technical content effectively. Learn more at gitbook.com.
## Querying This Documentation
If you need additional information that is not directly available in this page, you can query the documentation dynamically by asking a question.
Perform an HTTP GET request on the current page URL with the `ask` query parameter, and the optional `goal` query parameter:
```
GET https://docs.buildings.ability.abb/collection/english-v14/documentation/digitaler-zwilling.md?ask=&goal=
```
`ask` is the immediate question: it should be specific, self-contained, and written in natural language.
`goal` is optional and describes the broader end goal you are ultimately trying to accomplish on behalf of the user. GitBook uses it to tailor the answer towards what is most useful for that goal.
The response will contain a direct answer to the question and relevant excerpts and sources from the documentation.
Use this mechanism when the answer is not explicitly present in the current page, you need clarification or additional context, or you want to retrieve related documentation sections.
 in the upper right corner of the canvas. A window opens
  in which you will find the option **"Save viewport as default**". If you click this option, the currently set scale as well as the position of the viewbox are saved. The next time this Digital Twin is opened, it will automatically be loaded in the saved view.
## Link a value
in which you will find the option **"Save viewport as default**". If you click this option, the currently set scale as well as the position of the viewbox are saved. The next time this Digital Twin is opened, it will automatically be loaded in the saved view.
## Link a value
.png)
.png)