Floor

Overview
The "Floors" function is closely related to the function -> "Map".
In the "Map" function, assets were placed on an interactive map. In the "Floors" function, on the other hand, assets are placed on a static floor plan.
Open a floor
Proceed as follows to open a floor:

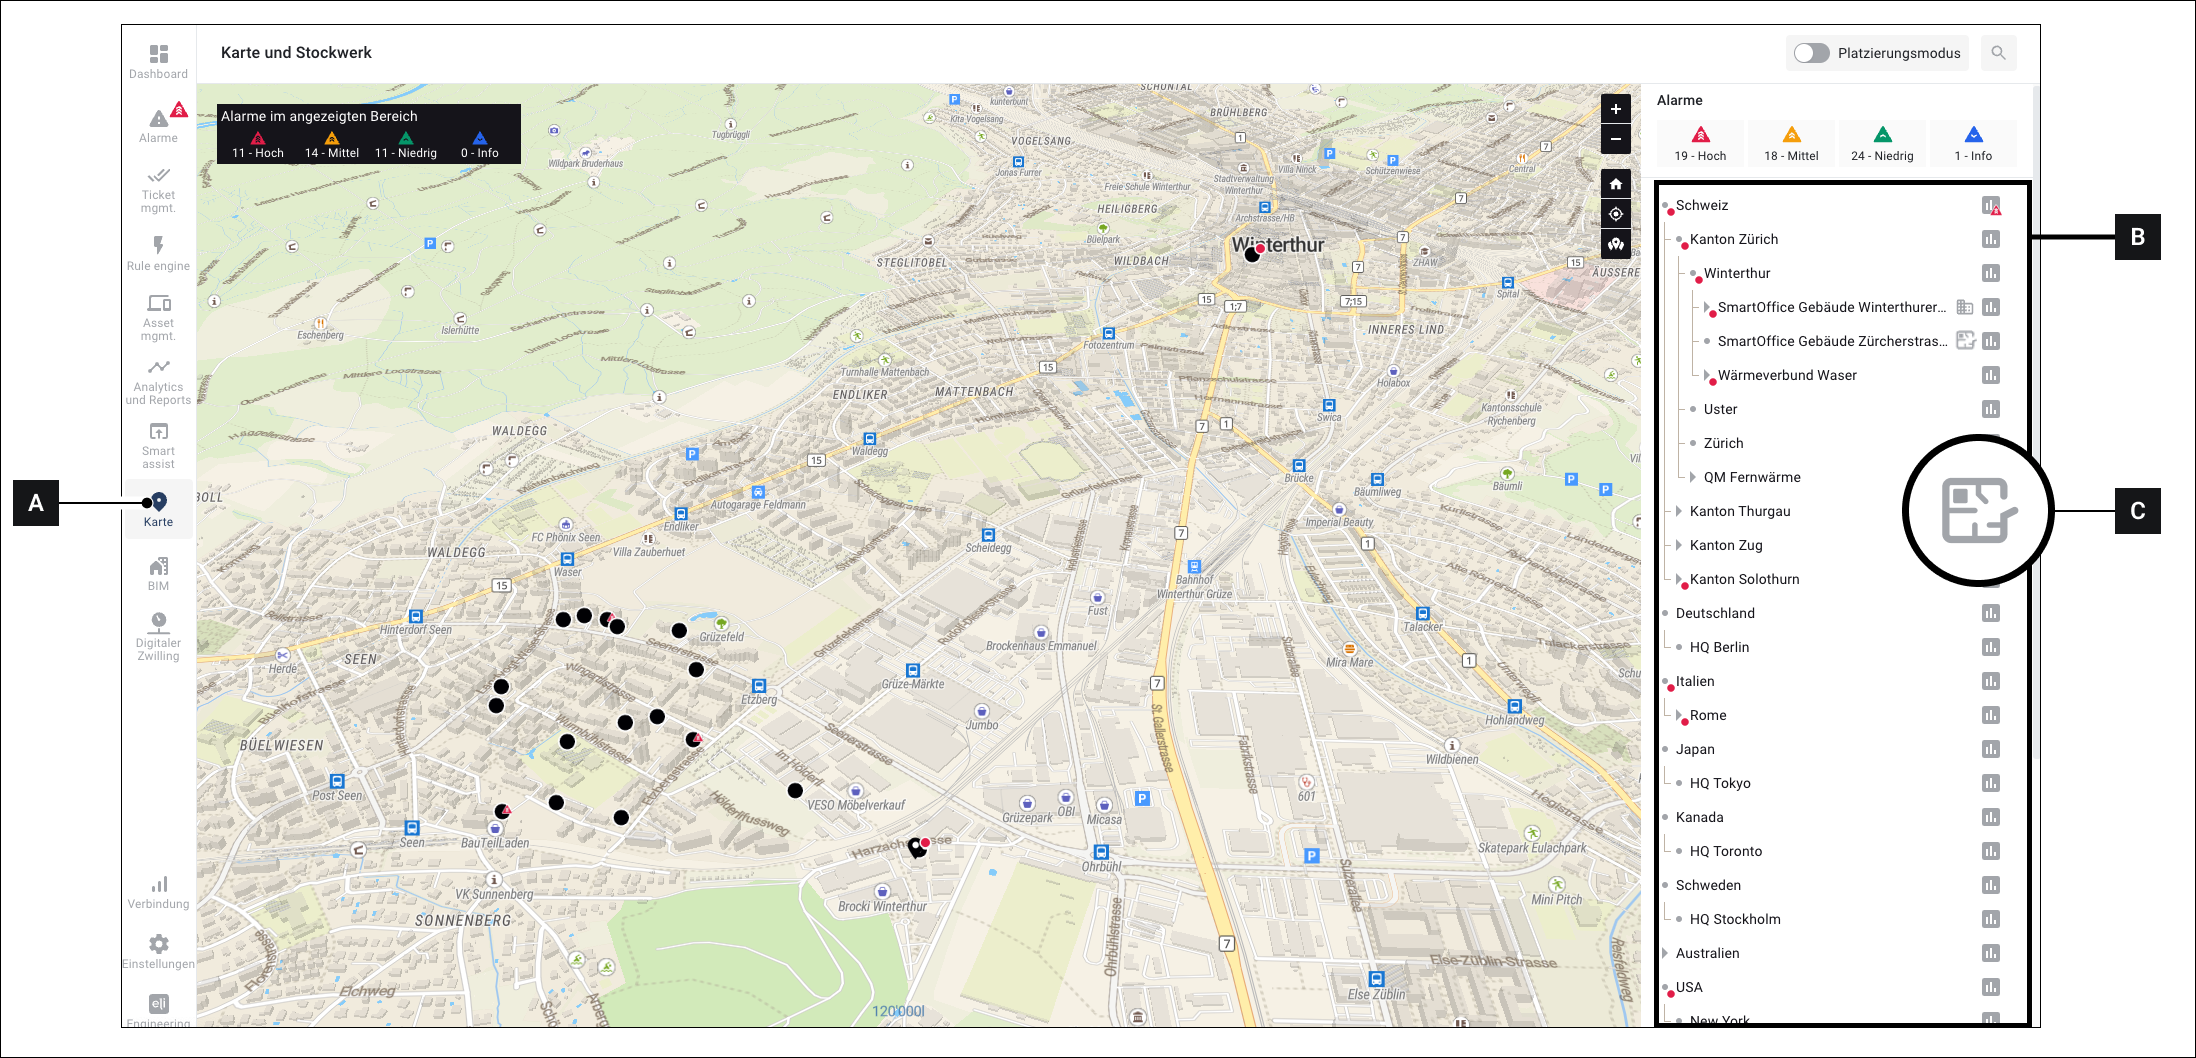
Click on Map [A]
Navigate in the sidebar [B] to the floor you want to open. ◈ Floors are marked with the symbol [C] marked. Assets without this symbol are not floors.
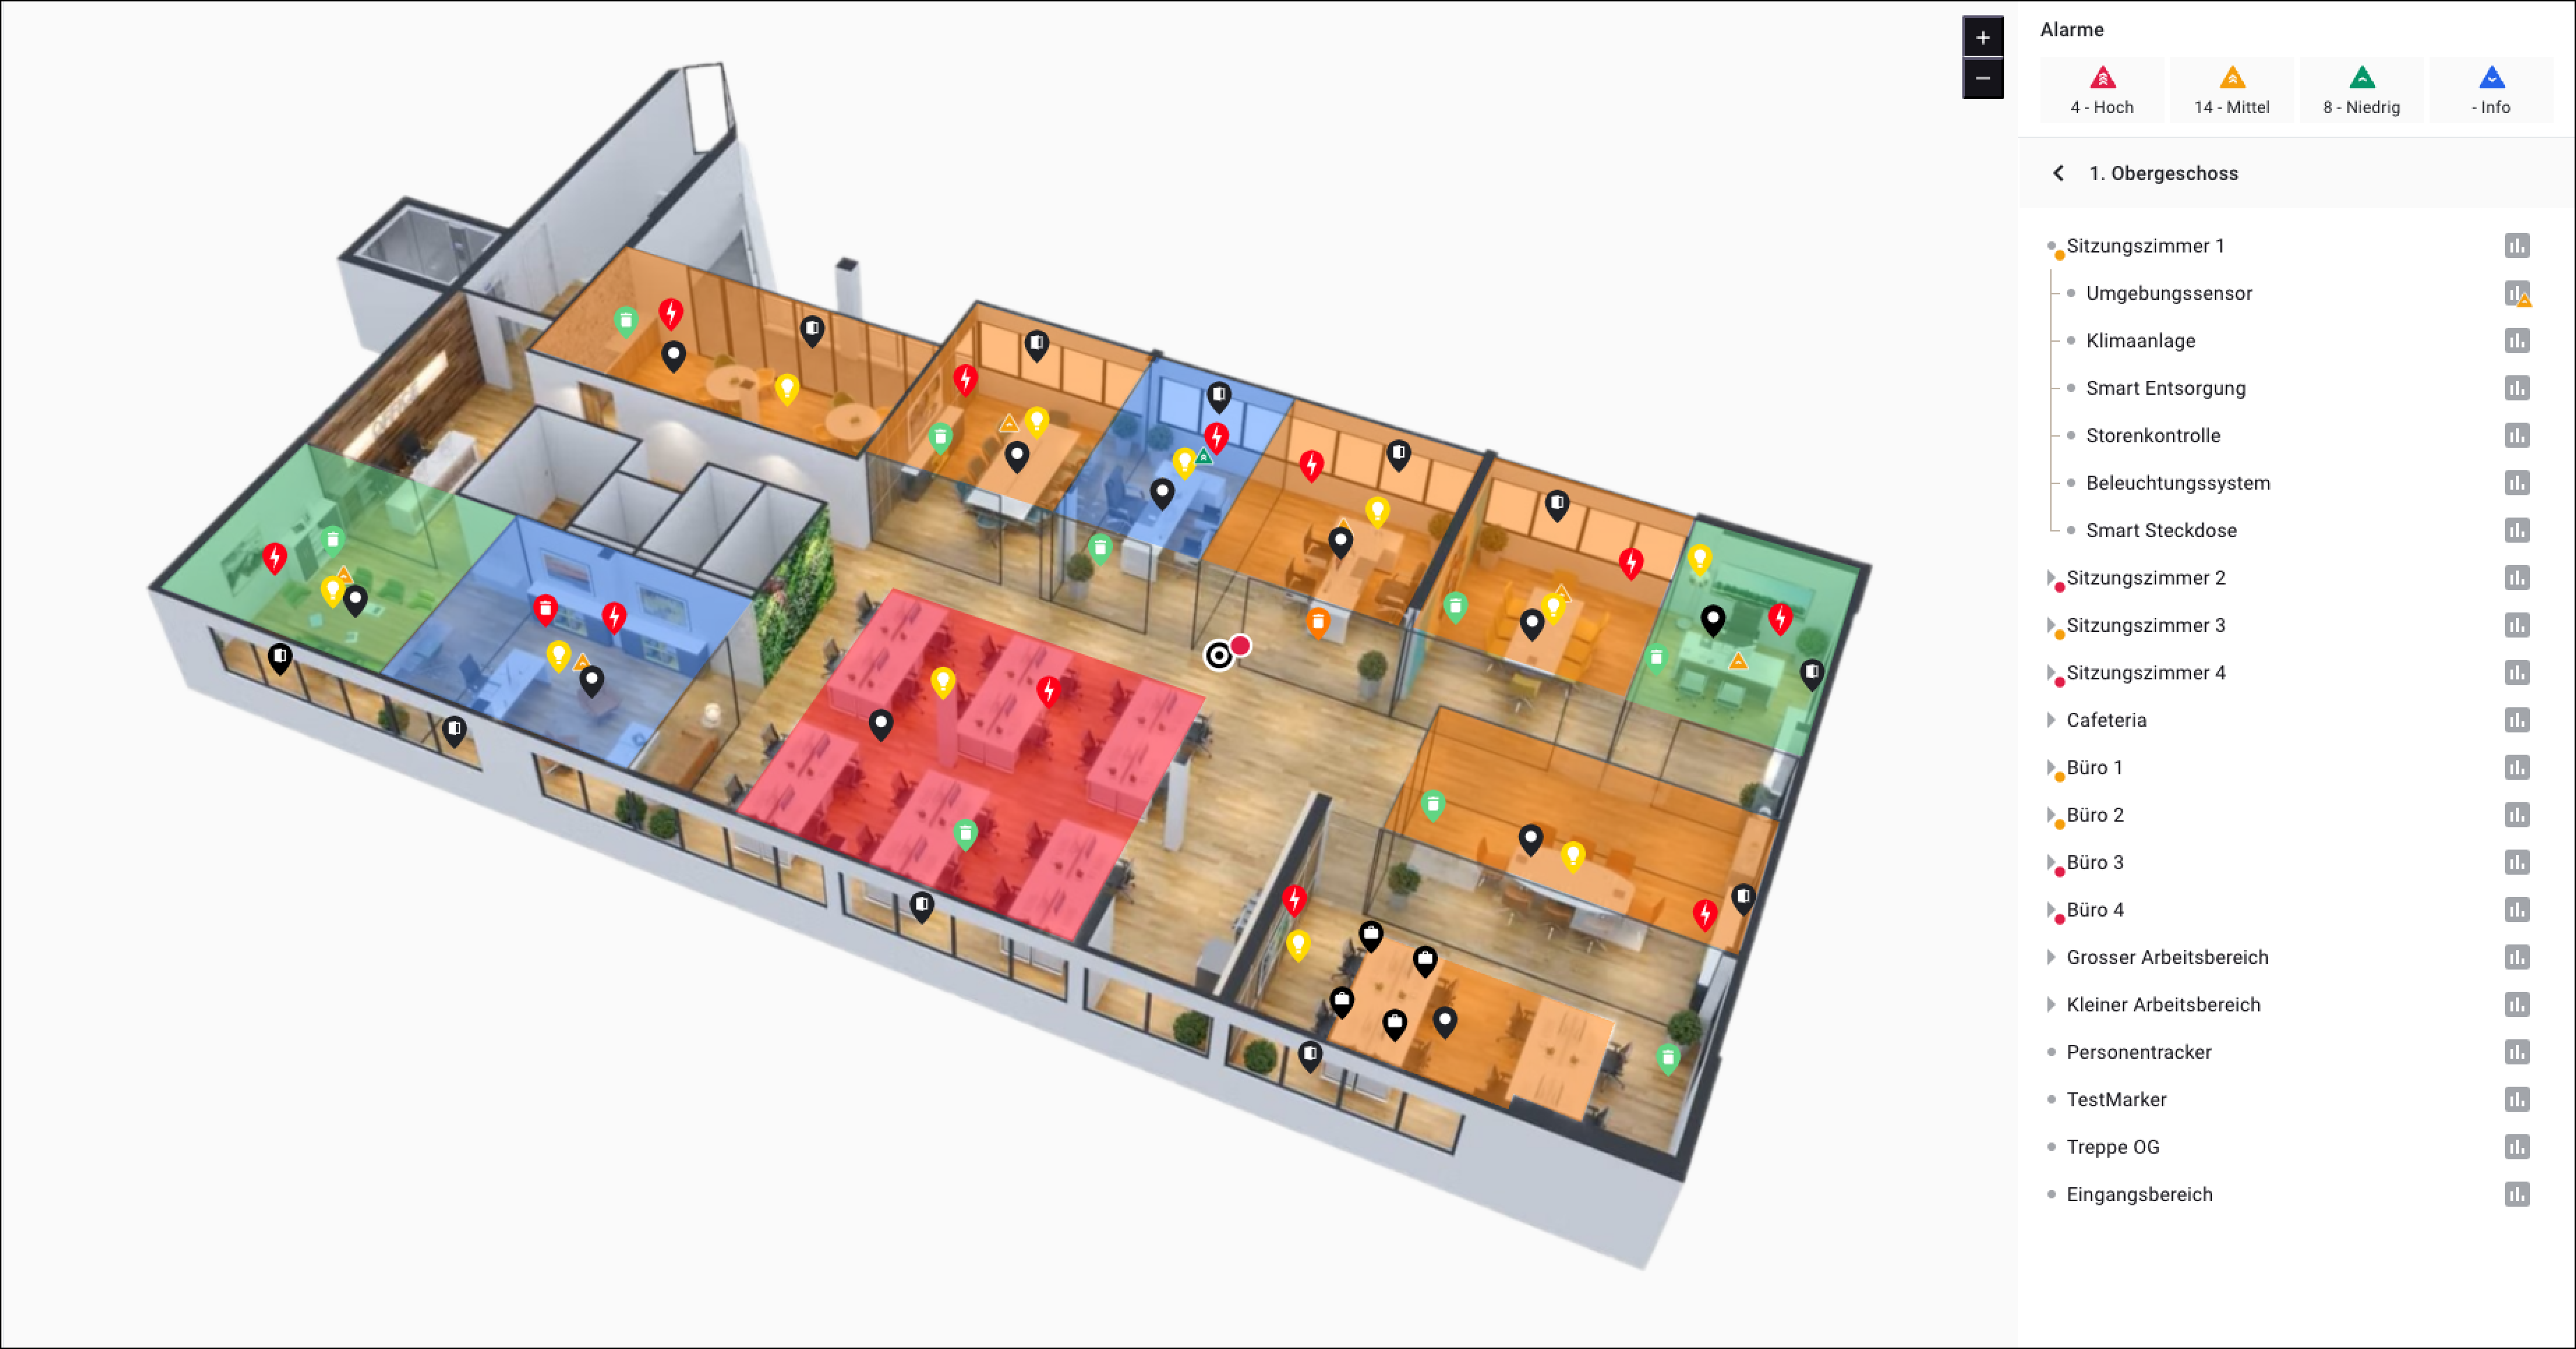
Click on the symbol [C] ▷ The floor overview (see Fig. 1) opens
Floor plans
Floor plans are static images. Unlike the interactive map, floor plans cannot be rotated, zoomed, etc.
Instead, you upload an image from your computer and place your assets on this image. In theory, you can use any image you like as a floor plan. Floor plans or renderings of 3D models are particularly suitable (see Fig. 1).
Polygons vs. points
On floors, you can represent assets in 2 different forms:
Points
Polygons

Points
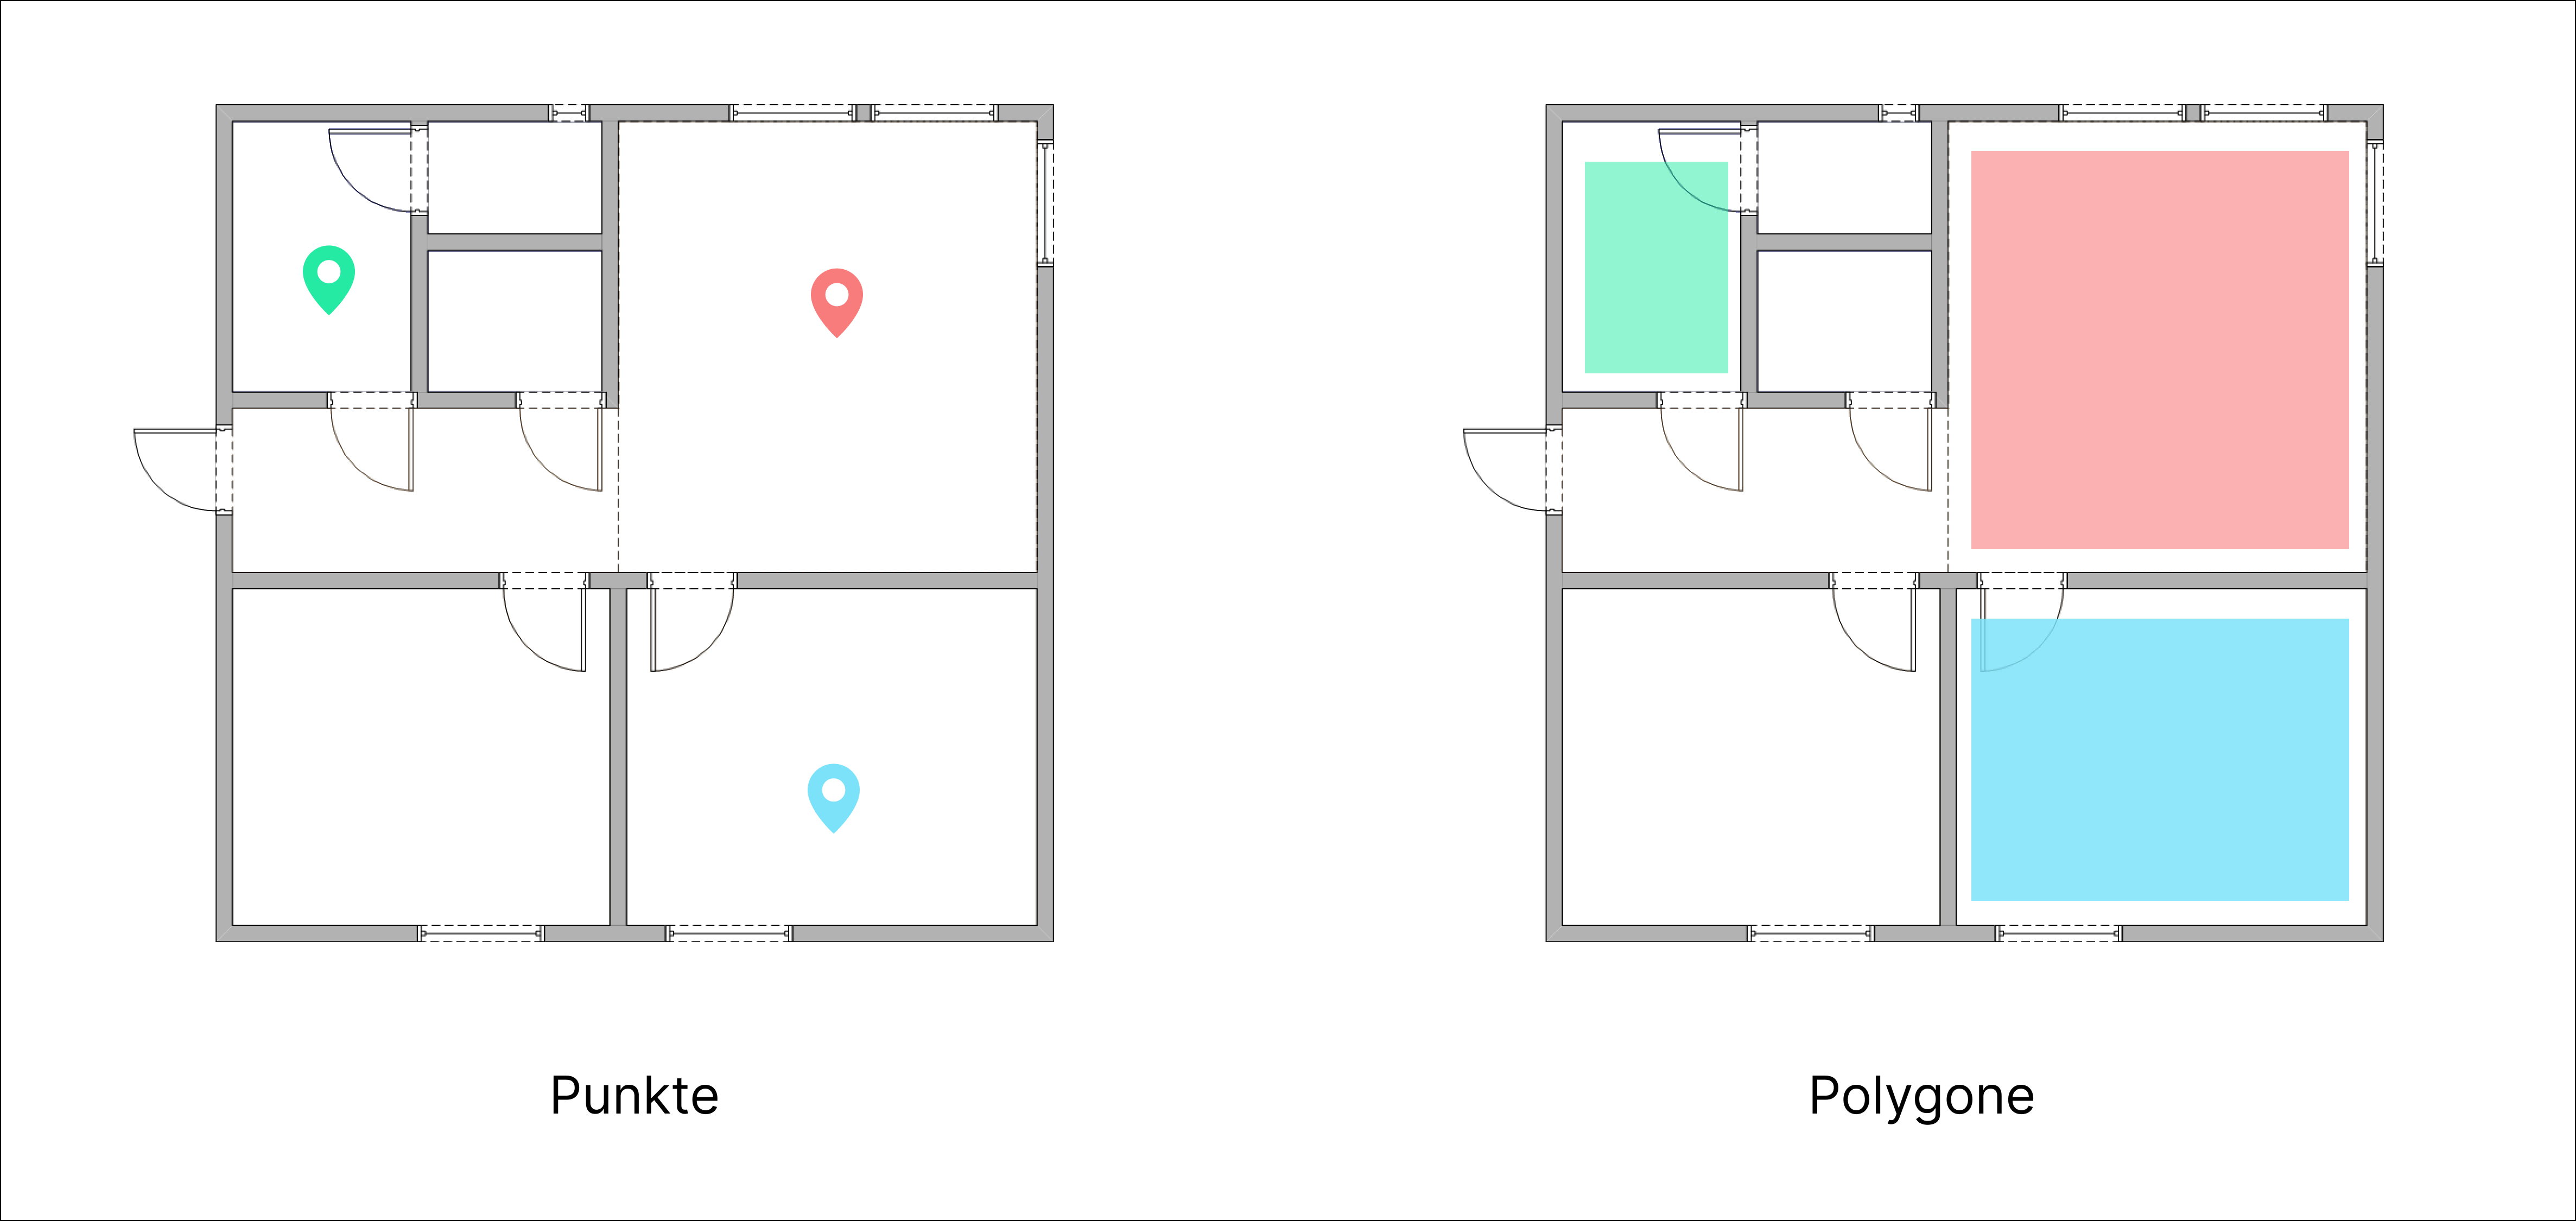
Points correspond to the icons on the map. They are particularly suitable for depicting assets such as sensors, controllers, etc.
Polygons
With the "Polygon" option, assets are not displayed as points but as colored areas. Polygons are particularly well suited for depicting rooms. Polygons are only available in the "Floors" function.
In Figure 2, assets are shown as points in the left part. In the right part, assets are shown as polygons. The shape and color of the polygons can be customized individually.
You can set for each individual asset on a floor whether this asset should be displayed as a point or as a polygon. On a floor, both points and polygons can exist at the same time.
Last updated
Was this helpful?