For the complete documentation index, see llms.txt. This page is also available as Markdown.

🚩tags

With tags, you can label and categorize content in eliona. The following content can be tagged:

  • Assets

  • User

  • Rules

Content can be assigned any number of tags. By assigning multiple tags to content, content can be filtered easily.

Tags can be collected in categories groups.

Each tag has its own color. This makes it possible to visually distinguish tags.

Tags are used for many different functions. For example, in the function ↗ ACL tags are used to control access to various areas of eliona.

Overview

Open tag management

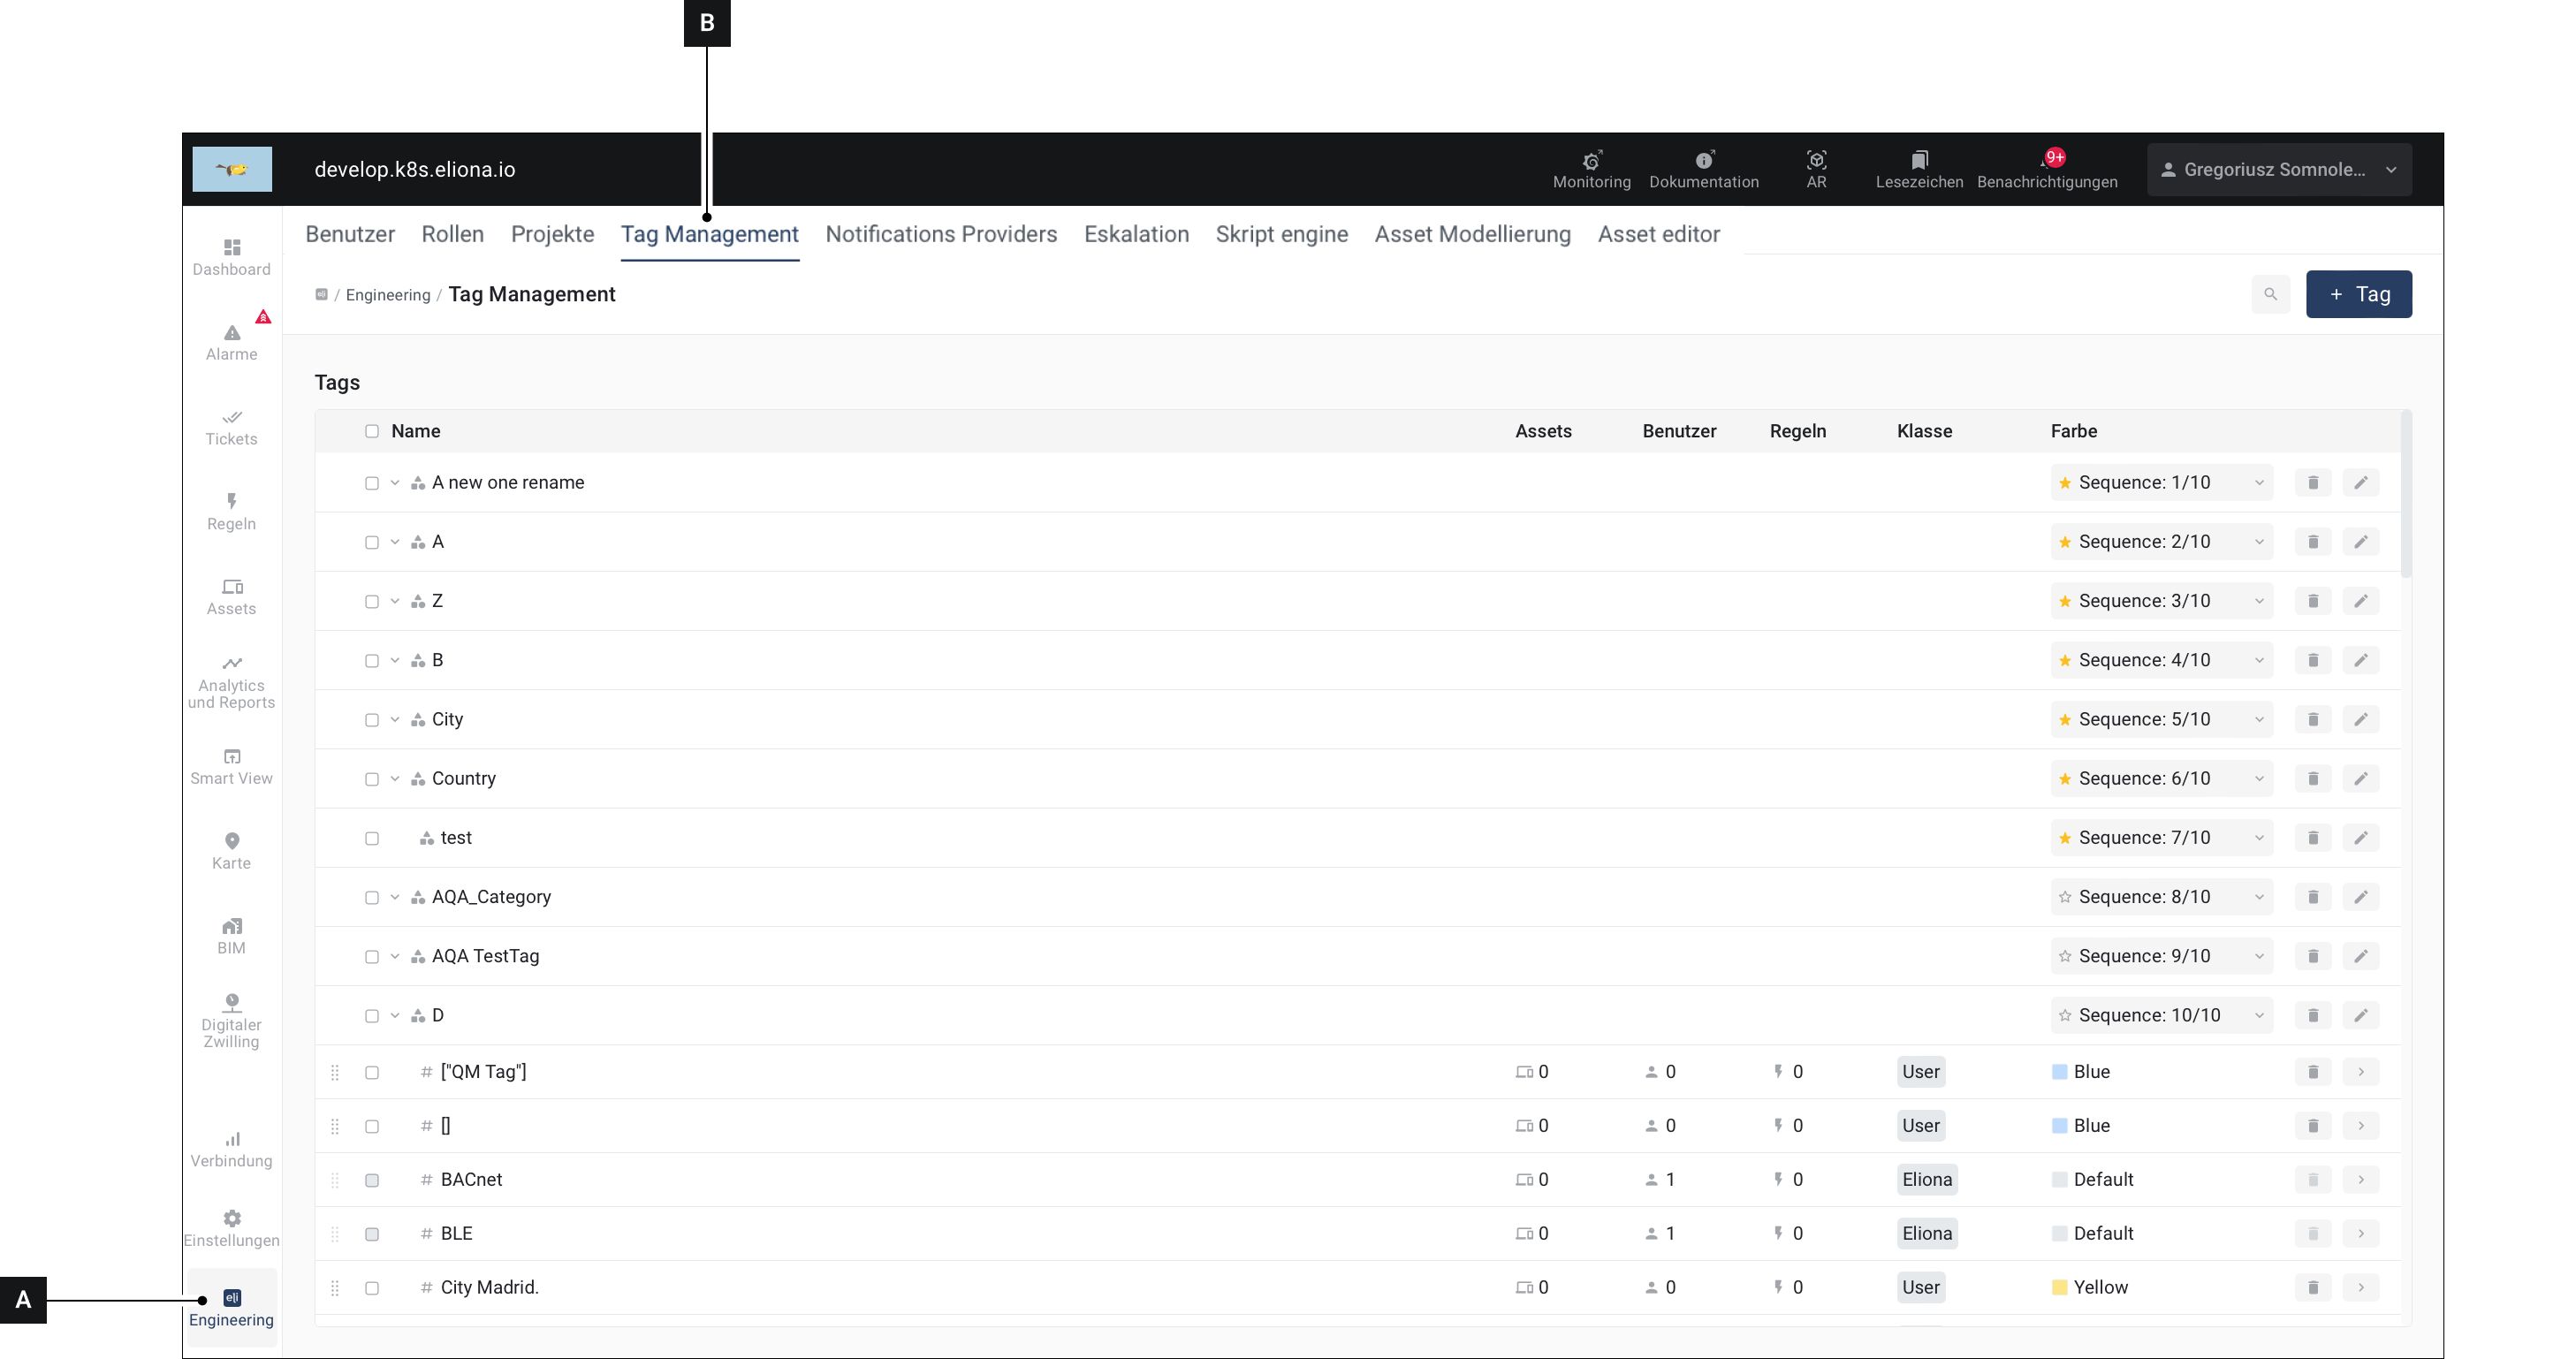
In tag management, you can perform all actions related to tags. Proceed as follows to open tag management.

  1. Click on Engineering [A]

  2. Click on Tag Management [B] ▷ The "Tag Management" window opens

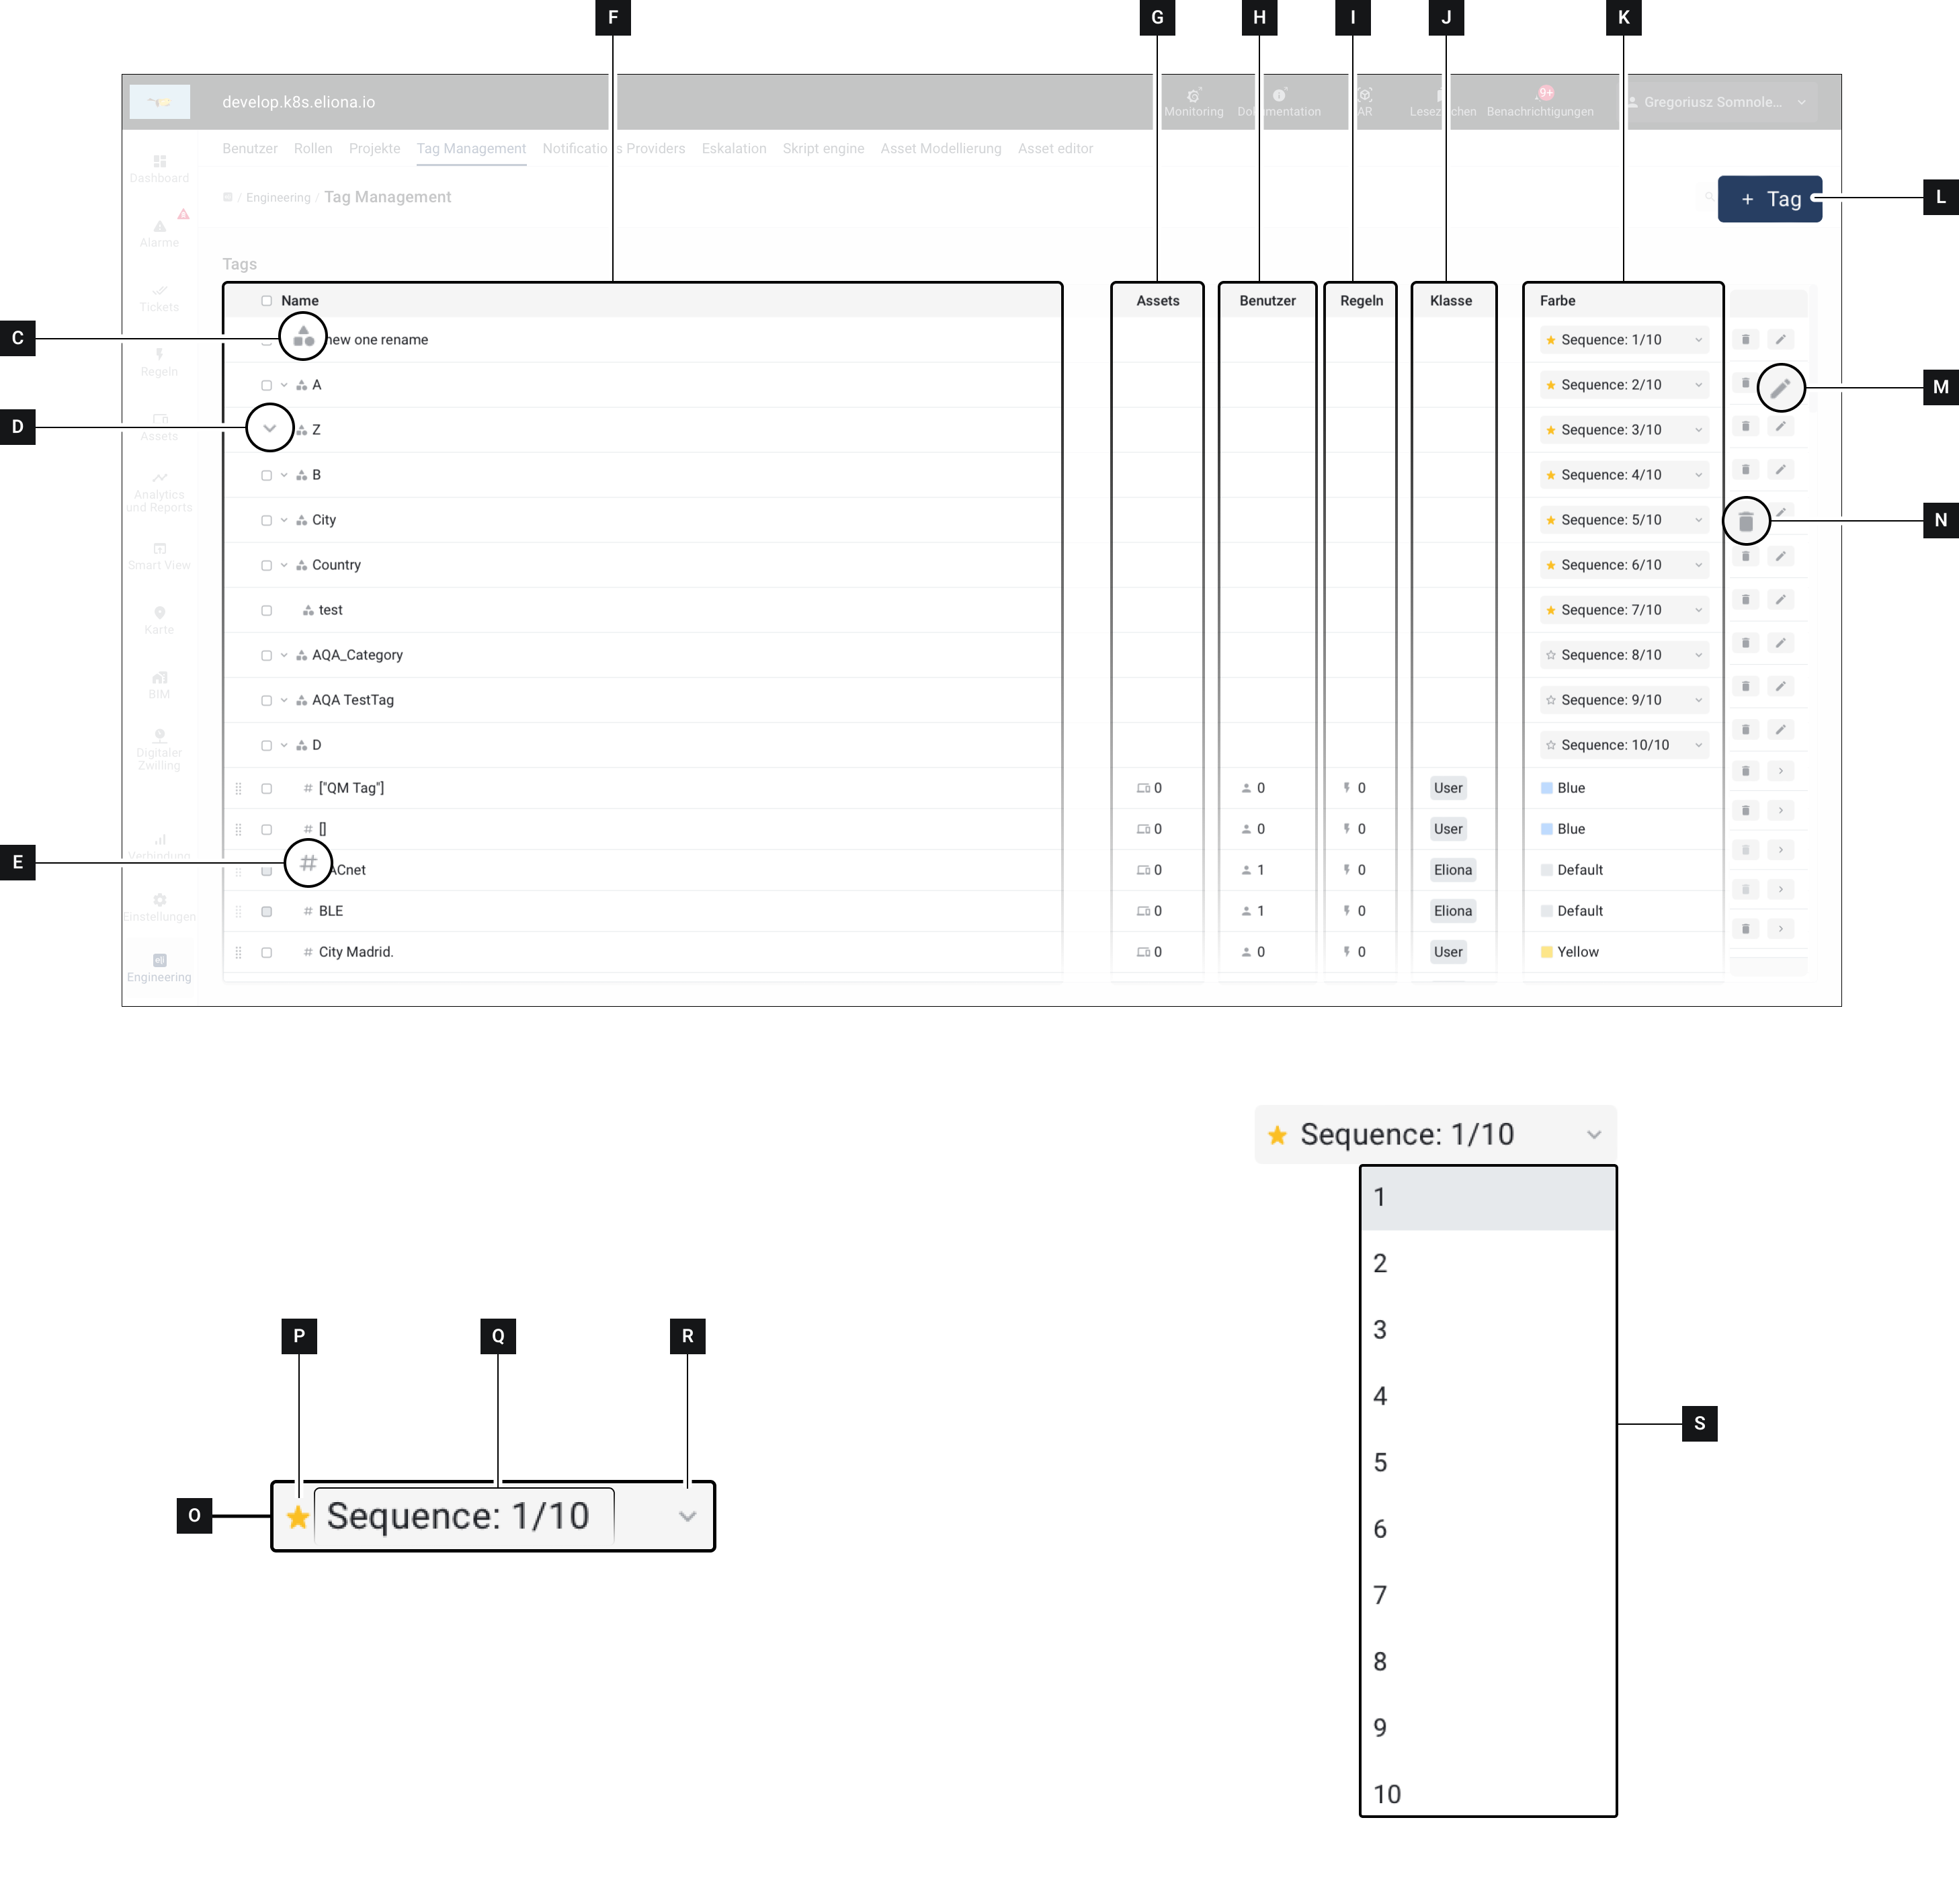
Overview

Element
Title
Details

[C]

Category symbol

↗ Categories are marked with this symbol

[D]

Expand

This symbol appears next to categories. Click this symbol to expand the category and see which tags are assigned to this category.

[E]

Tag symbol

Individual tags are marked with this symbol

[F]

Column "Name"

This column displays the names of tags and categories

[G]

Column "Assets"

This column shows how many assets the corresponding tag is assigned to.

[H]

Column "Users"

This column shows how many users the corresponding tag is assigned to.

[I]

Column "Rules"

This column shows how many rules the corresponding tag is assigned to.

[J]

Column "Class"

This column shows the class of the tag

[K]

Column "Color"

For tags: This column shows the color of the tag. ◈ You can select the color of a tag when creating the tag.

[L]

New tag

Click here to ↗ create a new tag or ↗ create a new category.

[M]

Edit

Click to edit the corresponding tag or category

[N]

Delete

Click to delete the corresponding tag or category

[O]

Category details

↗ More info about categories

[P]

Favorite

Click to mark the corresponding category as a favorite or remove the favorite mark.

[Q]

Sequence display

Shows the position of the corresponding category in the sequence

[R]

Open sequence selection

Click to open the sequence selection [S] of the corresponding category.

[S]

Sequence selection

Click a value to assign the category to the corresponding position in the sequence.

Create a new tag

Proceed as follows to create a new tag.

  1. Open the ↗ Tag Management on

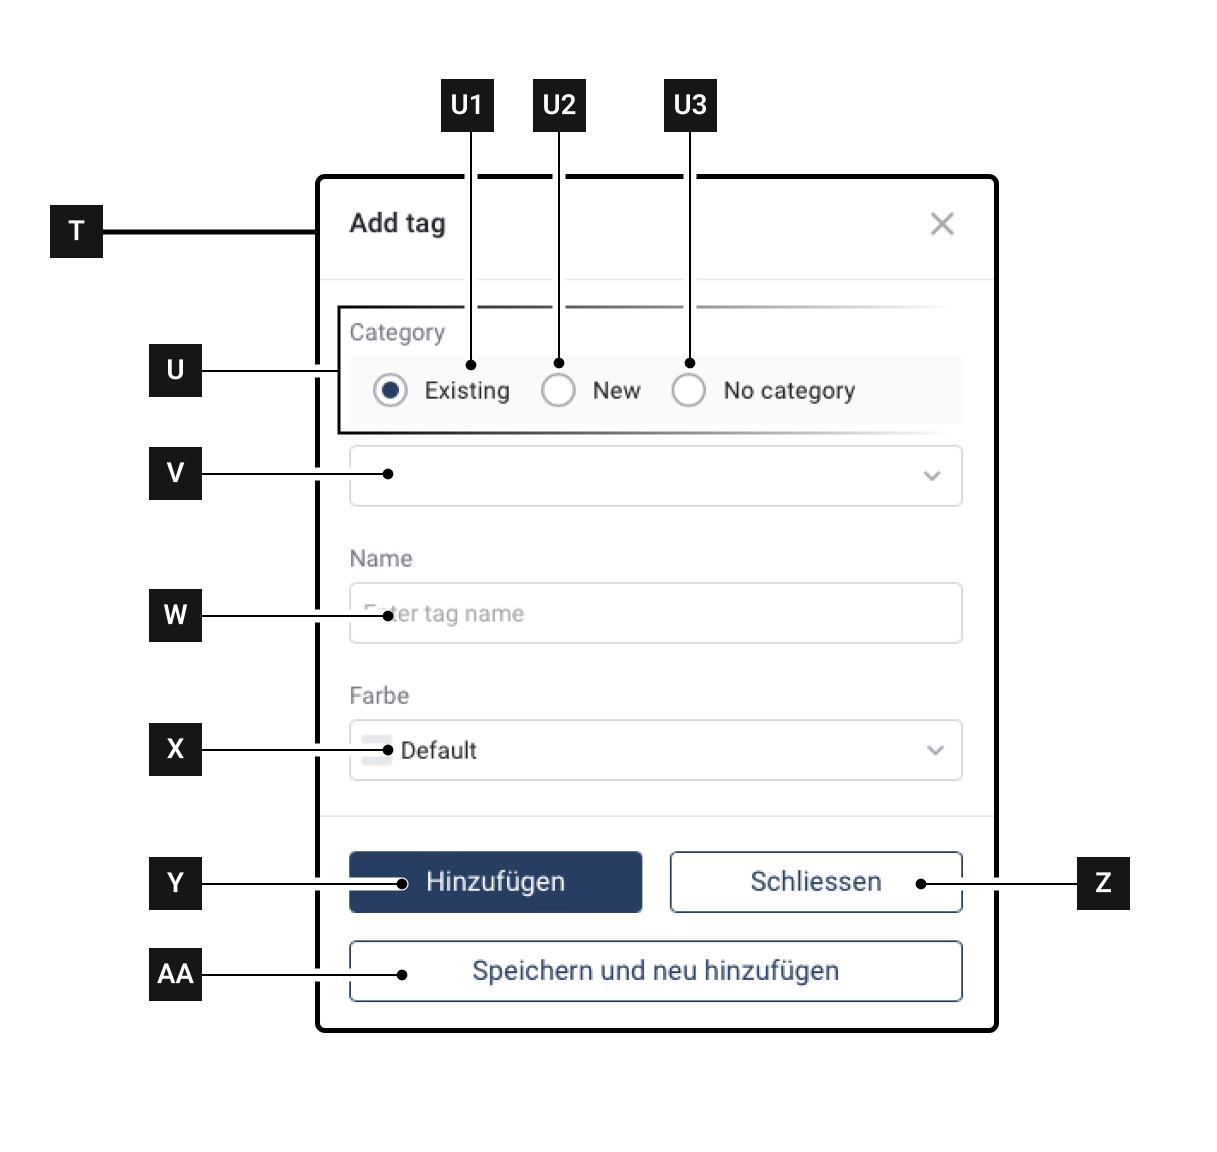
  2. Click on [L] ▷ The window [T] opens

  3. Select in [U] whether the tag should be created in an already existing category [U1], ⇄ OR a new category should be created [U2]OR the tag should not be assigned to any category [U3].

  4. If [U1] or [U2] was selected: In [V] select which category the tag should be assigned to, or enter the name for a new category.

  5. Enter in [W] enter a name for the new tag

  6. Select in [X] select a color for the new tag

  7. Click on [Y], to add the tag and close the [T] window ⇄ OR Click on [Z], to cancel ⇄ OR Click on [AA] to create the tag, keep the window open and create another tag.

categories

Tags can be organized into categories. These categories are mainly used to determine which tags are displayed in the ↗ alarm overview.

Categories exist in a certain order. This order is called the sequence. [Q].

Create a new category

To create a new category, proceed as described in ↗ Create a new tag Select the option in step 3 [U2]

Move tags into a new category

You can drag tags ↗ drag and drop into a category

Mark categories as favorite

Left: The category has been marked as a favorite. Right: The category is not marked as a favorite
This function is important for the alarm overview. In the alarm overview, only those tags are displayed for alarms for which all of the following conditions are met:

  • The tag is in a category

  • The category in which the tag is located is marked as a favorite

  1. Click on [P], to mark a category as a favorite

  2. Click again on [P], to remove the favorite mark

Arrange categories in an order

This function is important for the alarm overview. By arranging categories in a certain order, you can determine the order in which tags are displayed in the alarm overview.

Click on [R] and select under [S] the position in the sequence.

Tags without access

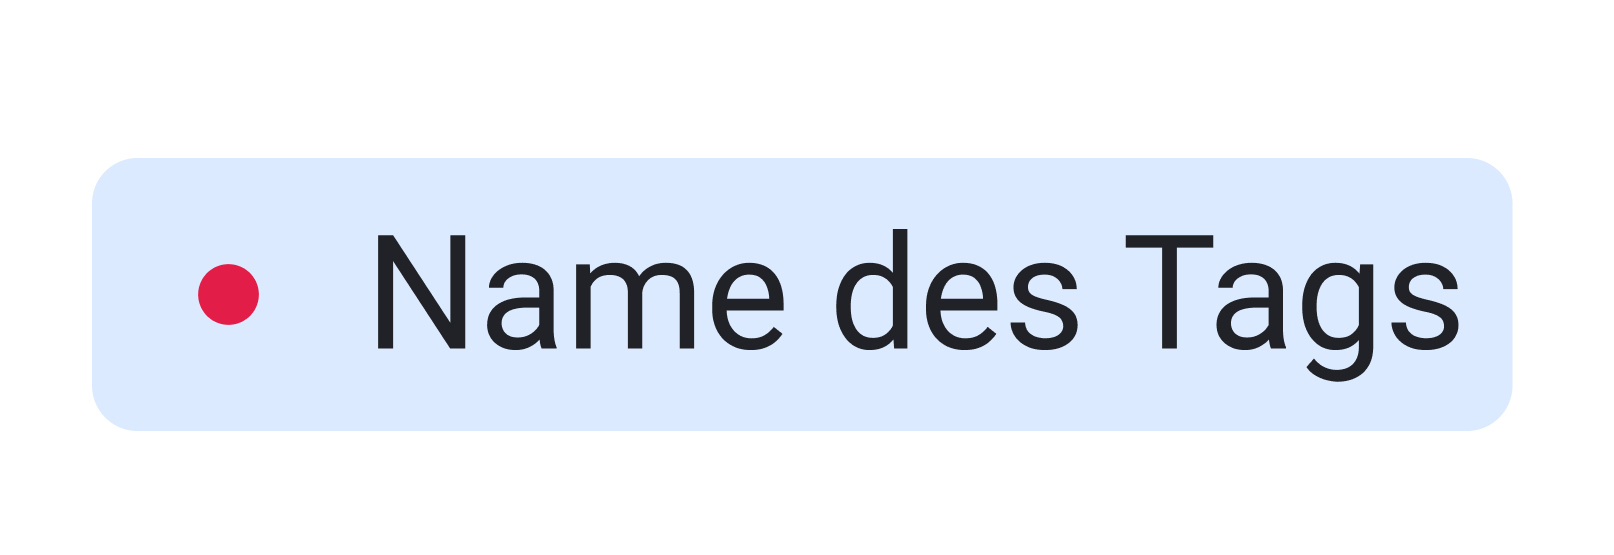
Applies only to users whose role has ↗ Expert Mode enabled.

Tags that a user does not have access to are marked with a red dot.

Was this helpful?