

Custom widgets
With Custom Widgets you can create your own widgets tailored exactly to your needs. The advantage over preconfigured widgets is that in Custom Widgets
Basic principle
A Custom Widget consists of several modules. You can combine as many of these modules as you like into a widget. You can further customize the individual modules in detail.
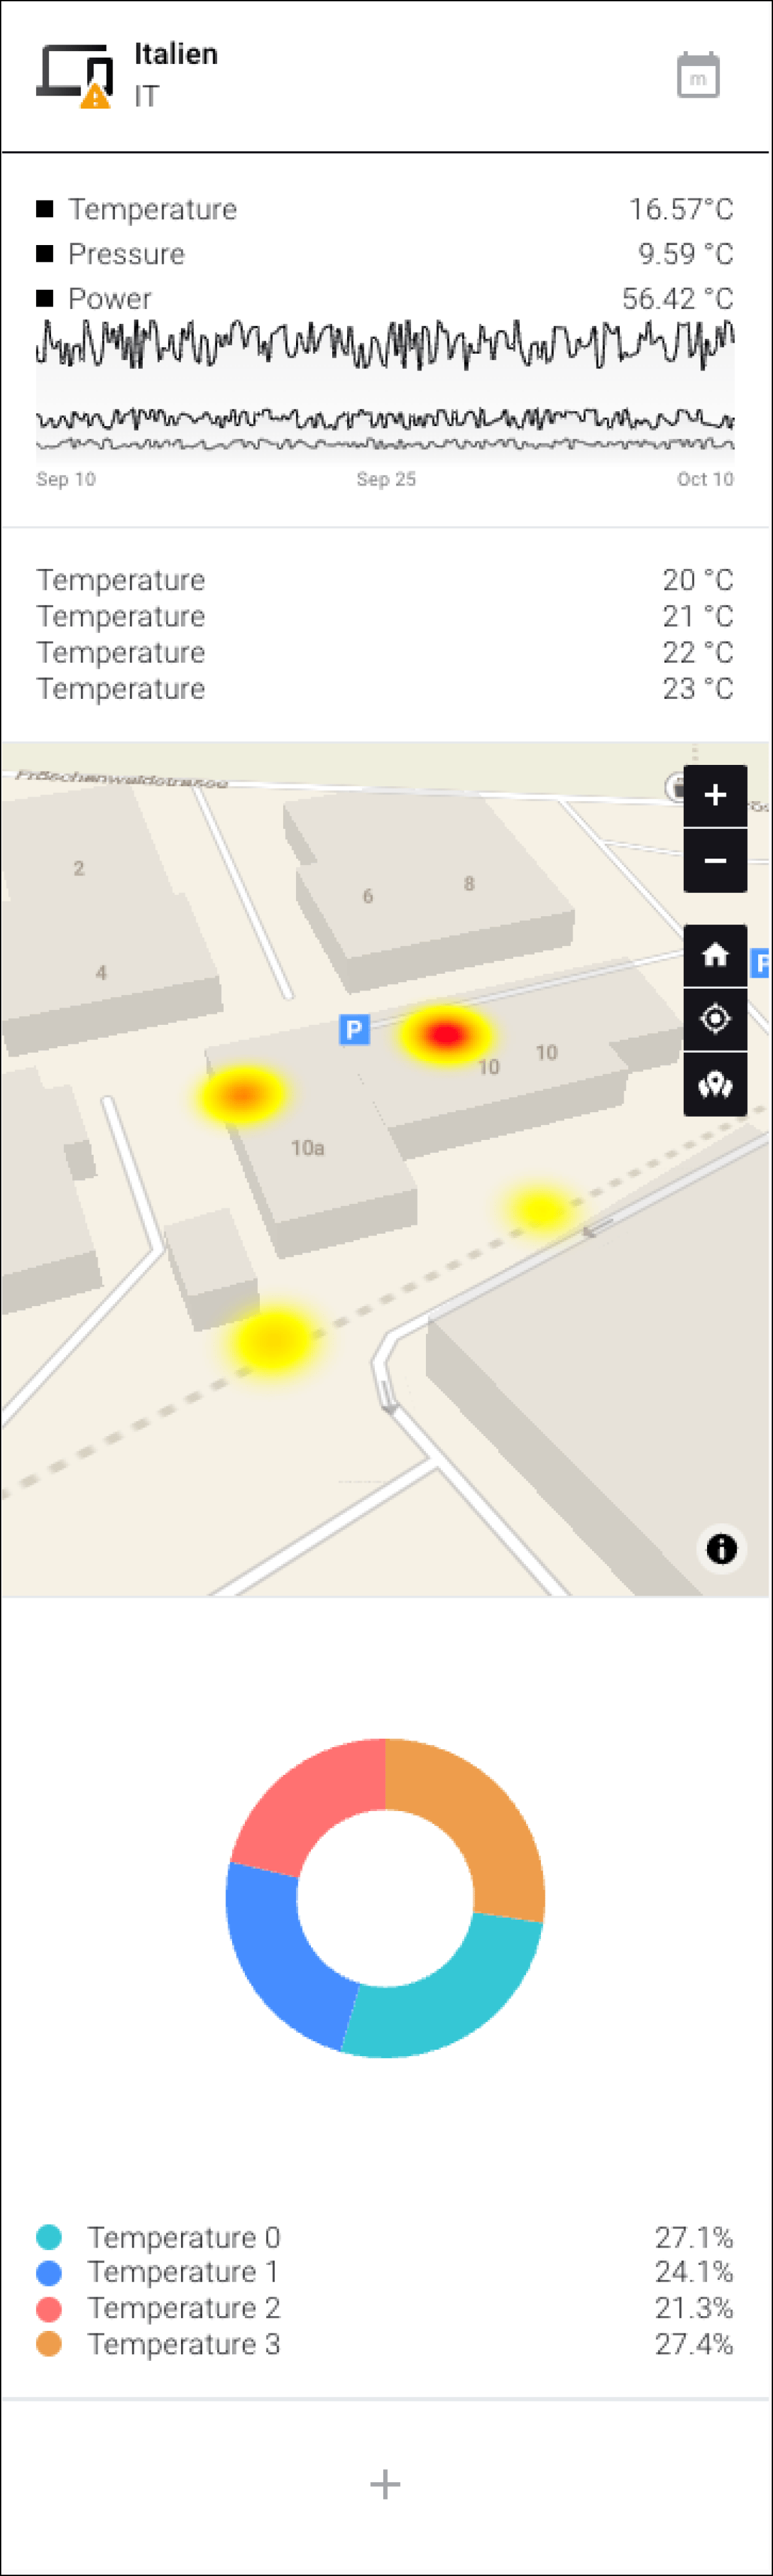
In Fig. 1 you can see an example of a Custom Widget consisting of the following modules (from top to bottom):
Analog trend
Heatmap
Donut
Step by step: Creating a Custom Widget
Step 1 – Create a Custom Widget
Follow the steps to create an "empty" Custom Widget.
Make sure you are in the "Dashboards" menu item
Click "Widgets" in the context bar ▷ The widget selection opens
Click on Custom Widget
Enter a name
Select an icon. This icon will later appear in the widget's title bar
Click "Confirm" ▷ The new widget has been created
Step 2 – Customize the new widget
After the widget was created in step 1, you can make the first adjustments.
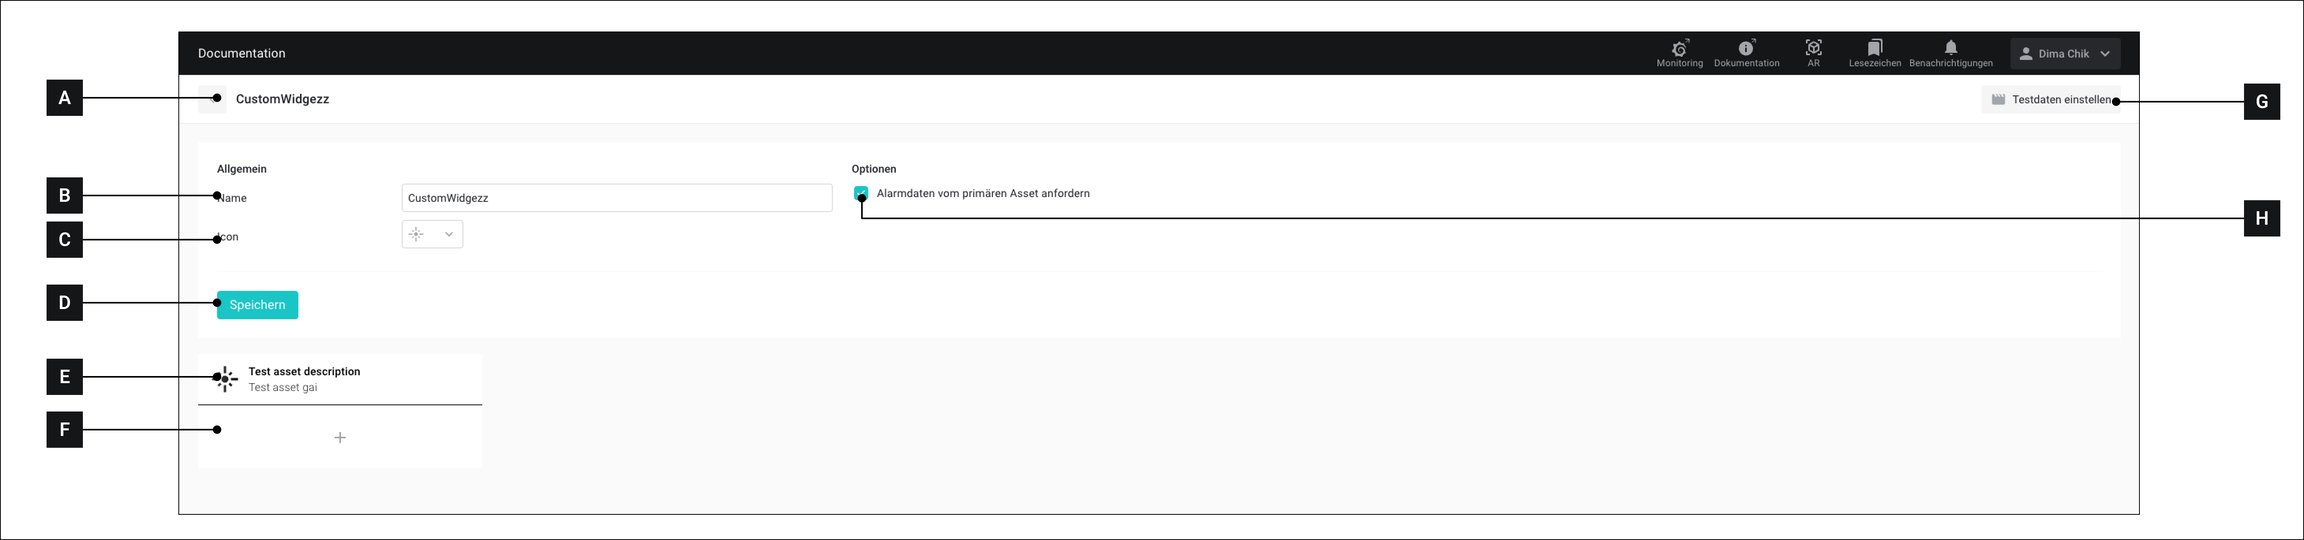
[A]
Back/Cancel
Return to the widget overview, without saving.
[B]
Name
You can adjust the name here afterward
[C]
Icon
You can adjust the icon here afterward
[D]
Save
Save entries
[E]
Preview
A preview of what the created widget will look like
[F]
Add module
Click here to add modules to the widget
[H]
Alarm data
If this checkbox is enabled, the widget will display the alarms of the asset defined under "Primary Asset". The "Primary Asset" is specified when you have finished configuring the Custom Widget and add it to the dashboard. See X
Step 3 – Add a module
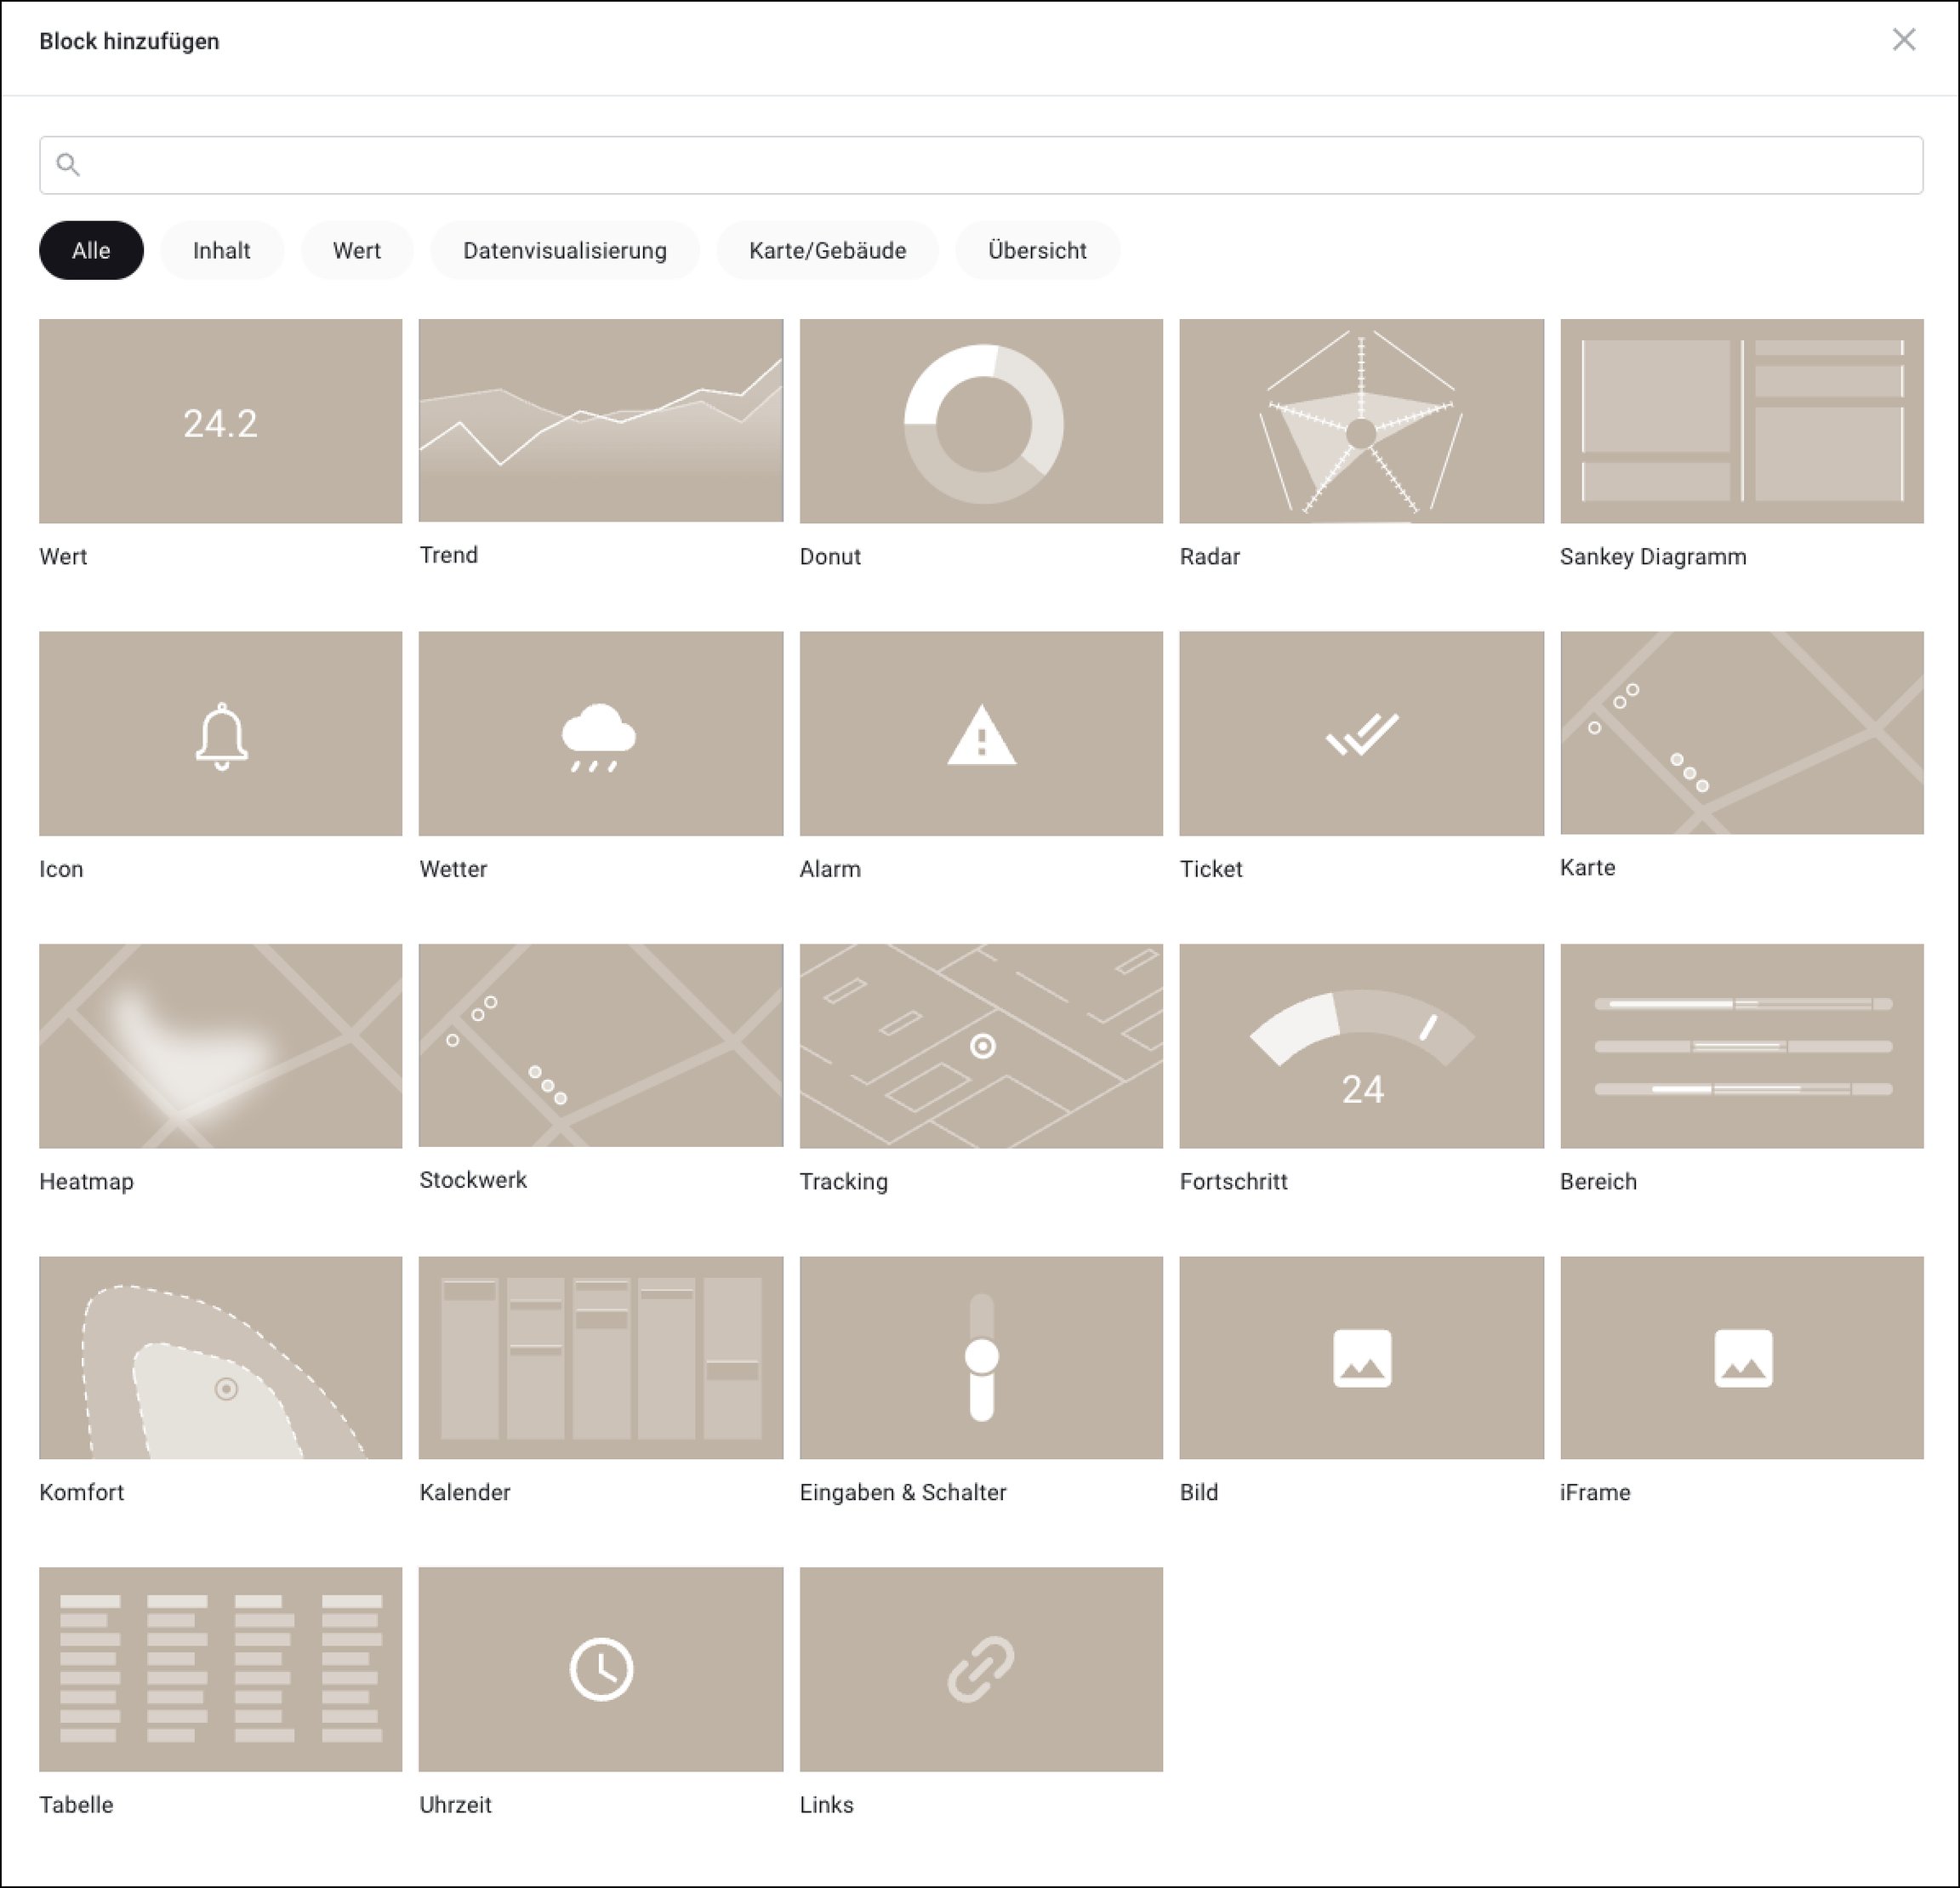
Click on [F], to add the first module to the new widget. ▷ The module selection (Fig. 3) appears
Move the mouse over a module to display a short description
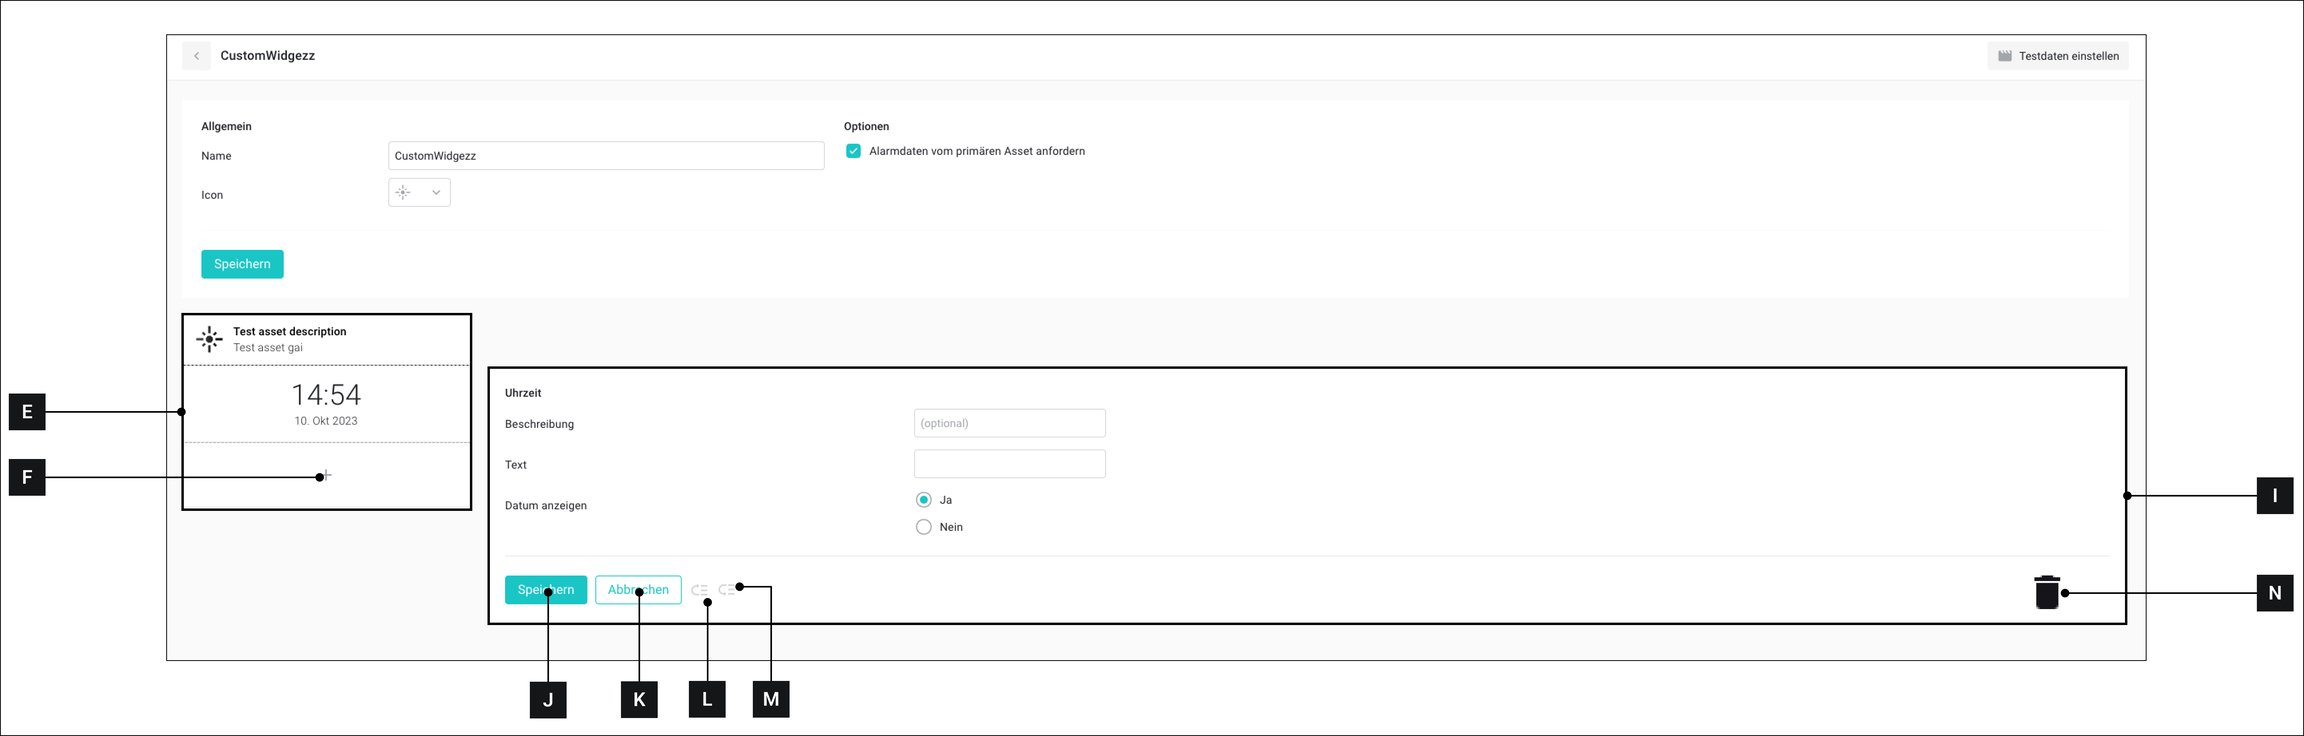
Click on a module to add it to the Custom Widget ▷ The Preview [E] of the widget is updated with the new module. ▷ The Module options [I] (Fig. 4) open
Configure the module in the Module options [I]
Click the button Save [J], to save the module settings or click [K], to cancel.
Step 4 – Add and arrange more modules
Click on [F] ▷ The module selection (Image 3) opens.
Click on the module you want to add to the widget
Proceed as explained in step 3 to configure the new module.
Rearrange modules
You can arrange modules within the Custom Widget as you like.
Click in the Preview [E] on a module. ▷ The module is outlined in black
Click on [L] ▷ The module is moved up
Click on [M] ▷ The module is moved down
Delete modules
You can delete a module from the Custom Widget.
Click in the Preview [E] on a module. ▷ The module is outlined in black
Click on [N] ▷ The module is deleted
Set test data
You can simulate what your new Custom Widget will look like when it has been filled with data.
Use the function Set test data [G]
Make sure you are in the "Dashboards" menu item
Click "Widgets" in the context bar ▷ The widget selection opens
Click on the Custom Widget for which you want to set test data
Click on Set test data [G] ▷ The "Test Data" window appears (Fig. 5)
Make the desired settings
Click on Continue [S] ▷ You can see the simulated data in the Preview [E]
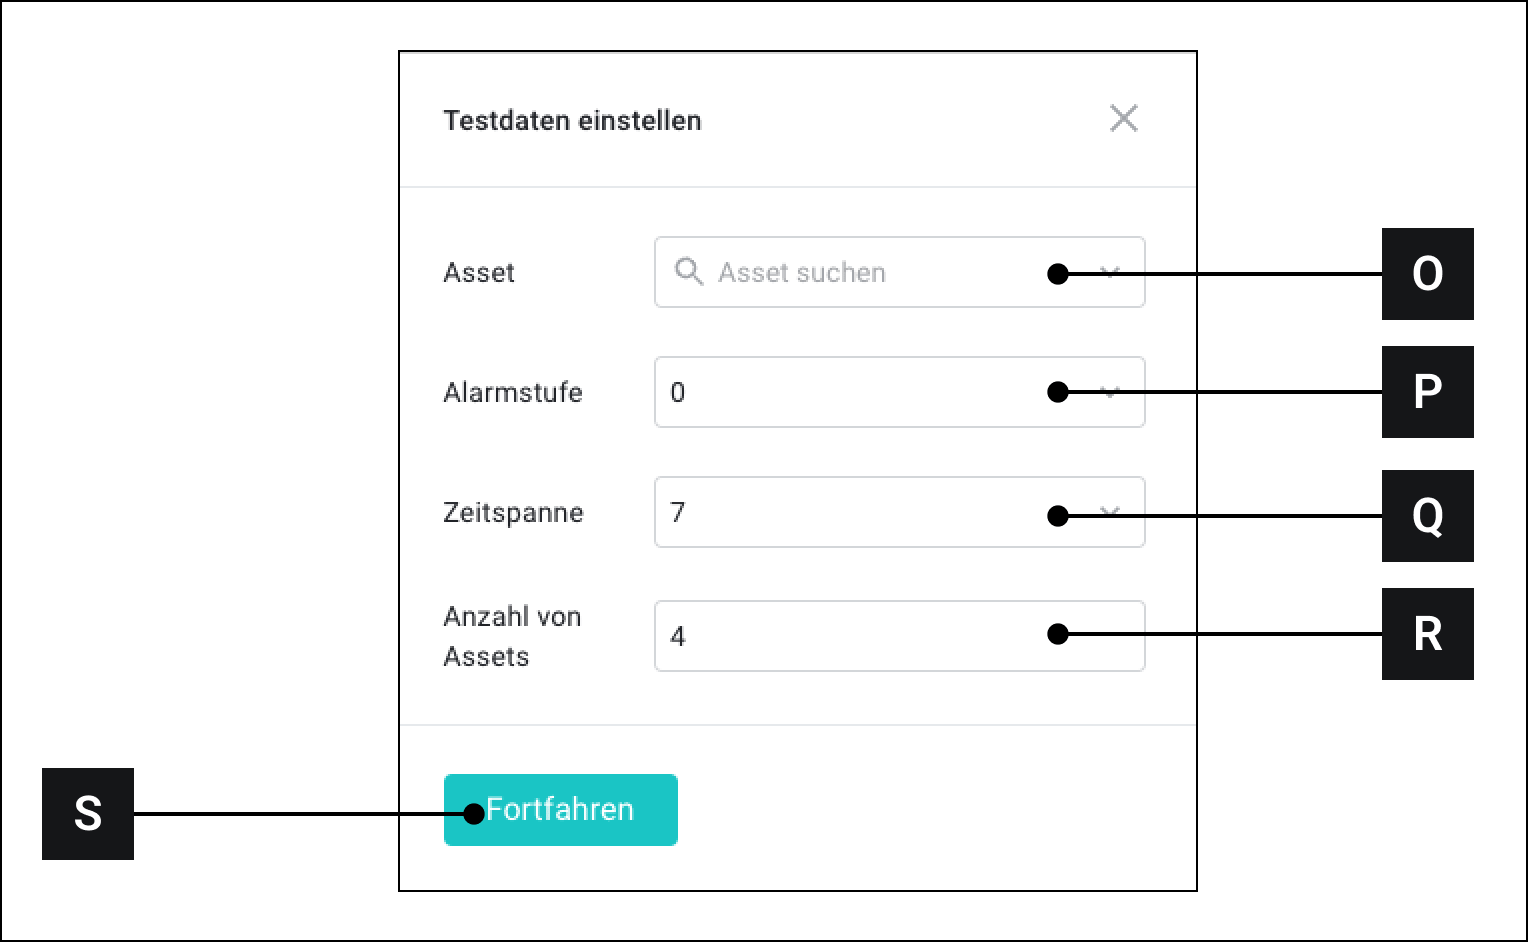
[O]
asset
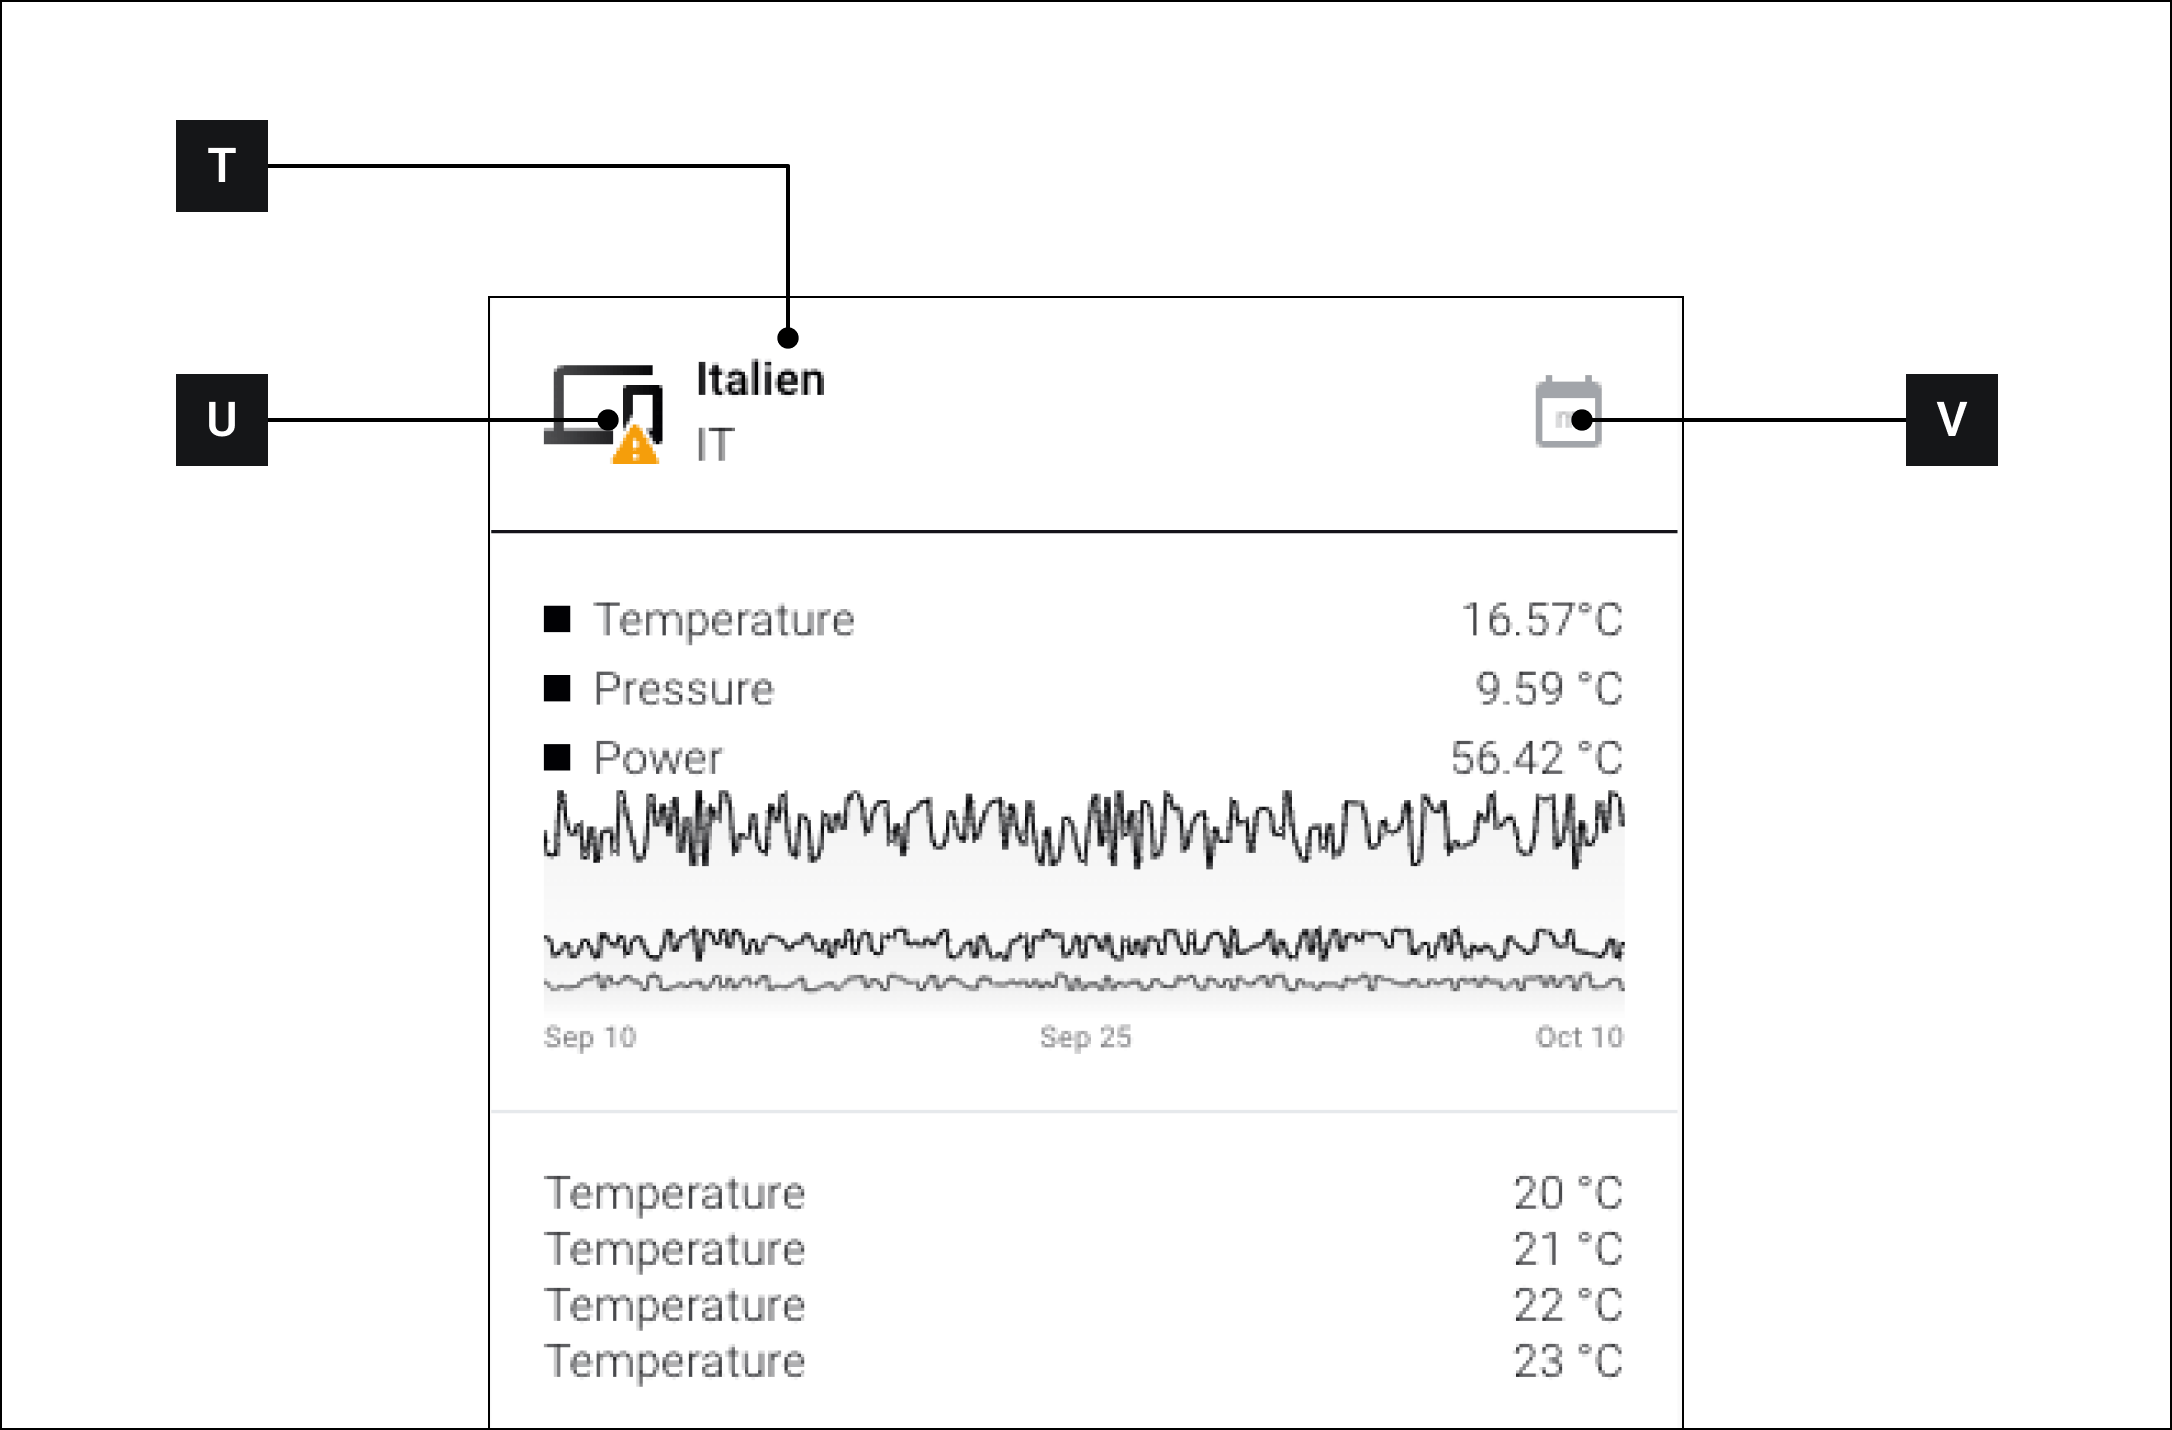
Simulates the display of the title of the Primary Asset in the title bar [T] (Fig. 6)
[P]
Alarm
Simulates the alarm level in the widget icon [U] or the title bar [T] (Fig. 6) Available values:
0: No alarm
1: High alarm level / title bar [T] turns red
2: Medium alarm level / yellow symbol in the widget icon [U]
3: Low alarm level / green symbol in the widget icon [U]
[Q]
Time span
Only effective for certain modules, e.g. trends. Changes the scaling of trends; the same effect is produced when [V] is pressed.
[R]
Number of assets
Only effective for certain modules, e.g. donuts. Simulates how the module changes when more assets are linked to it
[S]
Continue
Apply entries and close the "Test Data" window
Last updated
Was this helpful?