> For the complete documentation index, see [llms.txt](https://docs.buildings.ability.abb/collection/llms.txt). Markdown versions of documentation pages are available by appending `.md` to page URLs; this page is available as [Markdown](https://docs.buildings.ability.abb/collection/german/plattform/map-and-floor/floor/create-a-floor.md).
# Eine Etage erstellen
## Einen Stock erstellen
Ein Stock wird wie ein reguläres Asset über das Menü "Asset erstellen" angelegt.
Allerdings müssen mehrere Besonderheiten beachtet werden:
1. "Floor" muss als Asset-Typ ausgewählt werden
2. Ein Grundriss muss zugewiesen werden
3. Der Stock muss einem Gebäude untergeordnet werden
Beide dieser Besonderheiten werden in der folgenden Dokumentation erläutert.
{% hint style="info" %}
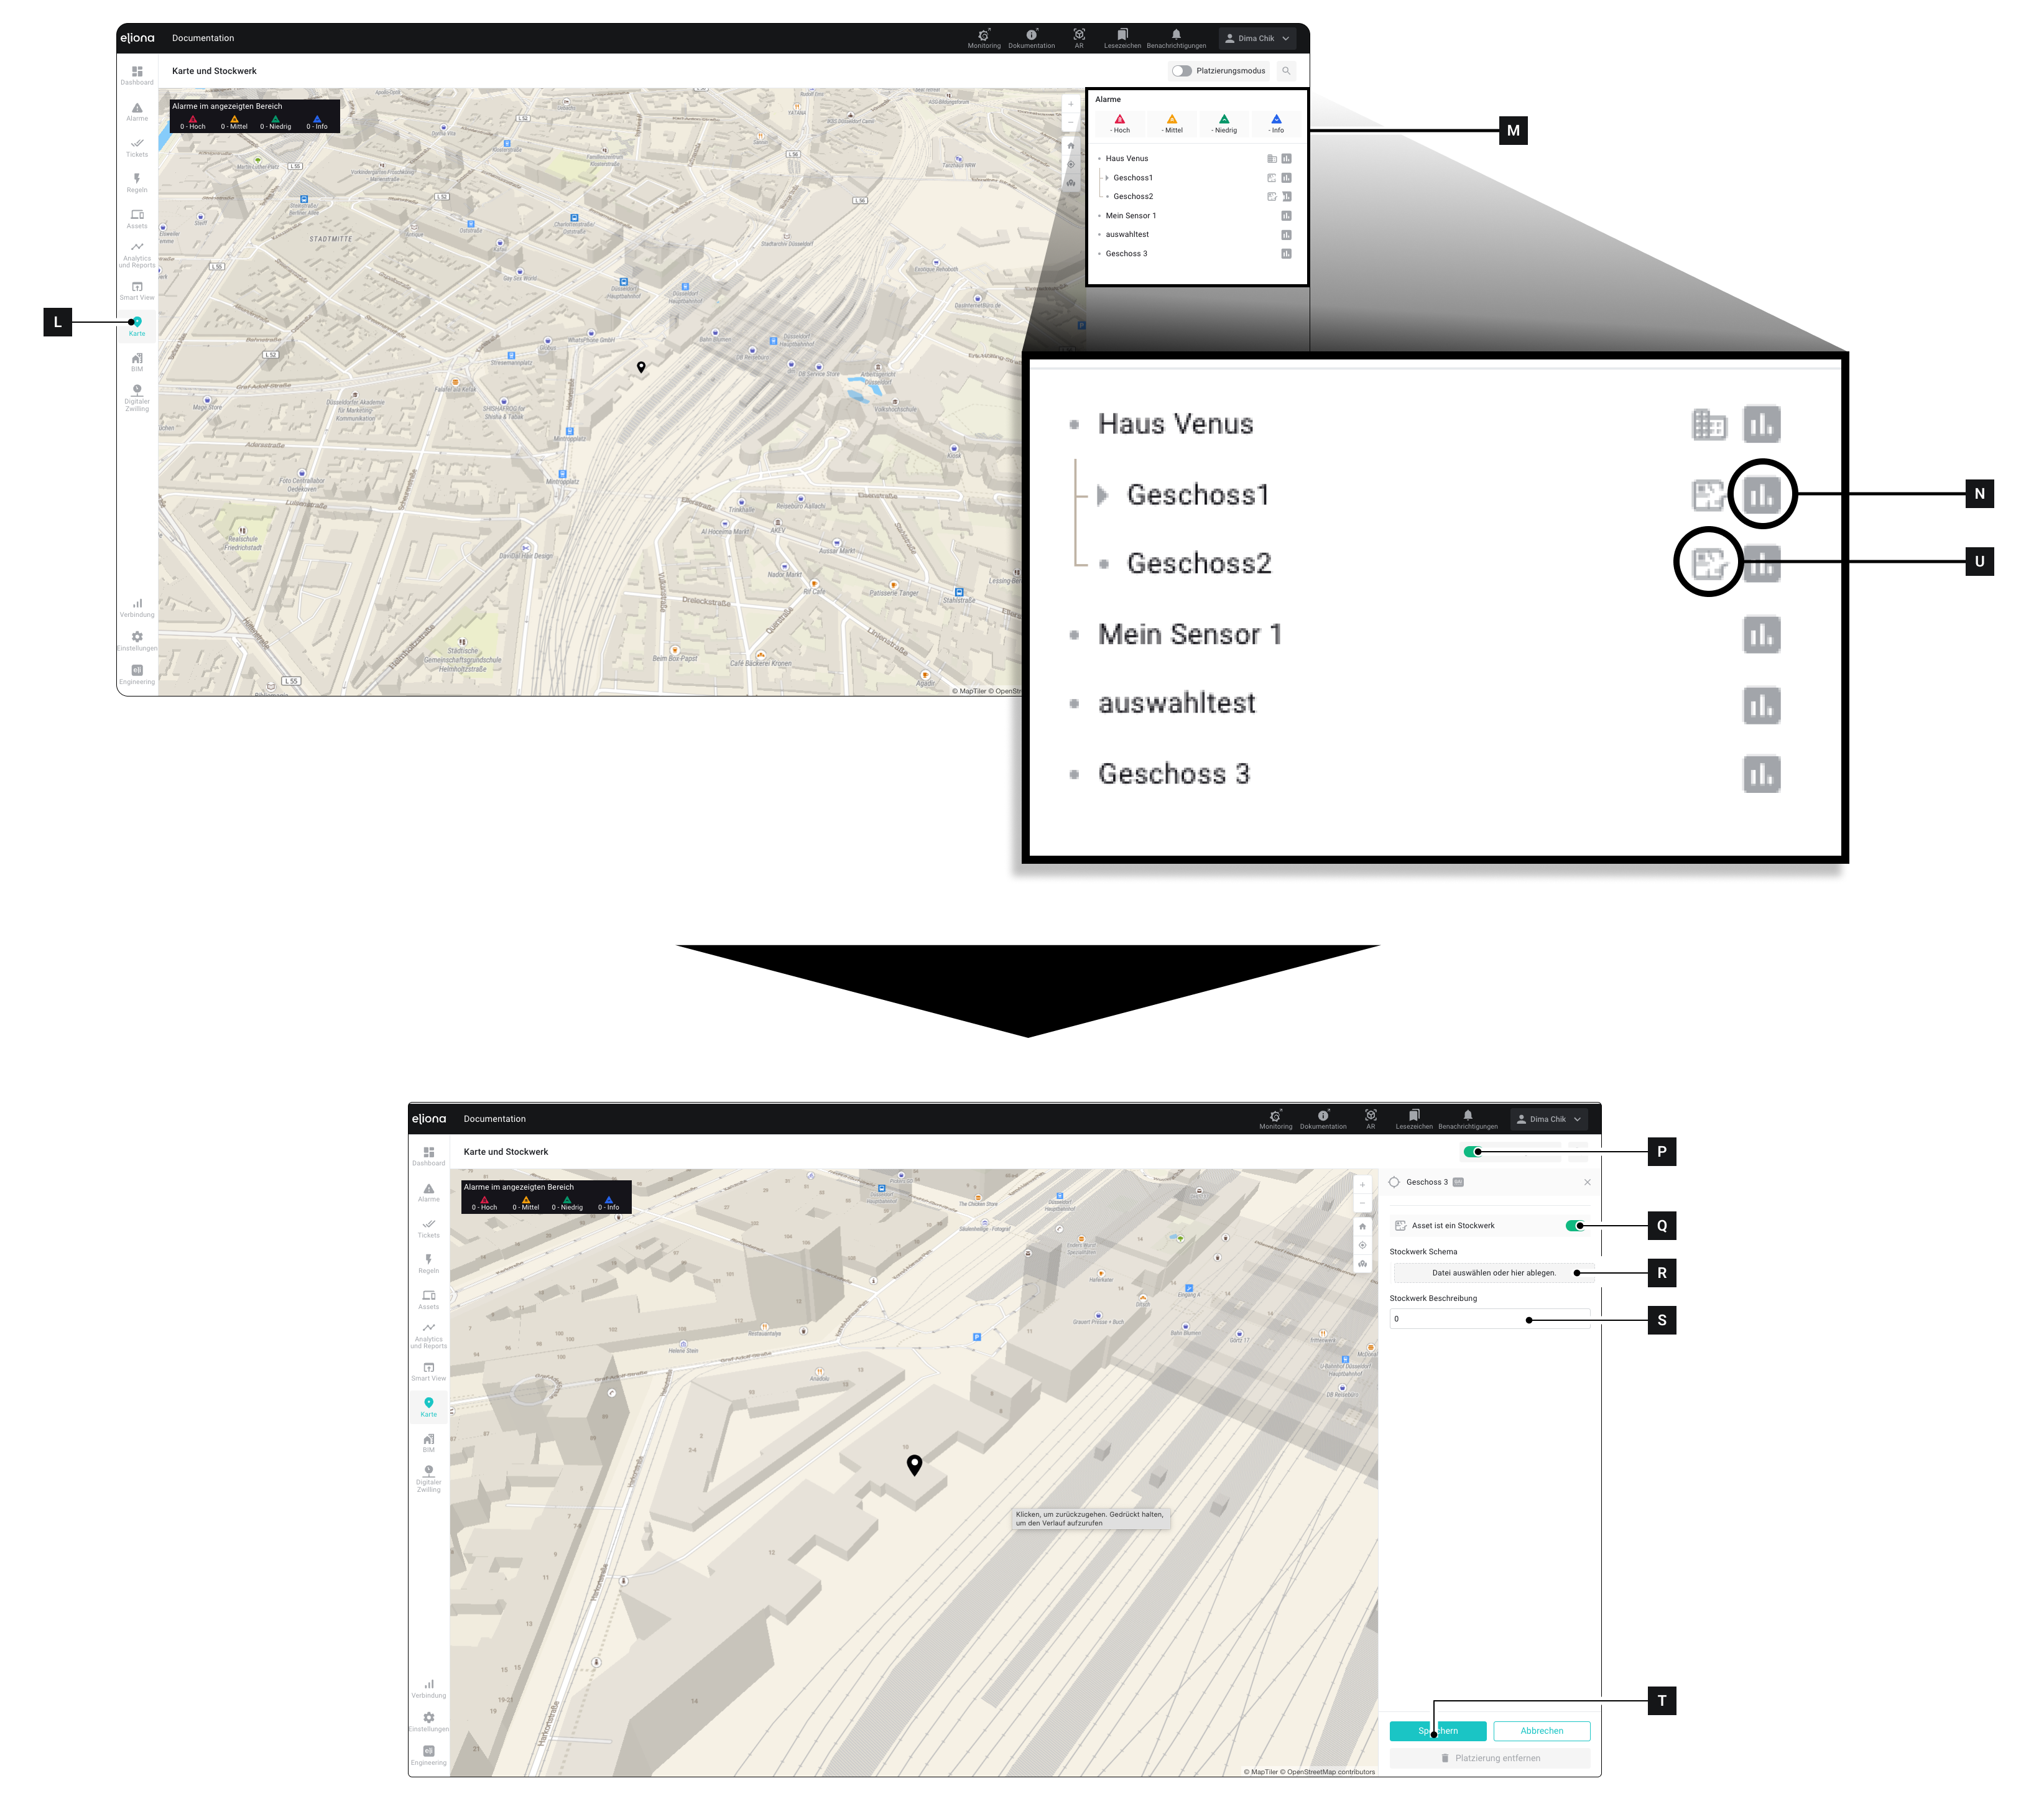
Richtig konfigurierte Stockwerke sind immer mit dem **\[U]-Symbol**.
{% endhint %}
### Ein "Floor"-Asset erstellen
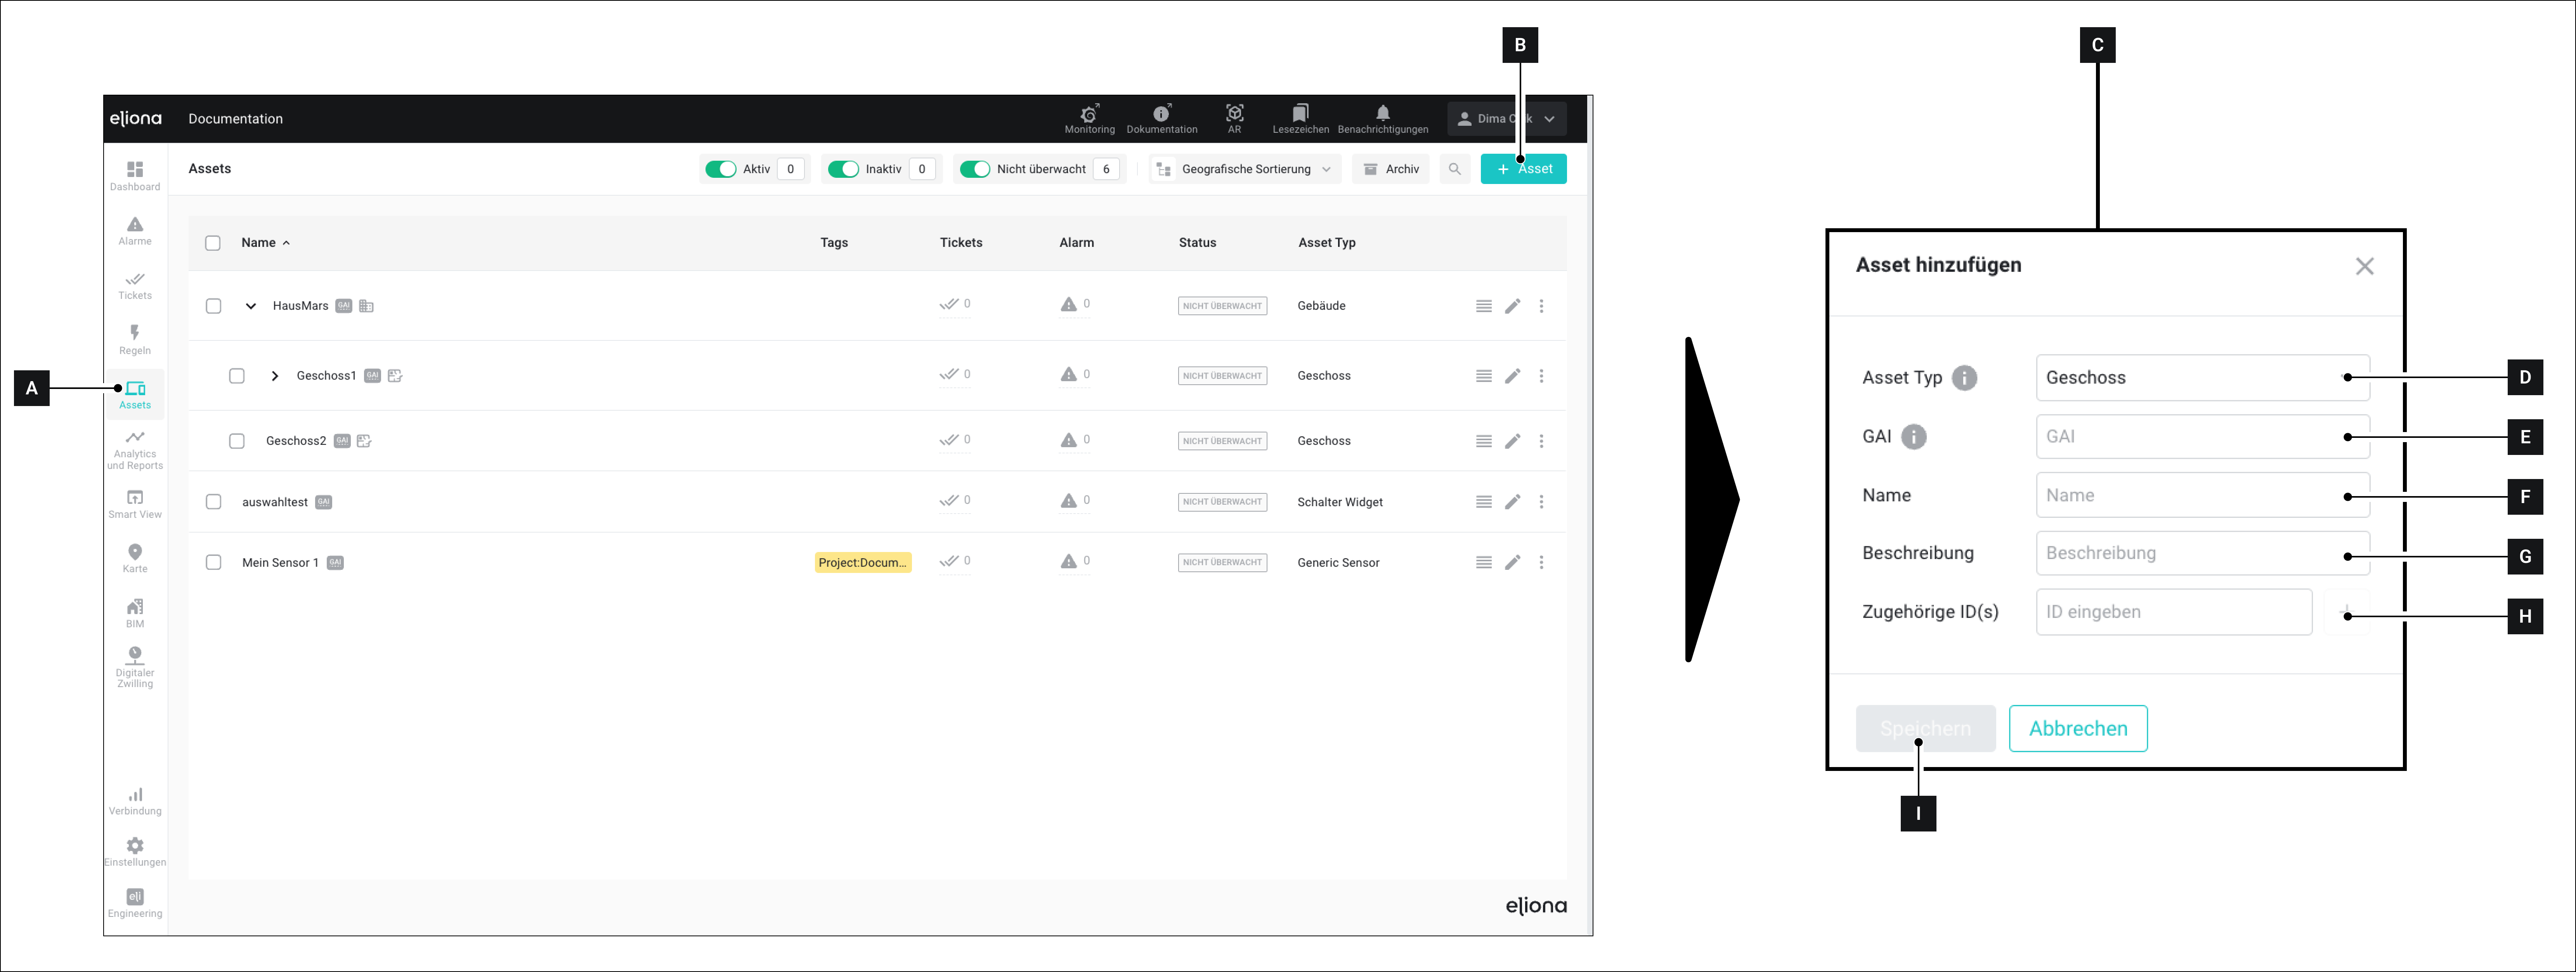
1. Öffnen Sie den Menüpunkt **Assets \[A]**
2. Klicken Sie auf **\[B]**\
▷ Die **Asset hinzufügen \[C]** Fenster öffnet sich
3. Unter **Asset-Typ \[C]:** Wählen Sie den Typ "Floor"
4. Eine GAI zuweisen **\[D]**
5. Geben Sie dem Asset einen Namen **\[E]**
6. (Optional): Fügen Sie dem Asset eine Beschreibung hinzu **\[F]**
7. (Optional): Geben Sie eine oder mehrere IDs des Assets ein **\[G]**
8. (Optional): Geben Sie dem Asset ein oder mehrere Tags
9. Klicken Sie auf **Speichern \[I]**\
▷ Das Asset wird erstellt
### Einen Stock einem Gebäude zuweisen
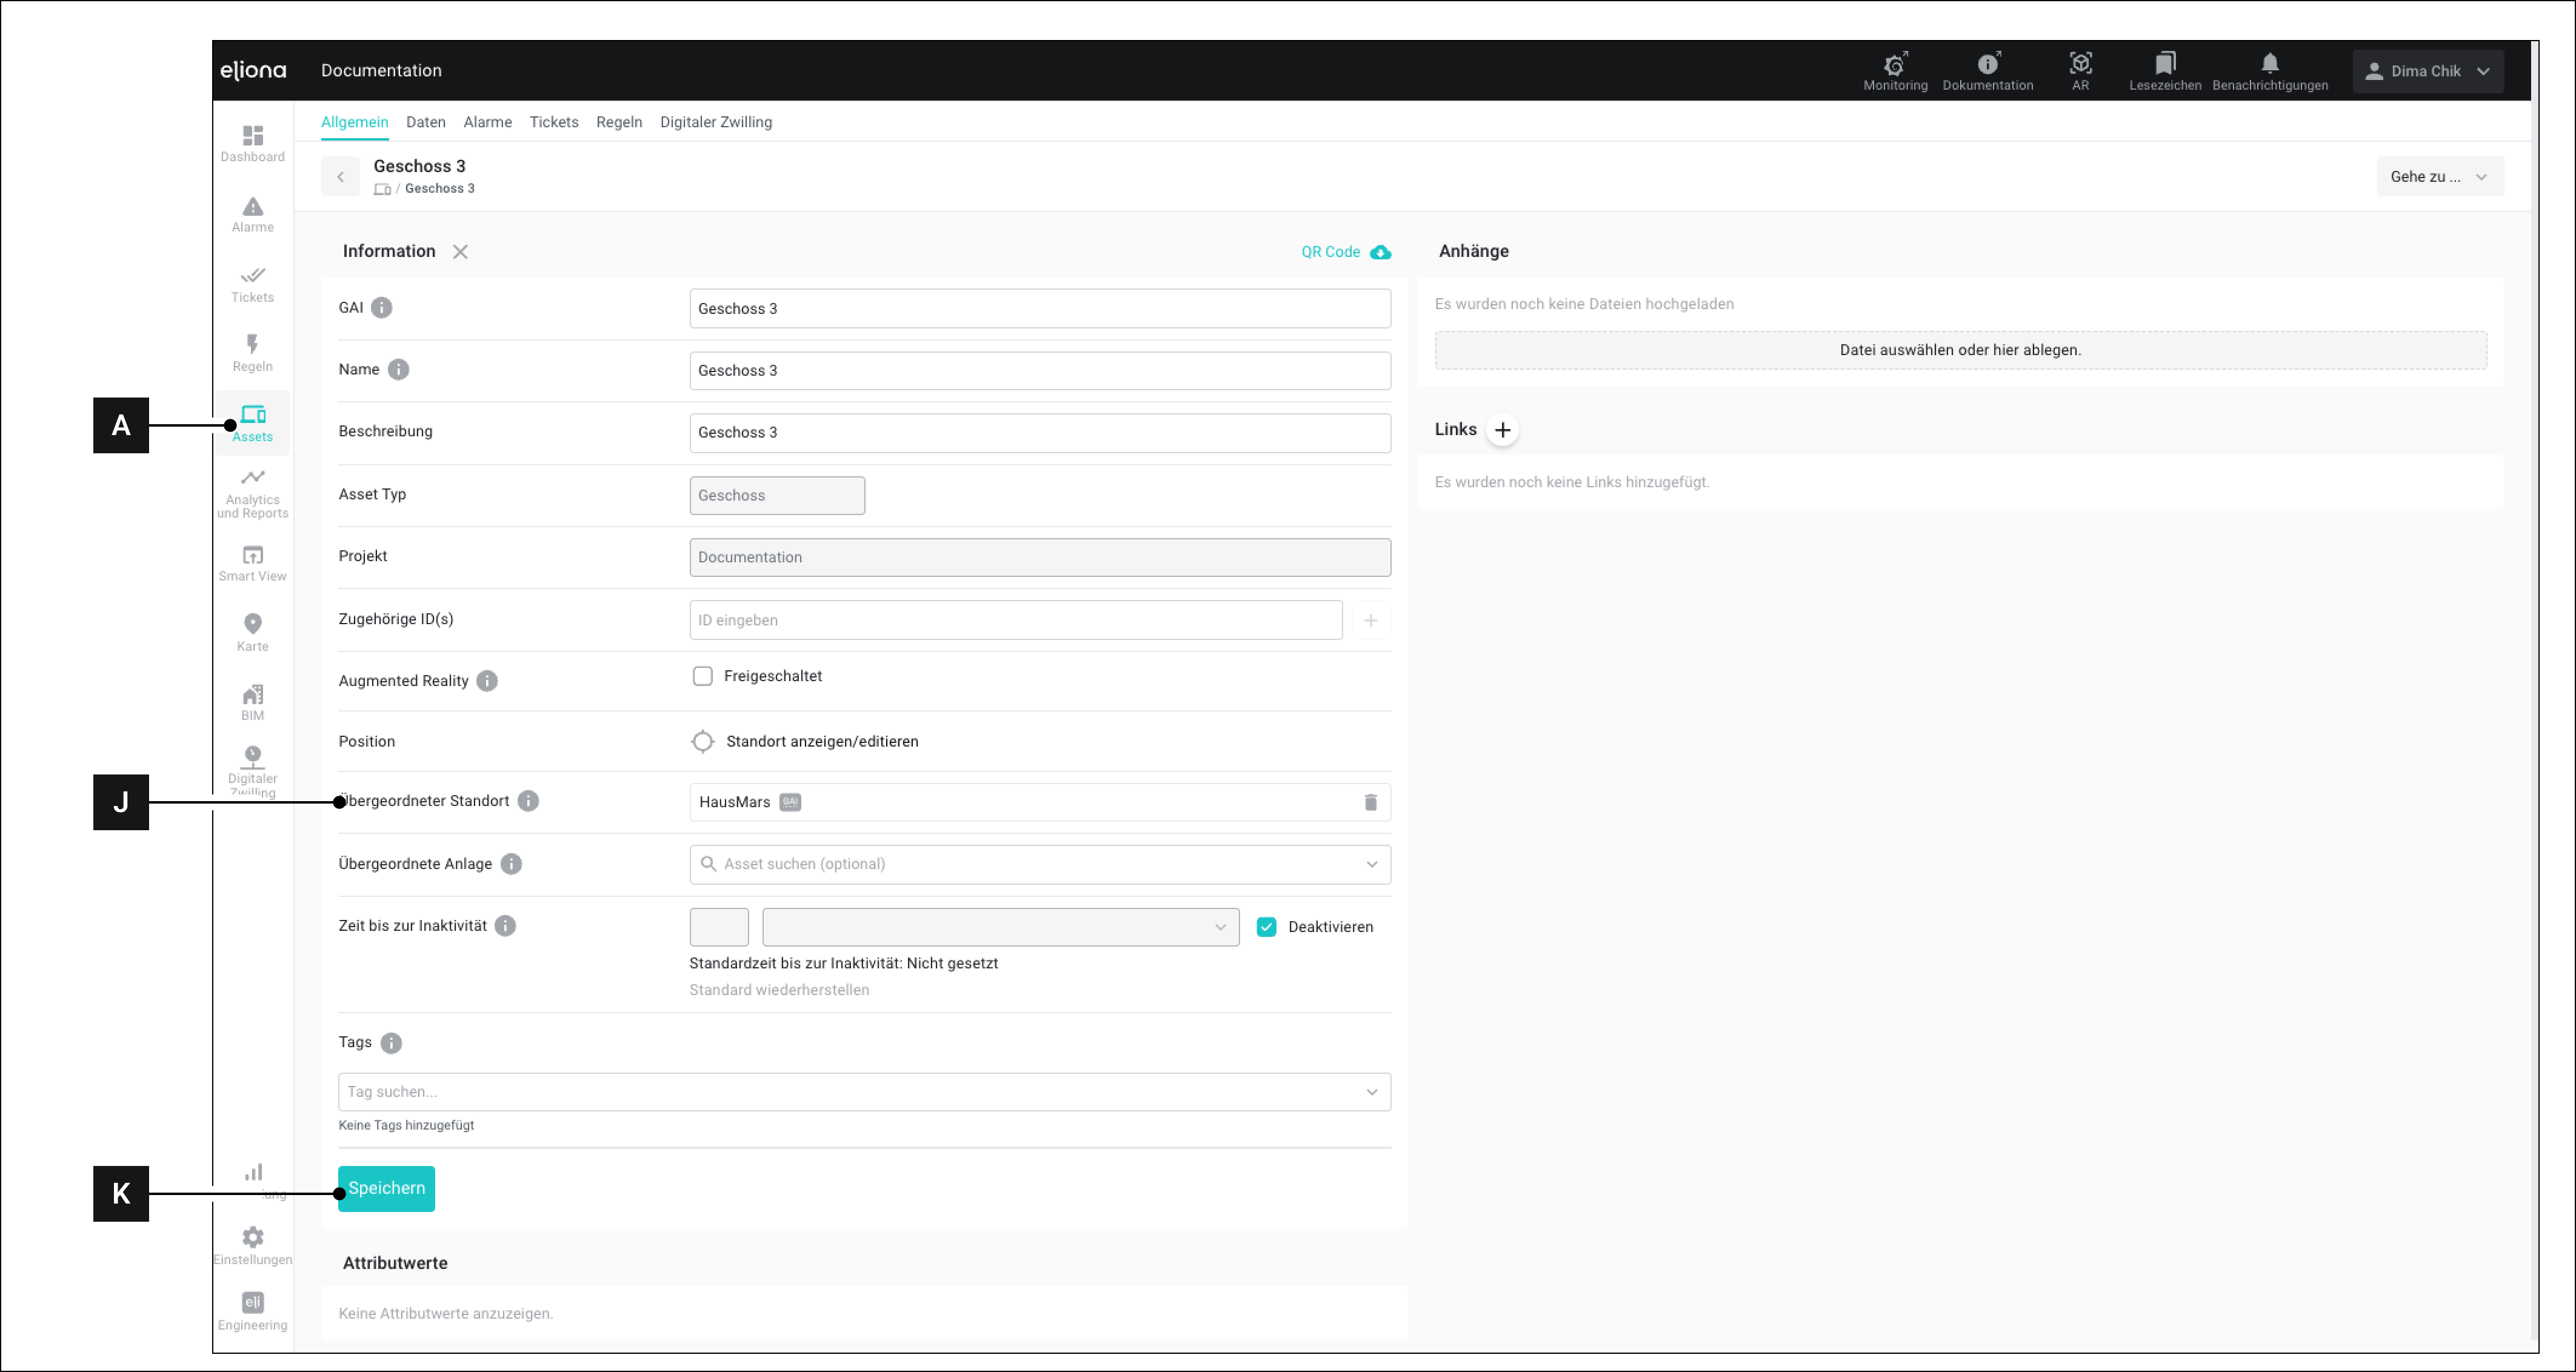
1. Öffnen Sie den Menüpunkt **Assets \[A]**
2. Navigieren Sie zu einem Asset vom Typ "Floor"
3. Im Element **Übergeordneter Standort \[J]** – Wählen Sie ein Asset aus, dem Sie den Stock zuweisen möchten.\
◈ Dieses übergeordnete Asset ist normalerweise ein Gebäude.
4. Klicken Sie auf **Speichern \[K]**
### Einen Grundriss hinzufügen
* Öffnen Sie die **Karte \[L]** Menü
* In der **Seitenleiste \[M]:** Klappen Sie das Asset auf, dem der Stock zugeordnet ist, dem Sie den Grundriss hinzufügen möchten.\
▷ Sie sehen alle Assets, die diesem Asset zugeordnet sind. Dazu können eine oder mehrere Etagen gehören.
* Klicken Sie für das Asset, dem Sie einen Grundriss hinzufügen möchten, auf das **\[N]** Symbol. ⚠ **Achtung** Klicken Sie NICHT auf den Namen des Assets!\
▷ Die Details werden geöffnet
* Aktivieren Sie den **Platzierungsmodus \[P]**
* Aktivieren Sie den Schalter **Asset ist eine Etage \[Q]**
* Unter **Etagen-Schema \[R]**, laden Sie einen Grundriss hoch
* Unter **Etagenbeschreibung \[S]**, wählen Sie die Nummer der Etage aus.
* Klicken Sie auf **Speichern \[T]**\
▷ Die Etage wird erstellt.\
▷ Die Etage ist mit einem **Symbol \[U]**.\
▷ Im **Assets \[A]** Menü erscheint die Etage nun unter dem übergeordneten Asset
{% hint style="success" %}
Nachdem Sie die Schritte in diesem Kapitel abgeschlossen haben, wird das Asset mit dem **\[U]-Symbol**.
Nur Assets, die mit dem **\[U]-Symbol** sind korrekt konfigurierte Etagen.
{% endhint %}
{% hint style="warning" %}
Wenn das Asset nicht mit dem **\[U]-Symbol**, können Sie die Schritte im nächsten Kapitel nicht ausführen.
{% endhint %}
---
# Agent Instructions
This documentation is published with GitBook. GitBook is the documentation platform designed so that both humans and AI agents can read, navigate, and reason over technical content effectively. Learn more at gitbook.com.
## Querying This Documentation
If you need additional information that is not directly available in this page, you can query the documentation dynamically by asking a question.
Perform an HTTP GET request on the current page URL with the `ask` query parameter, and the optional `goal` query parameter:
```
GET https://docs.buildings.ability.abb/collection/german/plattform/map-and-floor/floor/create-a-floor.md?ask=&goal=
```
`ask` is the immediate question: it should be specific, self-contained, and written in natural language.
`goal` is optional and describes the broader end goal you are ultimately trying to accomplish on behalf of the user. GitBook uses it to tailor the answer towards what is most useful for that goal.
The response will contain a direct answer to the question and relevant excerpts and sources from the documentation.
Use this mechanism when the answer is not explicitly present in the current page, you need clarification or additional context, or you want to retrieve related documentation sections.