| Element | Title | Details |
|---|---|---|
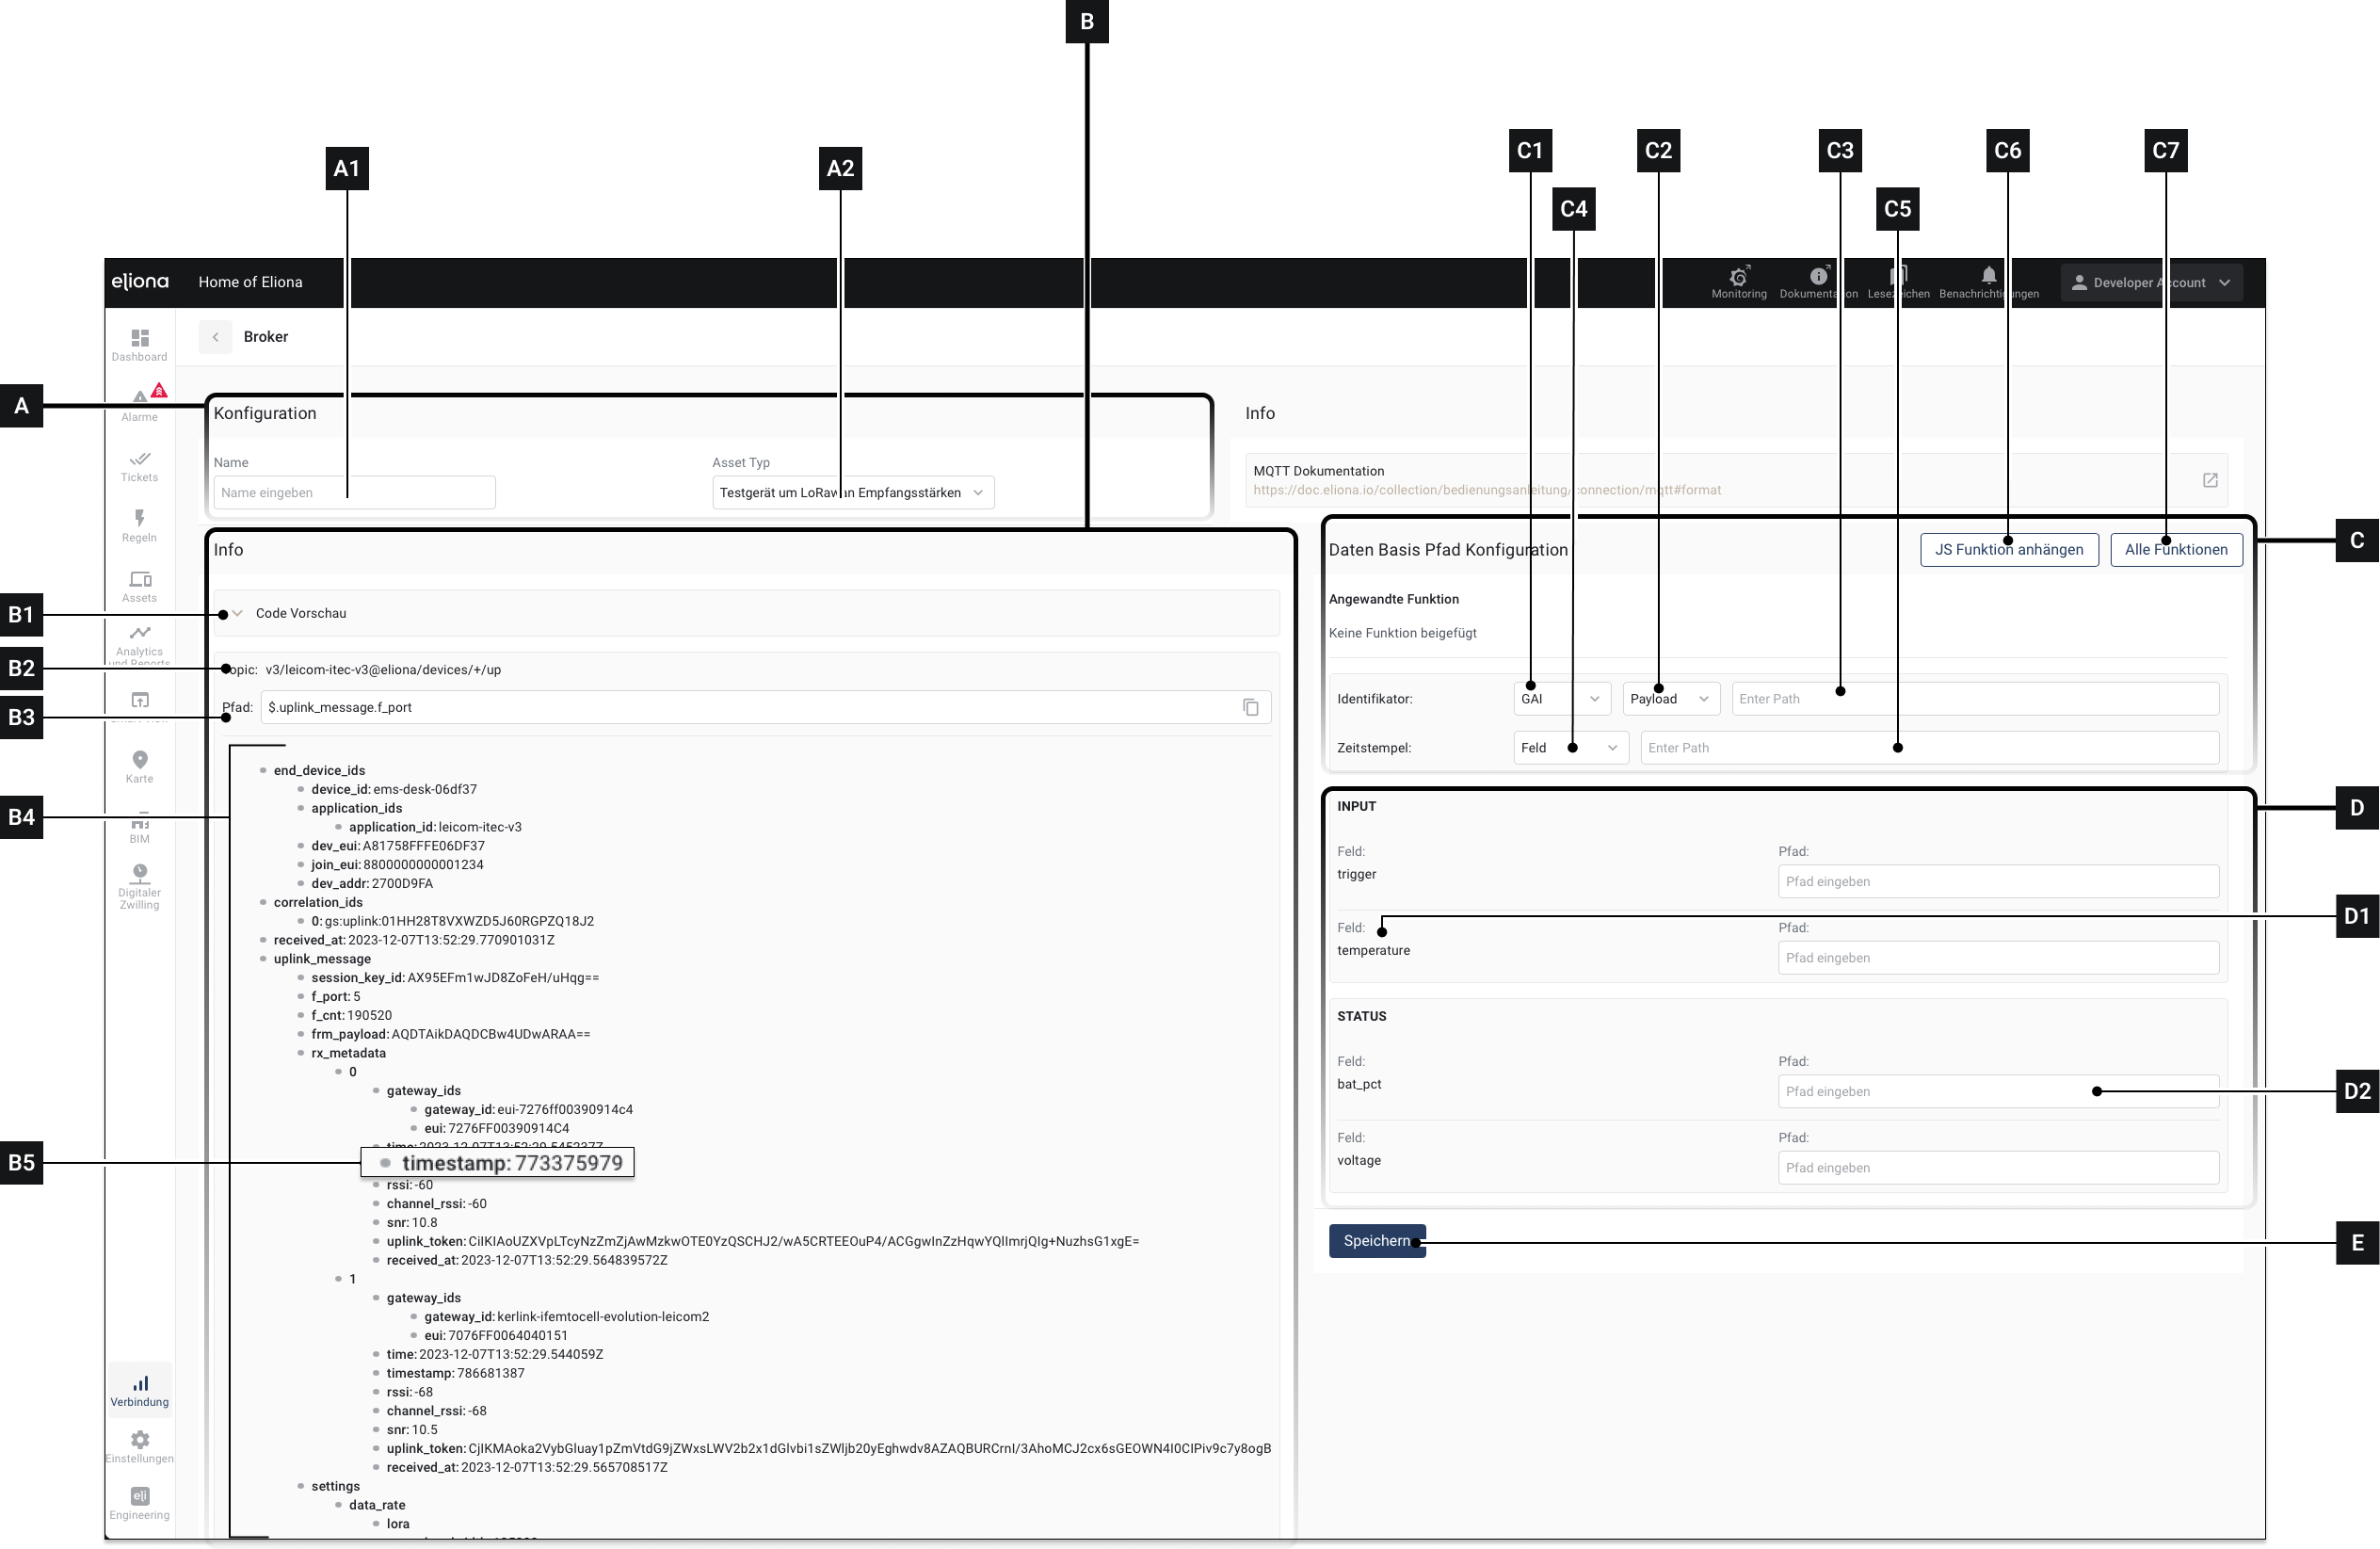
| [A] | Section "Configuration" | In this section, details about the format are configured |
| [A1] | Name | Give the format a name in this field |
| [A2] | Asset type | Choose for which asset type this format applies. This selection influences which values appear in section [D] |
| [B] | Section "Payload" | In this section, a preview of the incoming data is displayed. |
| [B1] | Code Preview | Click here to open the code preview. The code preview displays the information from section [D] in the form of a payload. |
| [B2] | Topic | The topic |
| [B3] | Topic path | The path to the respective payload entry |
| [B4] | Payload | This is the transmitted payload. Drag values from the payload to the corresponding paths [D2]. If you create a format via Option 1, the payload appears in this area. If a format is edited afterward, the content of the ↗ Payload Preview appears here |
| [B5] | Payload entry | A single component of the payload. You can drag and drop these components to the paths in the attributes [D2] |
| [C] | Section "Path Configuration" | In this section, you specify to which asset the incoming data is mapped. |
| [C1] | Identifier | Here you select the individual asset to which the incoming data is mapped. Options are: - GAI: The GAI is used to determine the asset to which the data is mapped - External: Instead of the GAI, the "Associated ID" of an asset is used. ↗ See [M1] in Asset -> Configure an asset -> Available settings |
| [C2] | Location of the identifier | Here you select where the identifier is taken from. Options are:
|
| [C3] | Identifier | Enter the identifier here. If the identifier should be the topic, you can simply enter "#" in the path |
| [C4] | Timestamp selection | Choose how the timestamp should be recognized. Options are: - Auto: The timestamp is automatically recognized - Field: Drag a payload entry into field [C5] |
| [C5] | Field for timestamp entry | If you have selected Field in [C4]: Simply drag the timestamp [B5] into the field |
| [C6] | Append function | click to append a JavaScript function |
| [C7] | All functions | View all existing functions |
| [D] | Input | In this section, the payload entries are assigned to the individual attributes. |
| [D1] | Attribute | This is one of the attributes that are set for this asset type. |
| [D2] | Path to the payload entry | This is one of the attributes that are set for this asset type. |
| [E] | Save | Click here to save the settings |