> For the complete documentation index, see [llms.txt](https://docs.buildings.ability.abb/collection/llms.txt). Markdown versions of documentation pages are available by appending `.md` to page URLs; this page is available as [Markdown](https://docs.buildings.ability.abb/collection/platform/map-and-floor/floor/create-rooms.md).
# Create Rooms
## About Rooms
Rooms are primarily used to correctly determine the current location of Localino trackers.
You can create an unlimited number of rooms on a floor.
## Procedure
Rooms are created in 3 steps.
### Step 1: Create a Room Asset
Each room must be created as a separate asset.
Proceed as described in [↗ Create an Asset](/collection/mandatory-base/assets/create-assets.md) and create an asset with the asset type "SPACE."
{% hint style="info" %}
"SPACE" is a predefined asset type.
Rooms created with this asset type will have additional functionalities in the future. For example, rooms will be bookable.
{% endhint %}
### Step 2: Assign Room Asset to a Floor
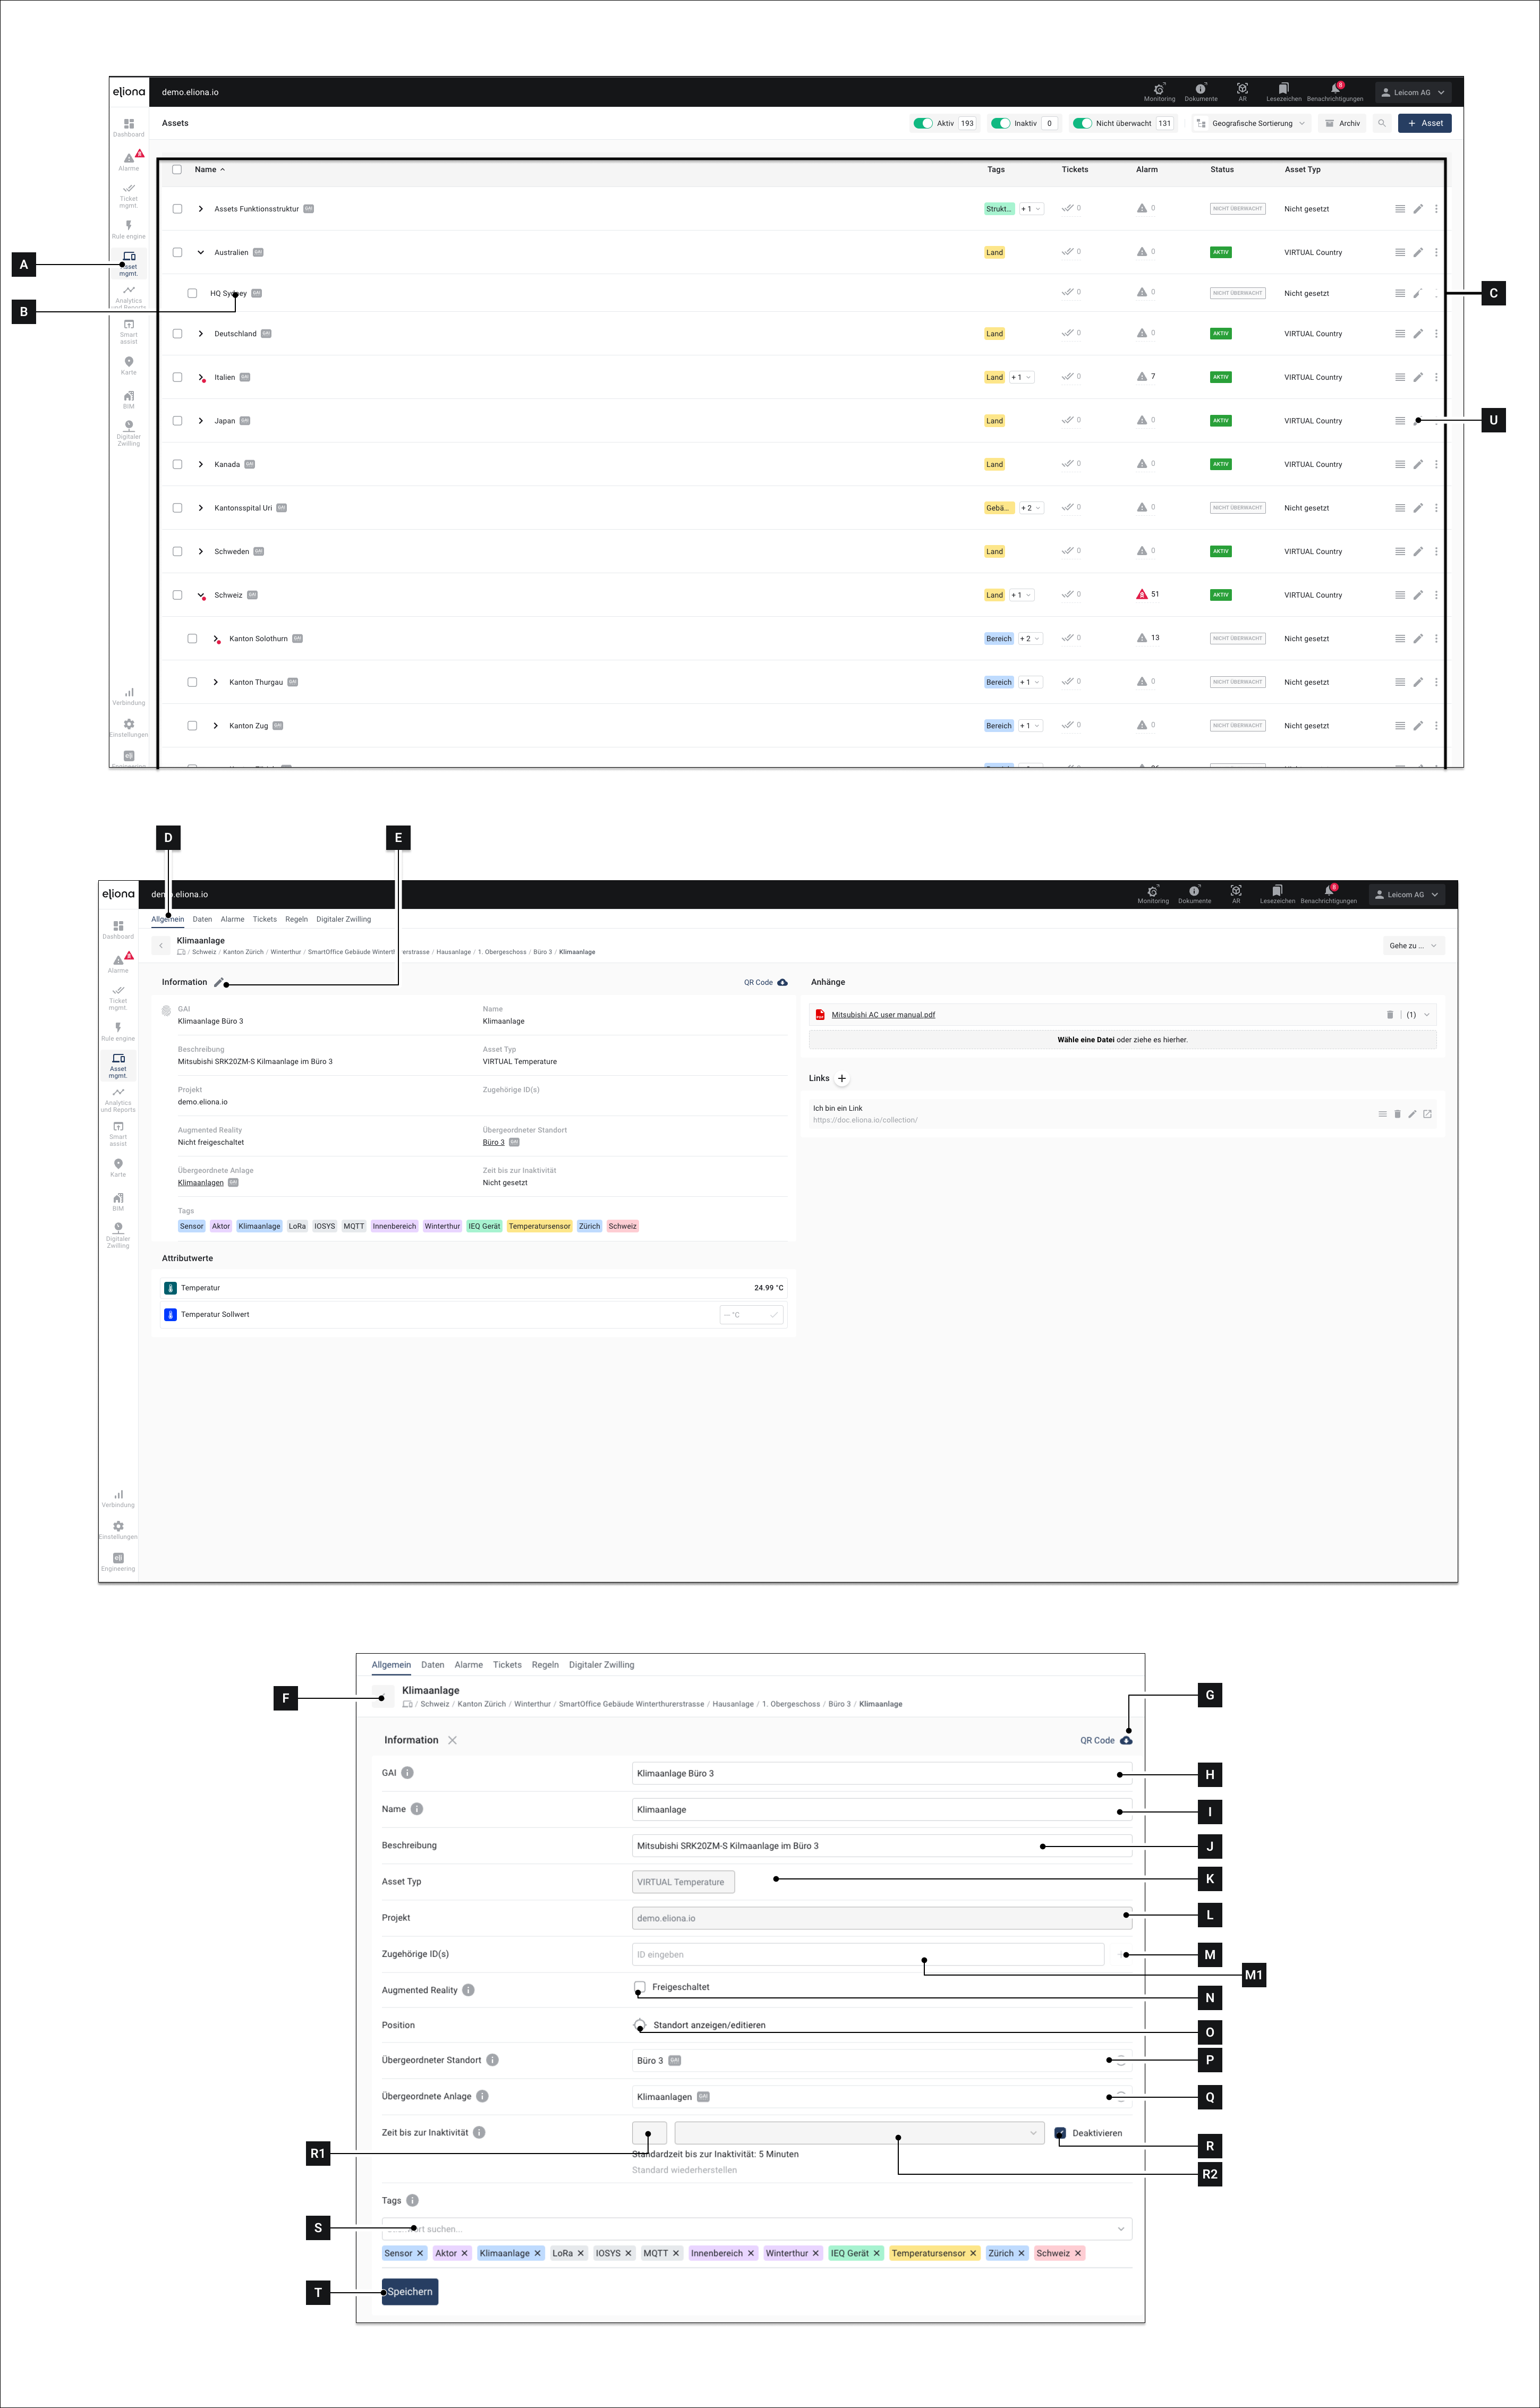
Next, you must assign the newly created room asset to a floor. This is done via the Asset Details.
1. In the menu bar, click on **Assets \[A]**\
▷ The "Assets" menu with the **Asset list \[C]** appears
2. Click on the name of the room asset that you configured in step 1 **\[B]**\
▷ The [-> "Asset Details"](https://doc.eliona.io/collection/documentation/assets/asset-details) open
3. Make sure you are on the "General" tab **\[D]**
4. Click on **\[E]**
5. Under **\[P]**, assign the room asset to a floor
6. Click on **Save \[T]**
### Step 3: Define the Room
Now you can define the room within the floor.
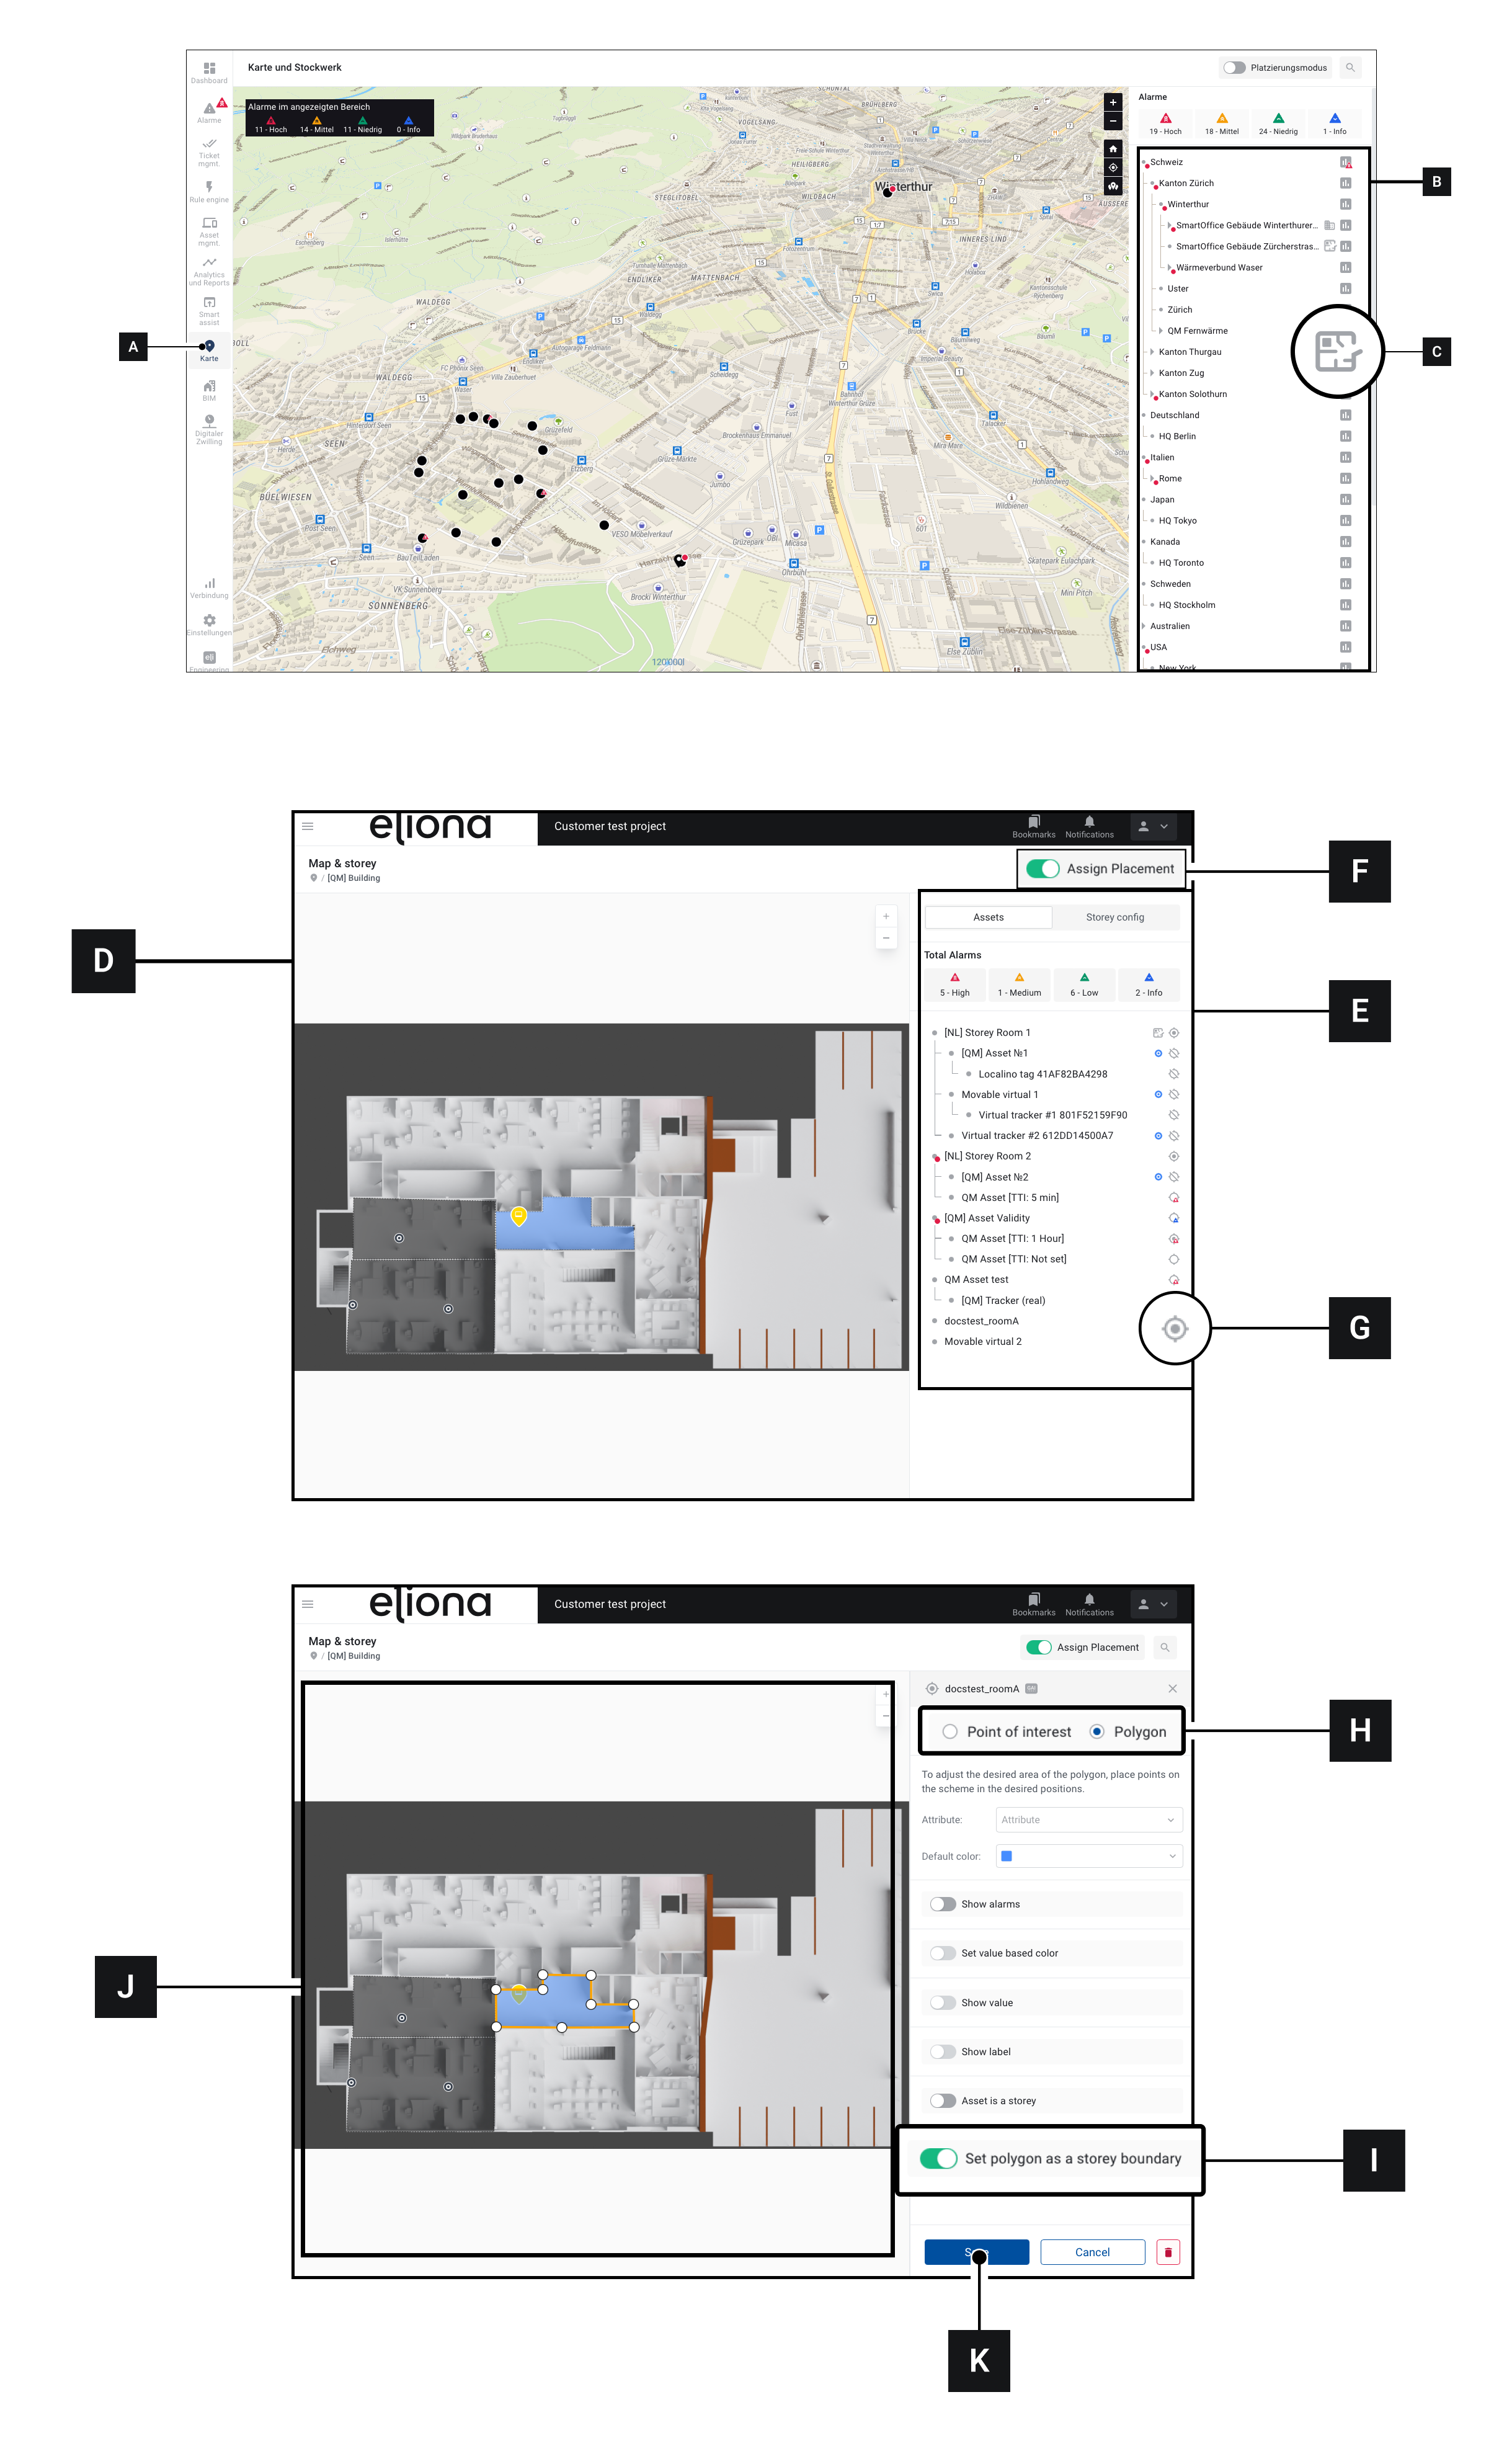
1. Open the map **\[A]**
2. In the sidebar **\[B]**, navigate to the building that contains the floor to which you want to add a room.
3. Expand the building\
▷ The subordinate floors appear
4. For the floor to which you want to assign the room: Click on **\[C]** ⌧ NOTE: Do not click on the name of the floor! You must click on the symbol.\
▷ The floor details **\[D]** open.\
▷ In the sidebar **\[E]**, you will see the asset that you created in the previous steps and assigned to the floor. You may also see other assets that are on the floor.
5. Activate the placement mode **\[F]**\
▷ The symbols next to the assets change.
6. For the room asset you want to define: Click on **\[G]**\
▷ The sidebar changes
7. Select Polygon **\[H]**
8. Activate the switch "Set Polygon as a storey boundry" **\[I]**
9. In the viewport **\[J]**, define the polygon as explained in [↗ Place a Polygon.](/collection/platform/map-and-floor/floor.md#polygons)
10. Click on Save **\[K]**
{% hint style="warning" %}
**CAUTION!** Multiple rooms may not overlap. If multiple rooms overlap, errors can occur.
{% endhint %}
---
# Agent Instructions
This documentation is published with GitBook. GitBook is the documentation platform designed so that both humans and AI agents can read, navigate, and reason over technical content effectively. Learn more at gitbook.com.
## Querying This Documentation
If you need additional information that is not directly available in this page, you can query the documentation by asking a question.
Perform an HTTP GET request on the following URL with the `ask` and `goal` query parameters:
```
GET https://docs.buildings.ability.abb/collection/platform/map-and-floor/floor/create-rooms.md?ask=&goal=
```
`ask` is the immediate question: it should be specific, self-contained, and written in natural language.
`goal` is what the user is ultimately trying to achieve, the reason they need the answer. Sharing it helps GitBook give you a better, more relevant answer. A goal is most helpful when it describes the outcome the user wants rather than restating the question. For example, with `ask=how do I create an API token`, a goal like `automate deployments from our CI pipeline` lets GitBook tailor the answer to that use case.
The response will contain a direct answer to the question and relevant excerpts and sources from the documentation.
Use this mechanism when the answer is not explicitly present in the current page, you need clarification or additional context, or you want to retrieve related documentation sections.