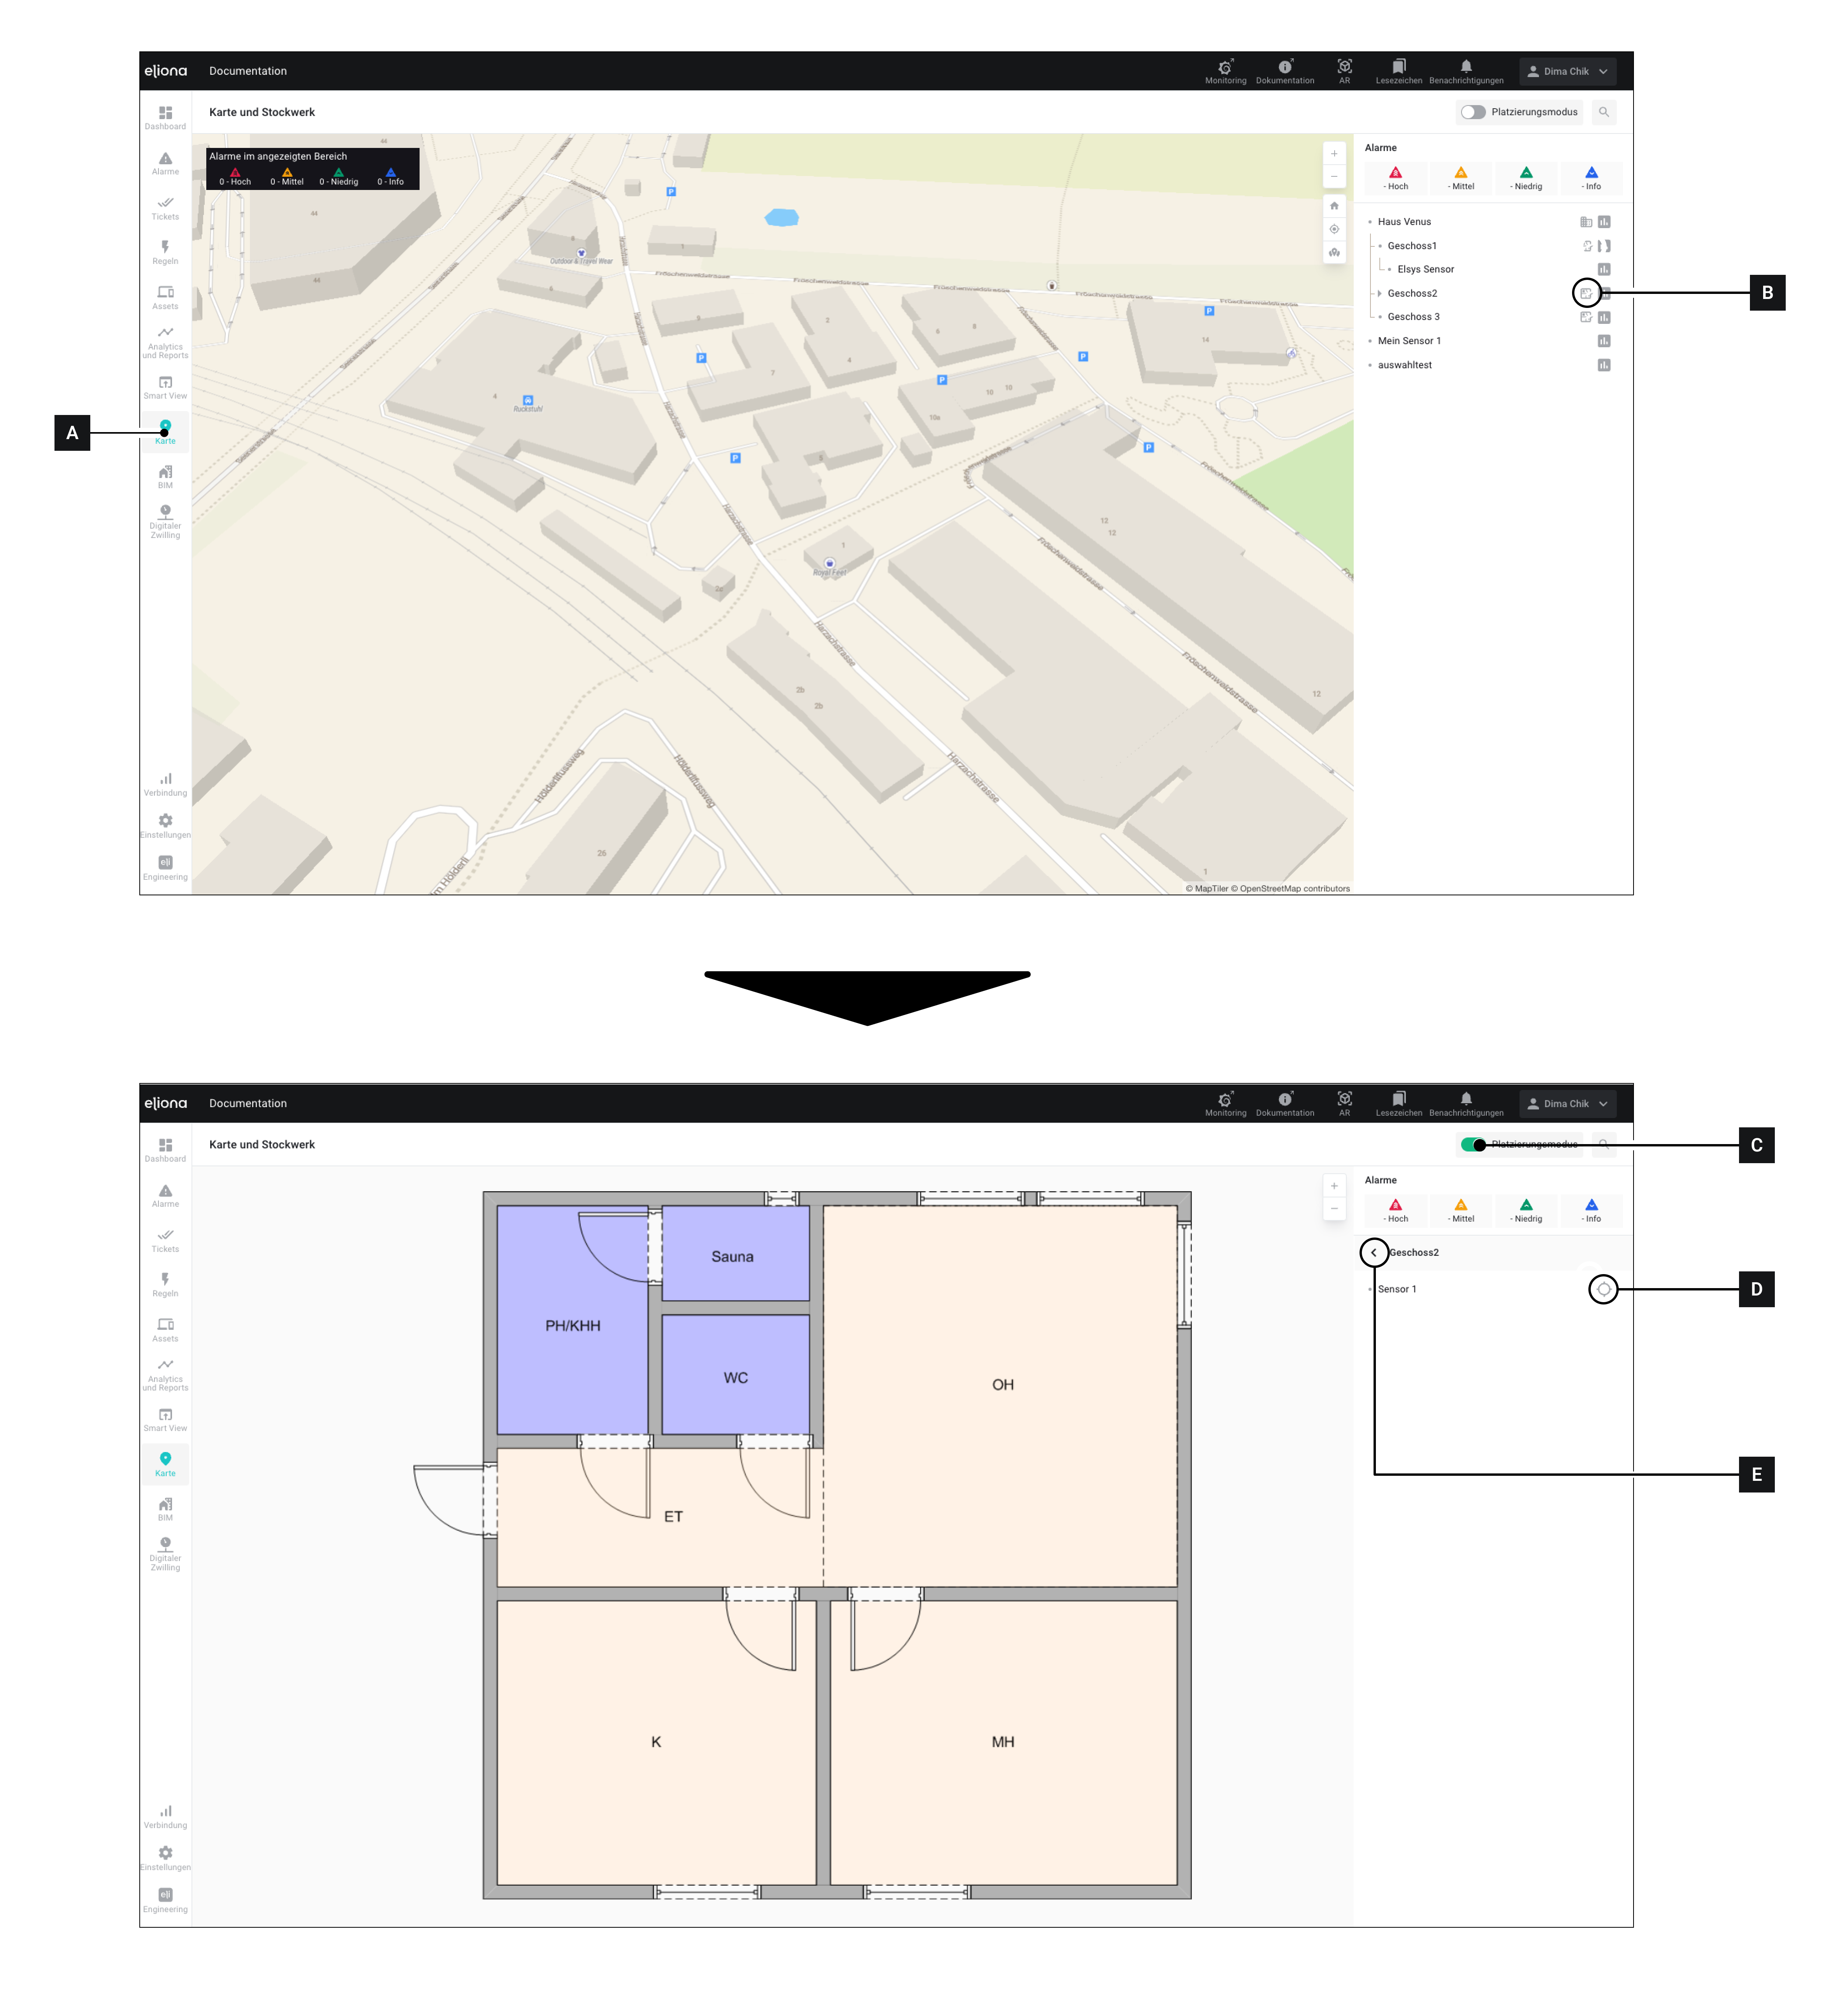
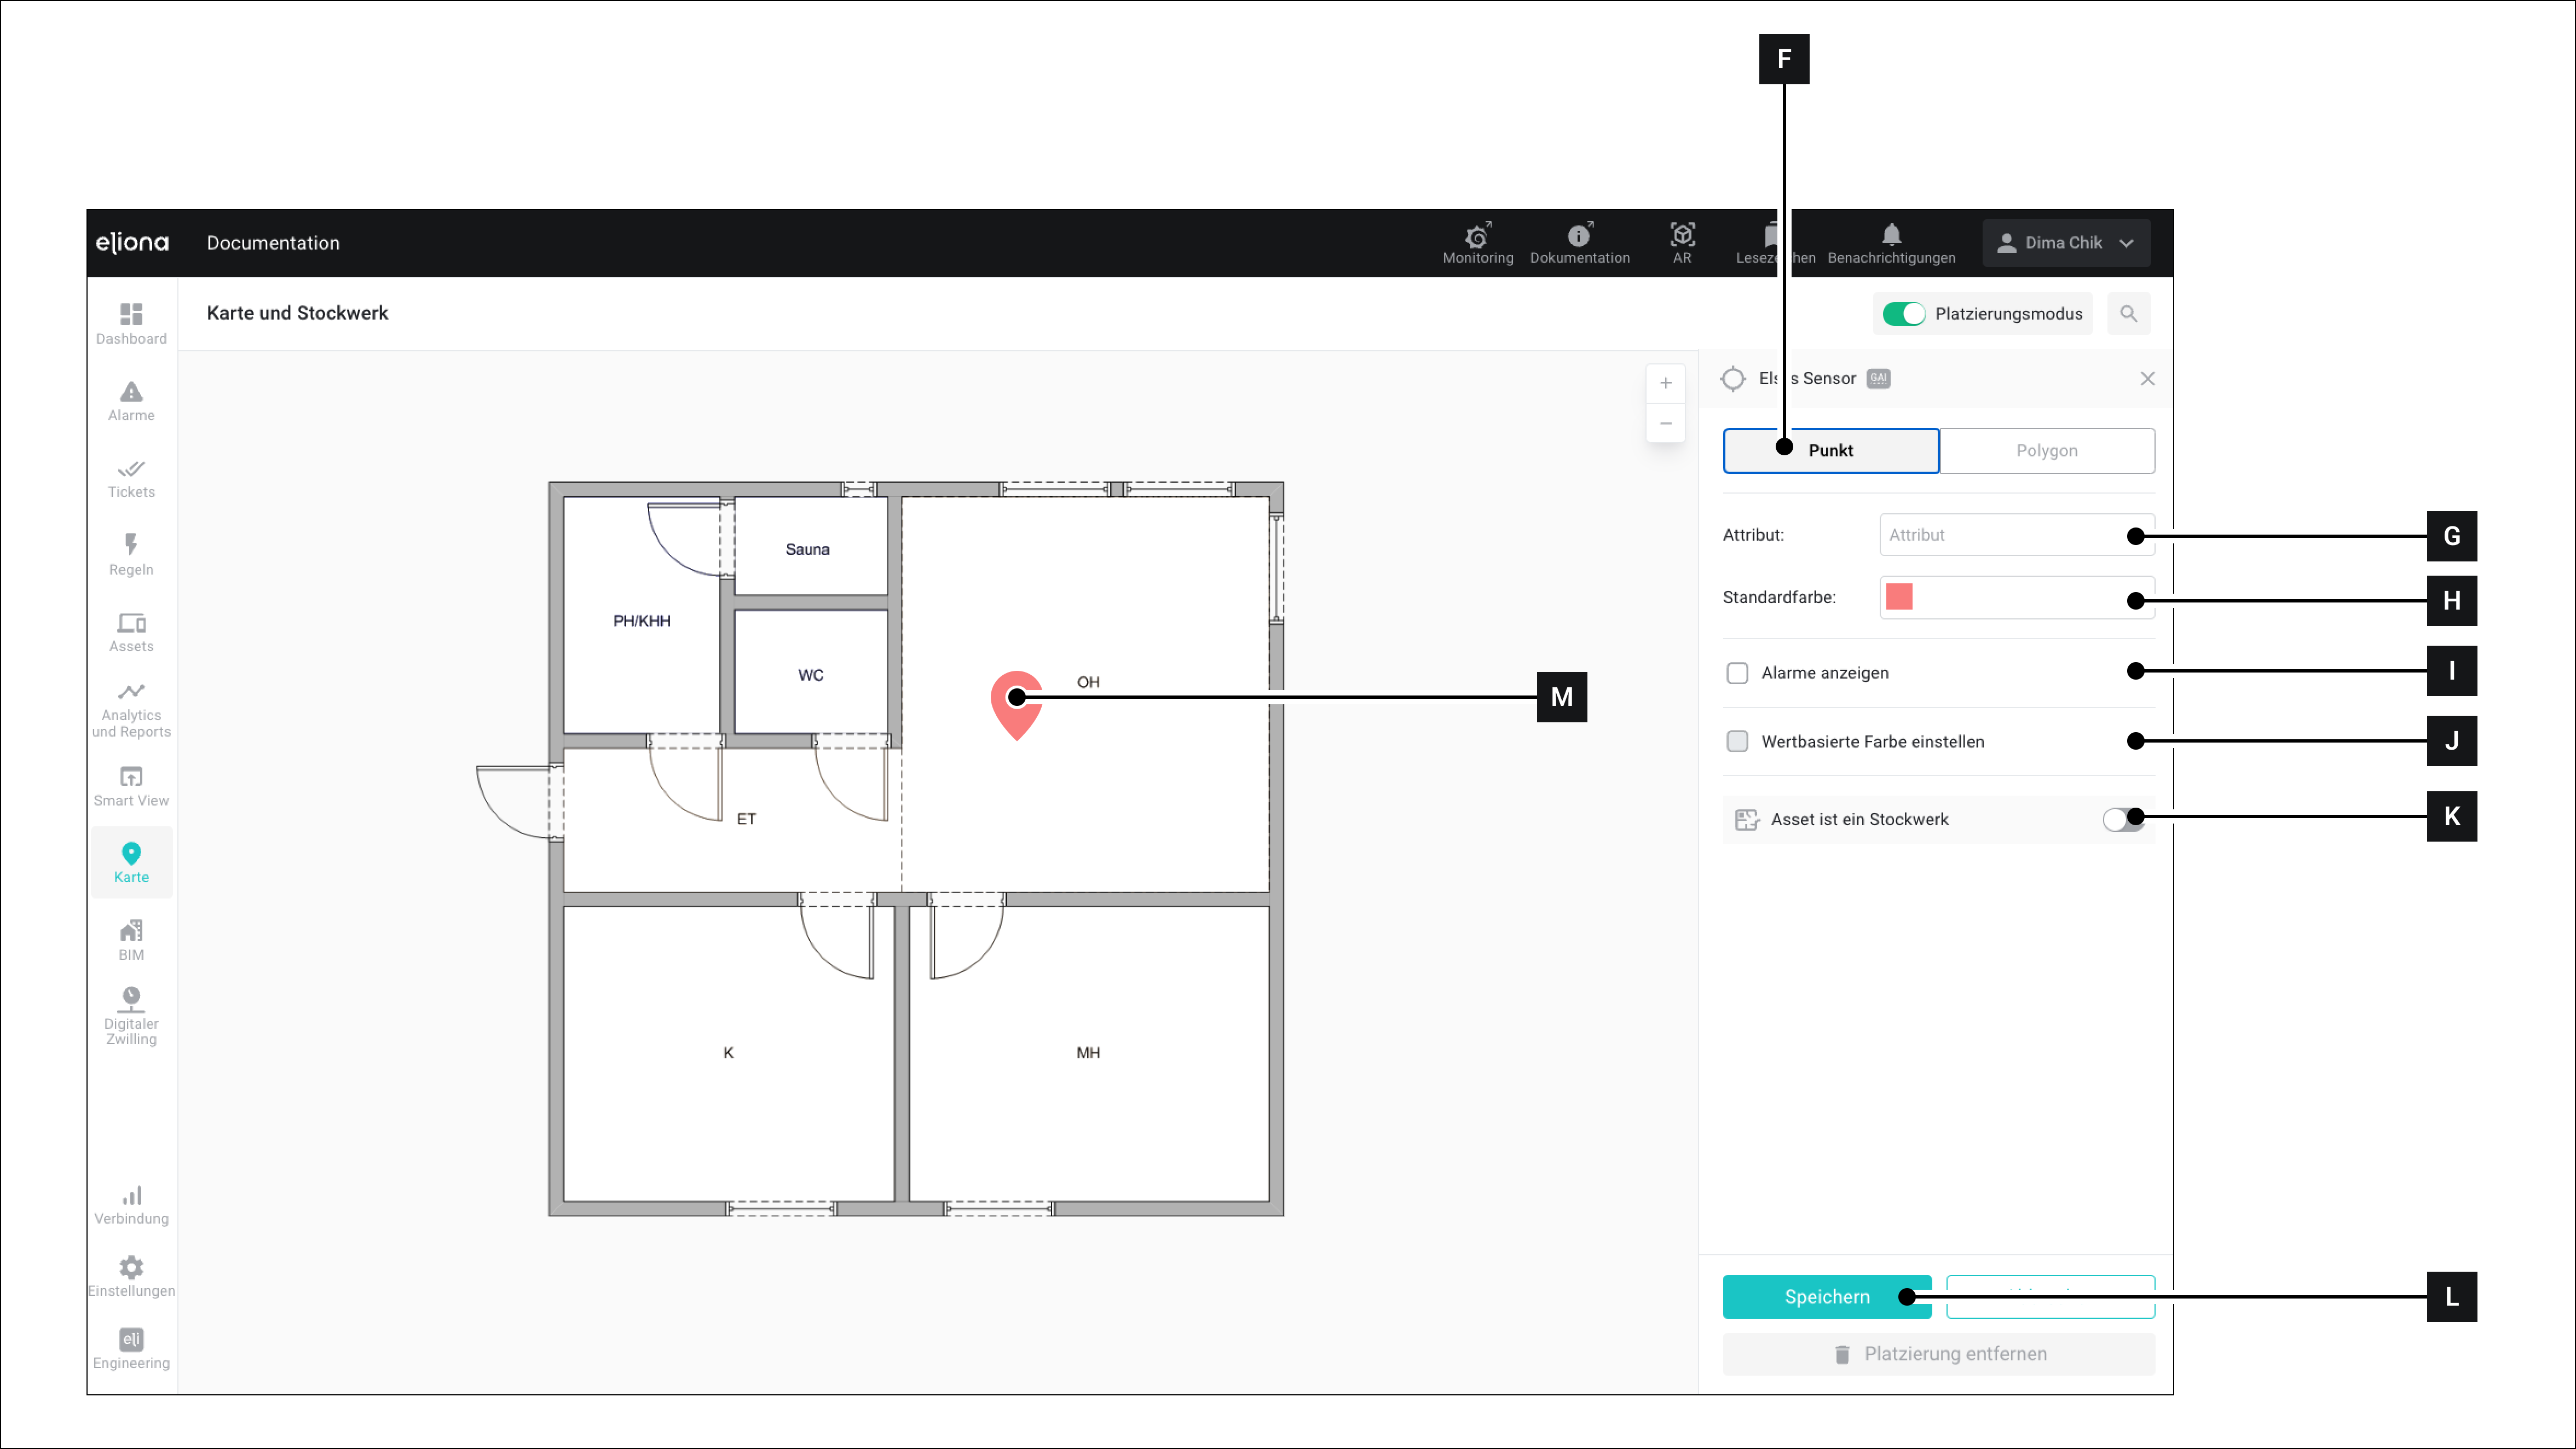
The "Place selection" for a point
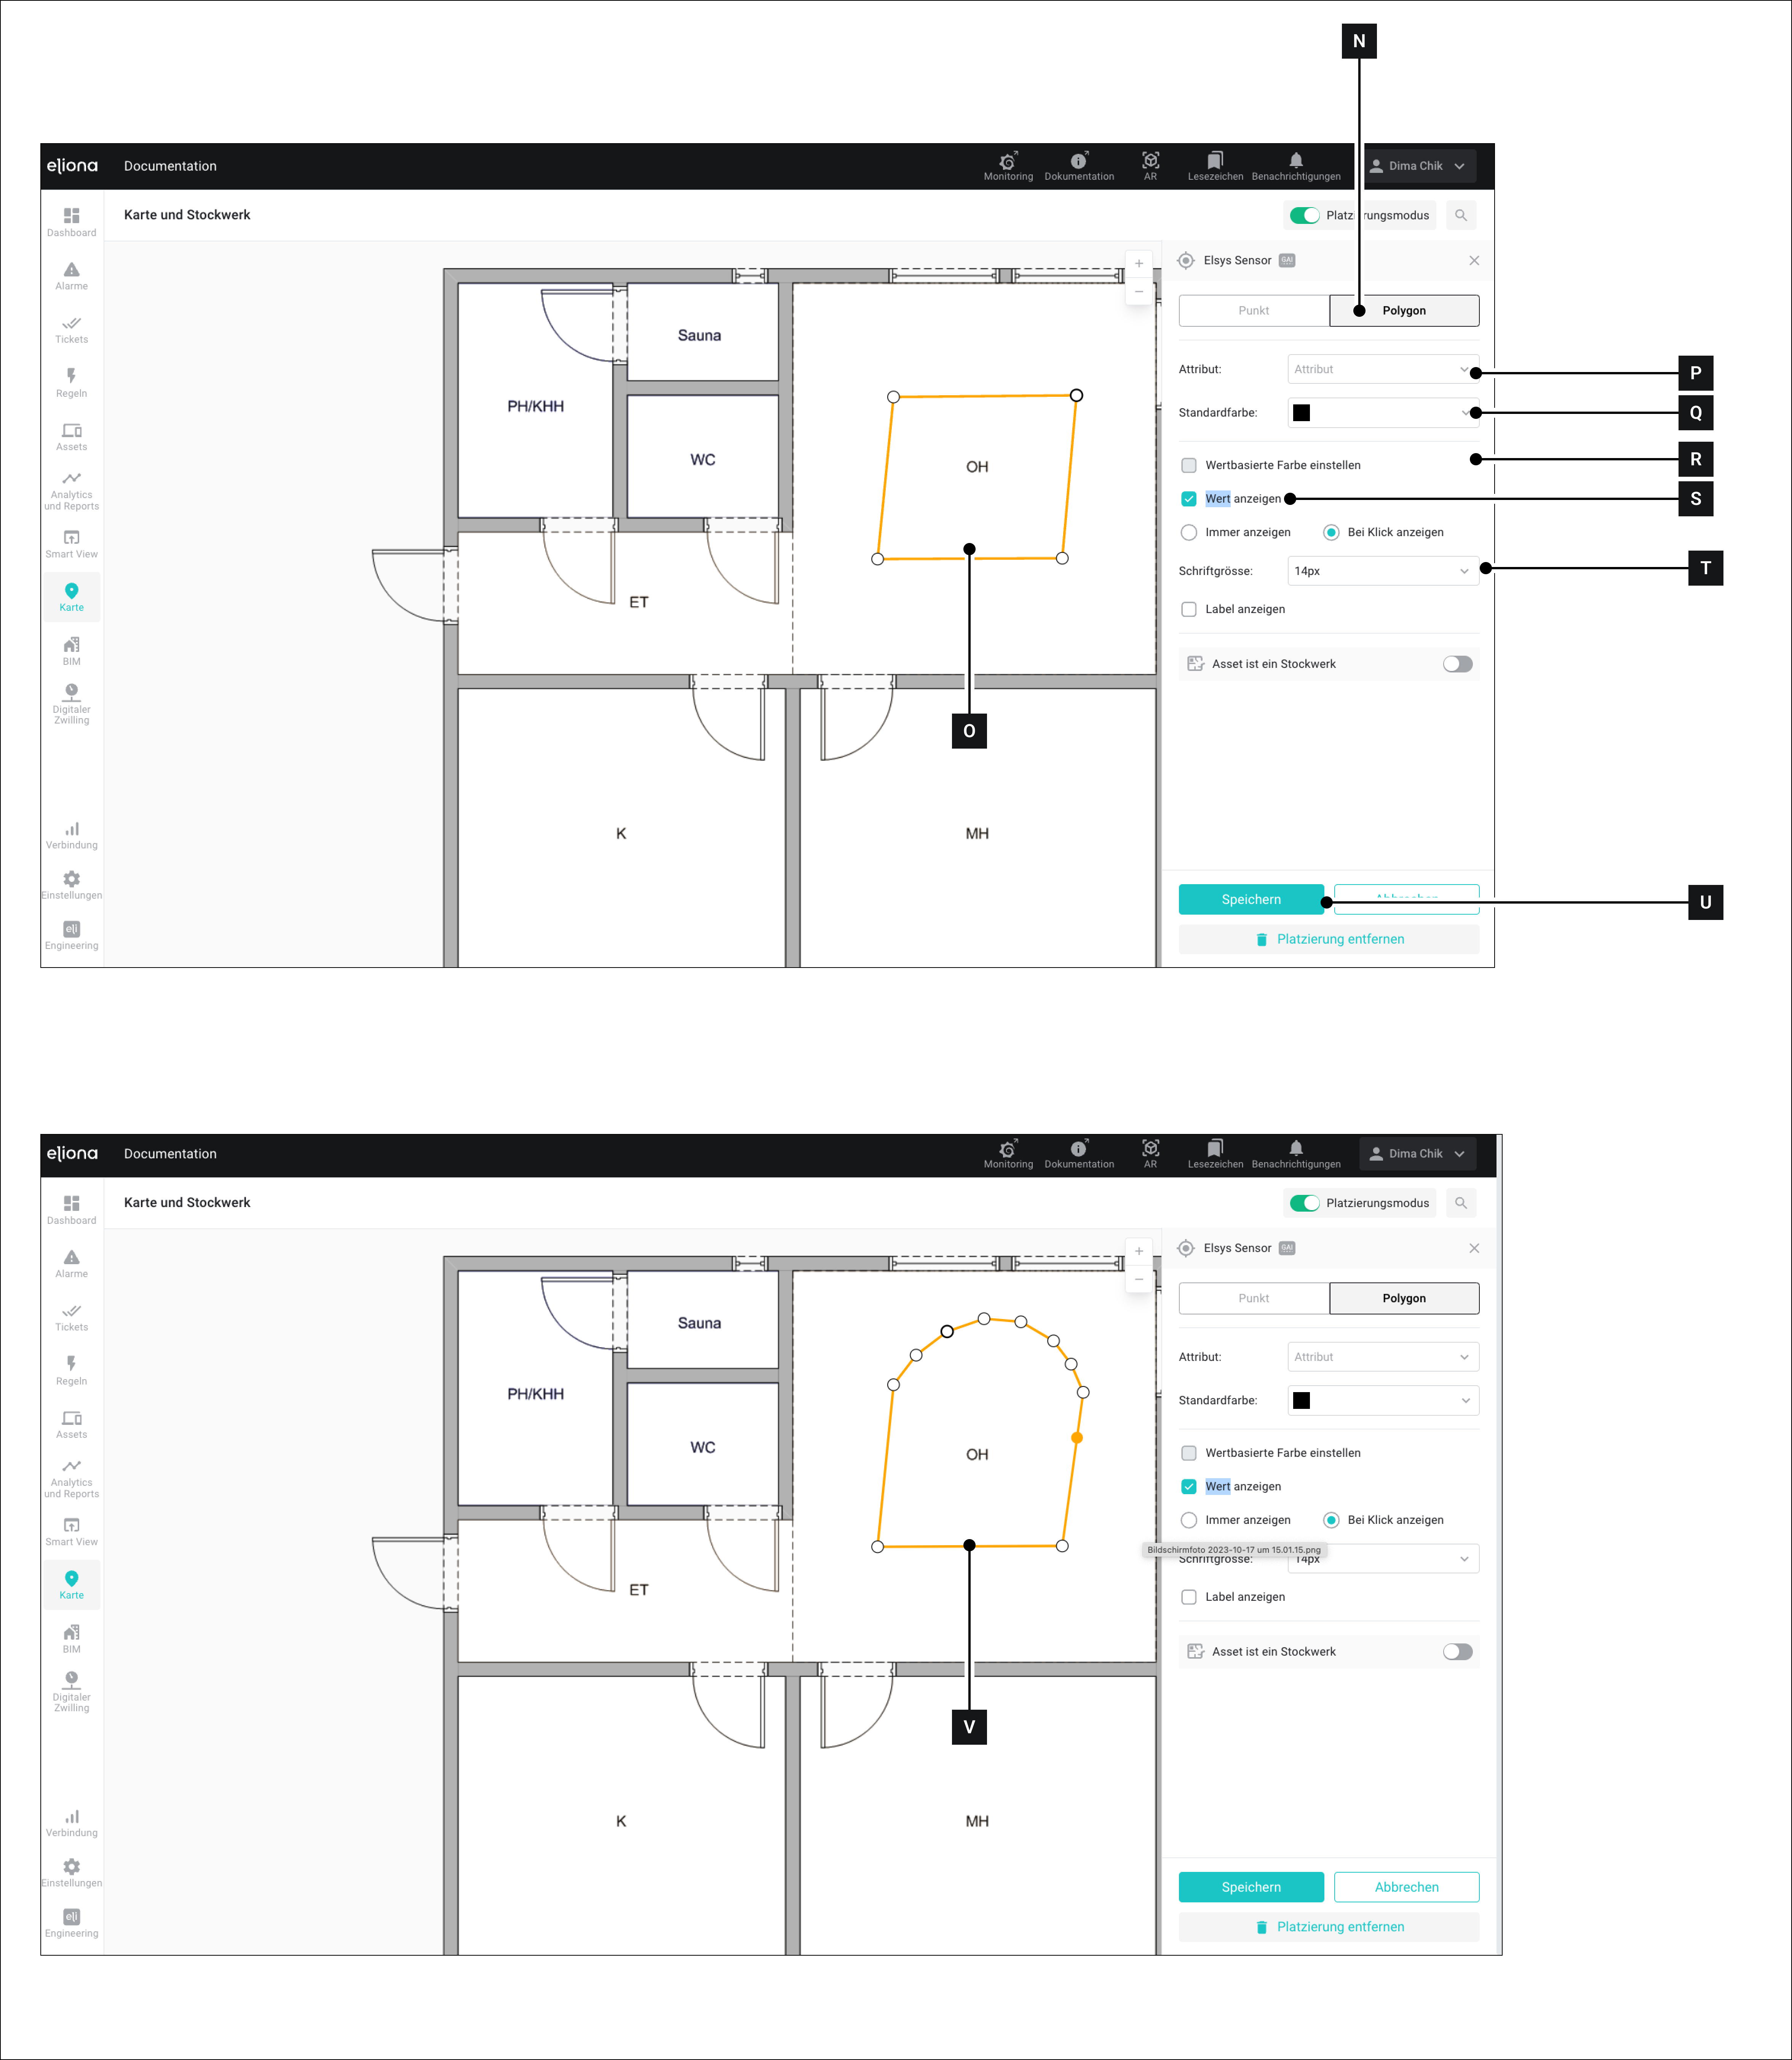
The "Place selection" for a polygon
.png?alt=media&token=23b4cb32-292a-4e85-8438-42a126465047)
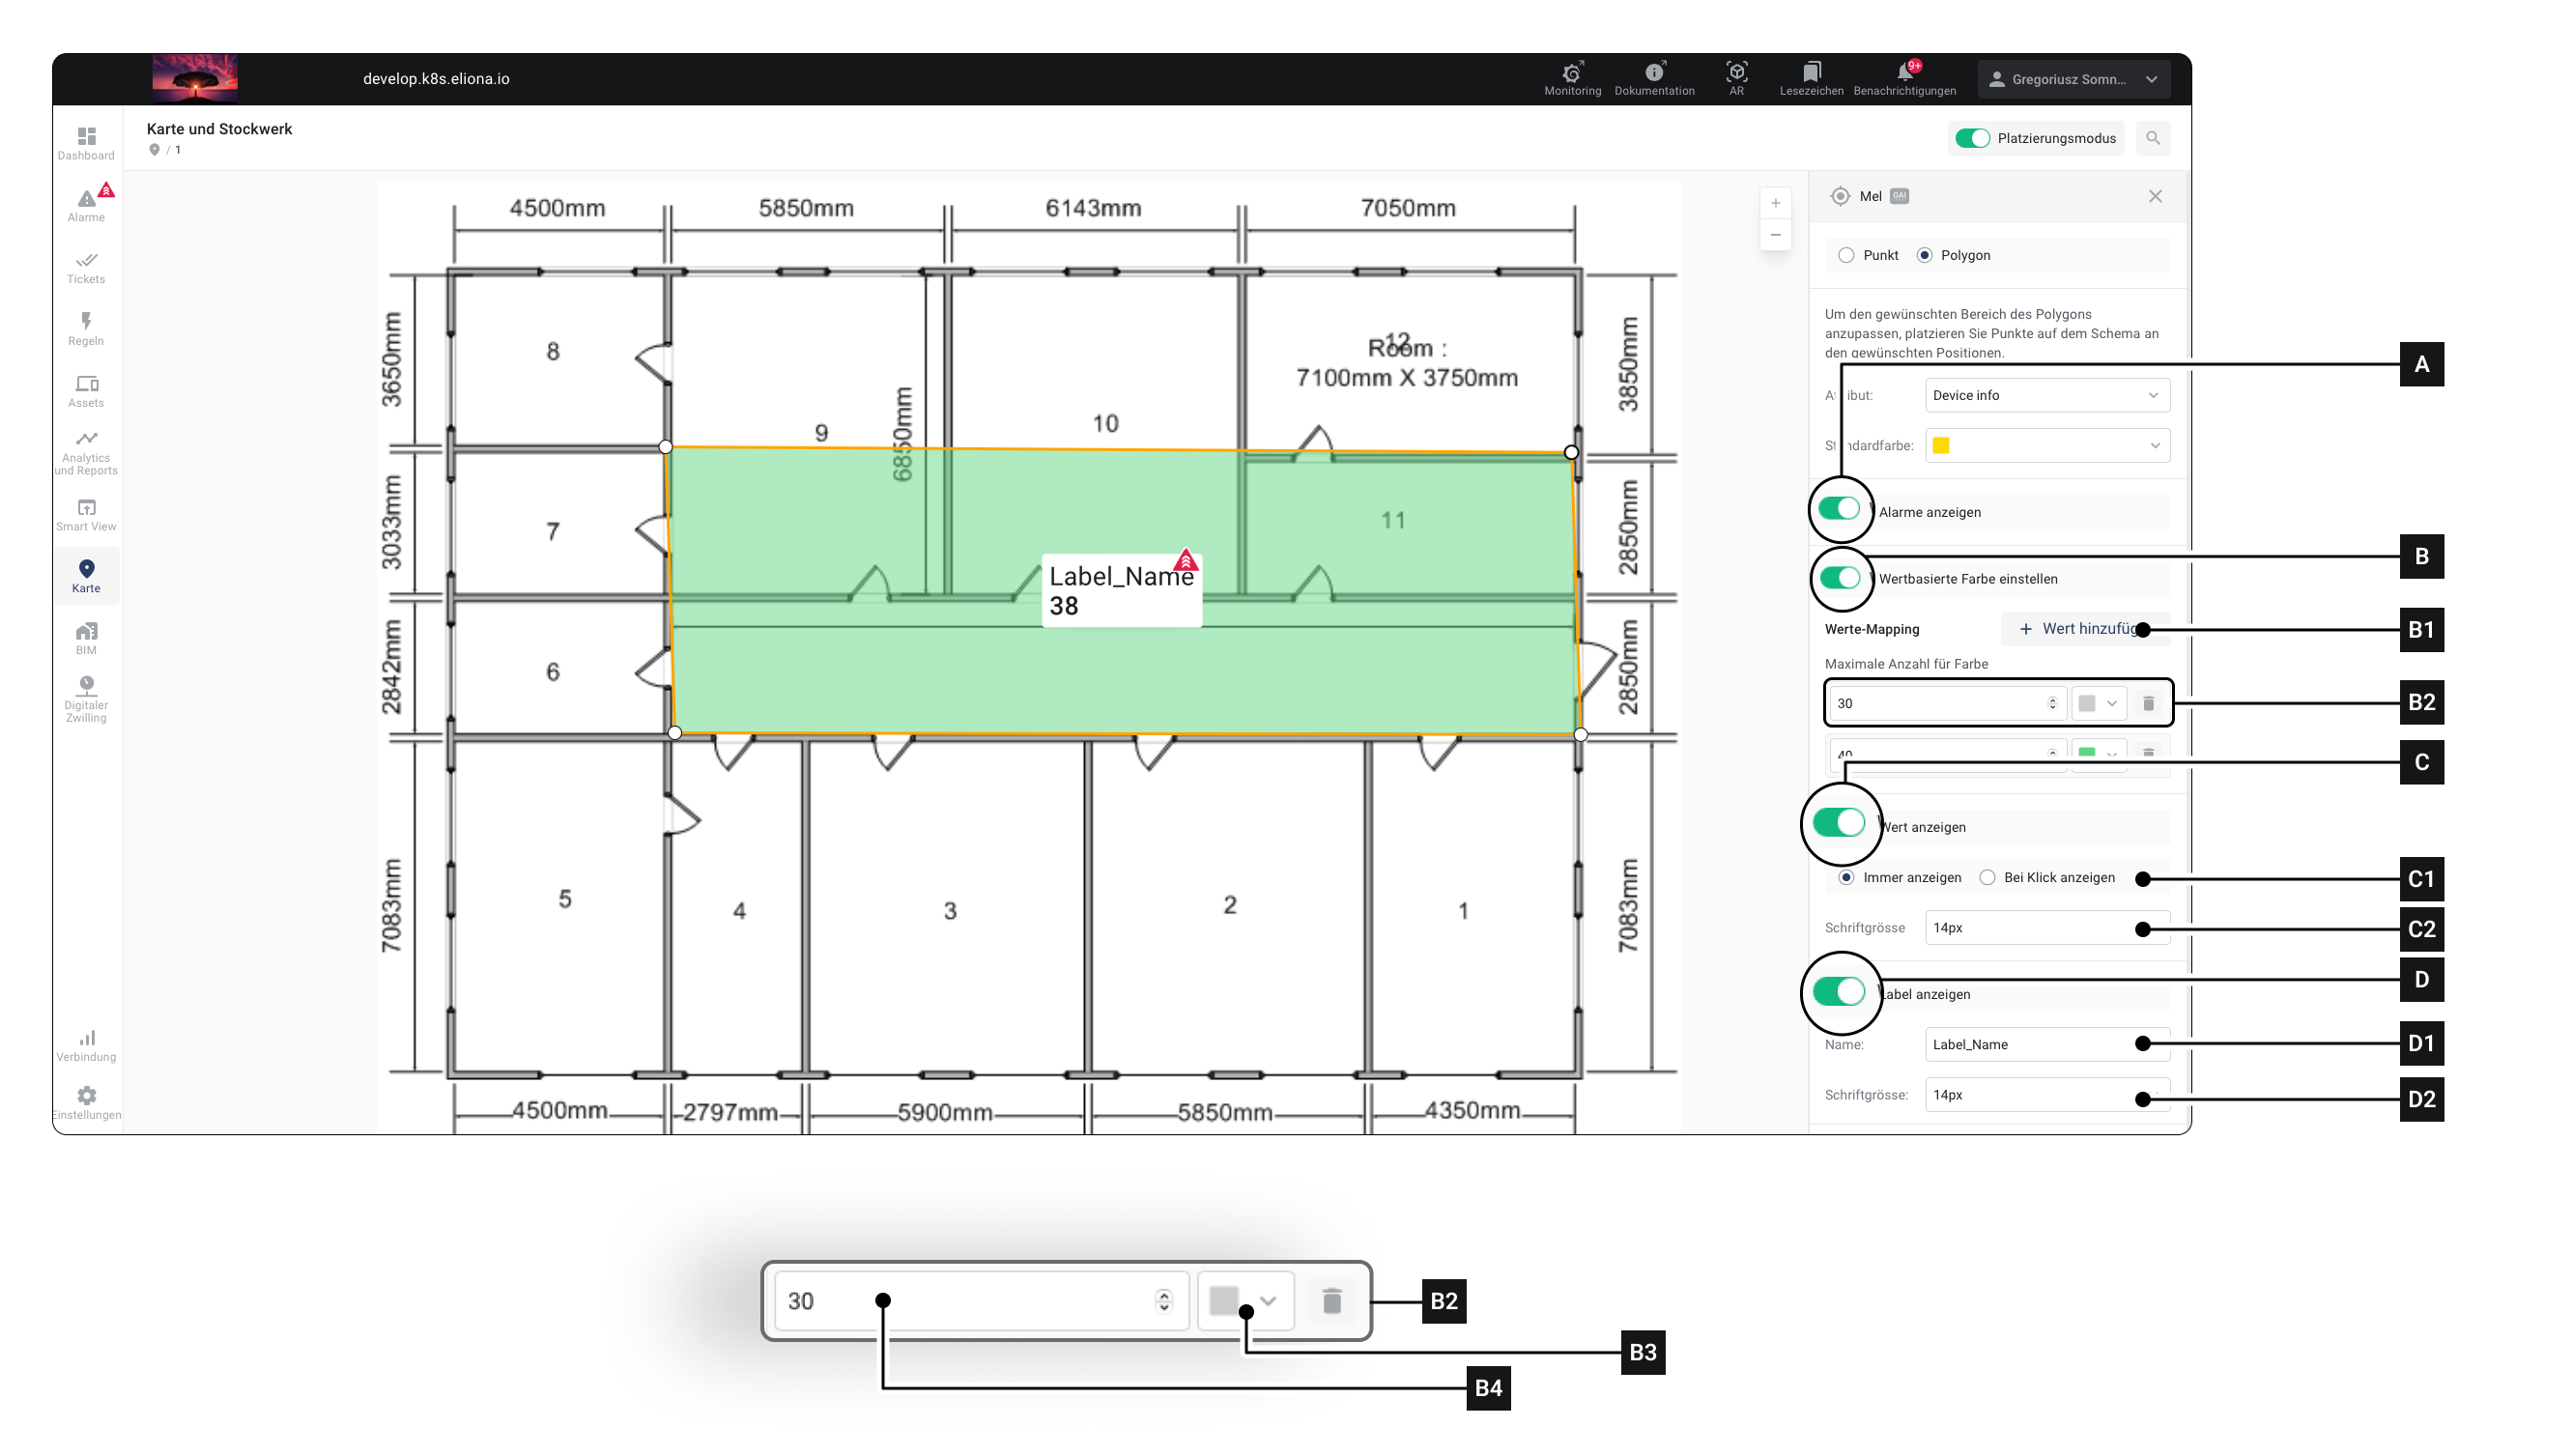
| Element | Title | Details |
|---|---|---|
| [A] | "Alarms" switch | Activate this switch if an alarm should be displayed in the polygon. |
| [B] | "Set value-based color" switch | Activate this switch to change the color of the polygon depending on the value of the connected asset. -> Value Mapping |
| [B1] | Add new value | Click to add a new limit value |
| [B2] | Value | An entry for a limit value. |
| [B3] | Value specification | Here you can enter the desired limit value. |
| [B4] | Choose color | As long as the value is within the range defined in [B3], the polygon is displayed in the selected color. |
| [C] | "Show value" switch | Activate this switch so that the current value of the asset is displayed in the polygon. |
| [C1] | Selection | Choose whether the value is always displayed or only after a click. |
| [C2] | Font size | Set the font size of the value. |
| [D] | "Label" switch | Activate this switch so that the current value of the asset is displayed in the polygon. |
| [D1] | Label name | Enter the text to be displayed in the label here |
| [D2] | Font size | Set the font size of the label. |
| [E] | "Asset is a floor" switch | Asset is now seen as a floor |
| [E1] | Floor schema | Upload a floor plan here |
| [E2] | Floor number | Select the number of the floor here. |
| [F] | "Set polygon as room boundaries" switch | Here, the room boundaries for the trackers can be determined. |
| [G] | "Asset can be booked" switch | When the switch is activated, the asset can be booked in the Booking Widget. To enable this, the "Bookable" option must be activated in the asset template. |