# Configure a Subscription

{% hint style="success" %}
**Prerequisite** You have created a new subscription as explained in [↗ Broker Details -> Create new subscription](https://docs.buildings.ability.abb/collection/mandatory-base/platform-core/connect-hub/connectivity-as-a-service/configure-client#configure-broker).
{% endhint %}

## Overview

<div data-full-width="true"><figure><img src="https://3489494878-files.gitbook.io/~/files/v0/b/gitbook-x-prod.appspot.com/o/spaces%2F9GvUpaatBiReR43XFSMg%2Fuploads%2FC4nJspX0Px3FYBrt5TdT%2FDocsConnection%20Neue_Subscription.png?alt=media&#x26;token=30c937b7-a1e1-4336-bc6d-a02d37ec17d0" alt=""><figcaption><p>
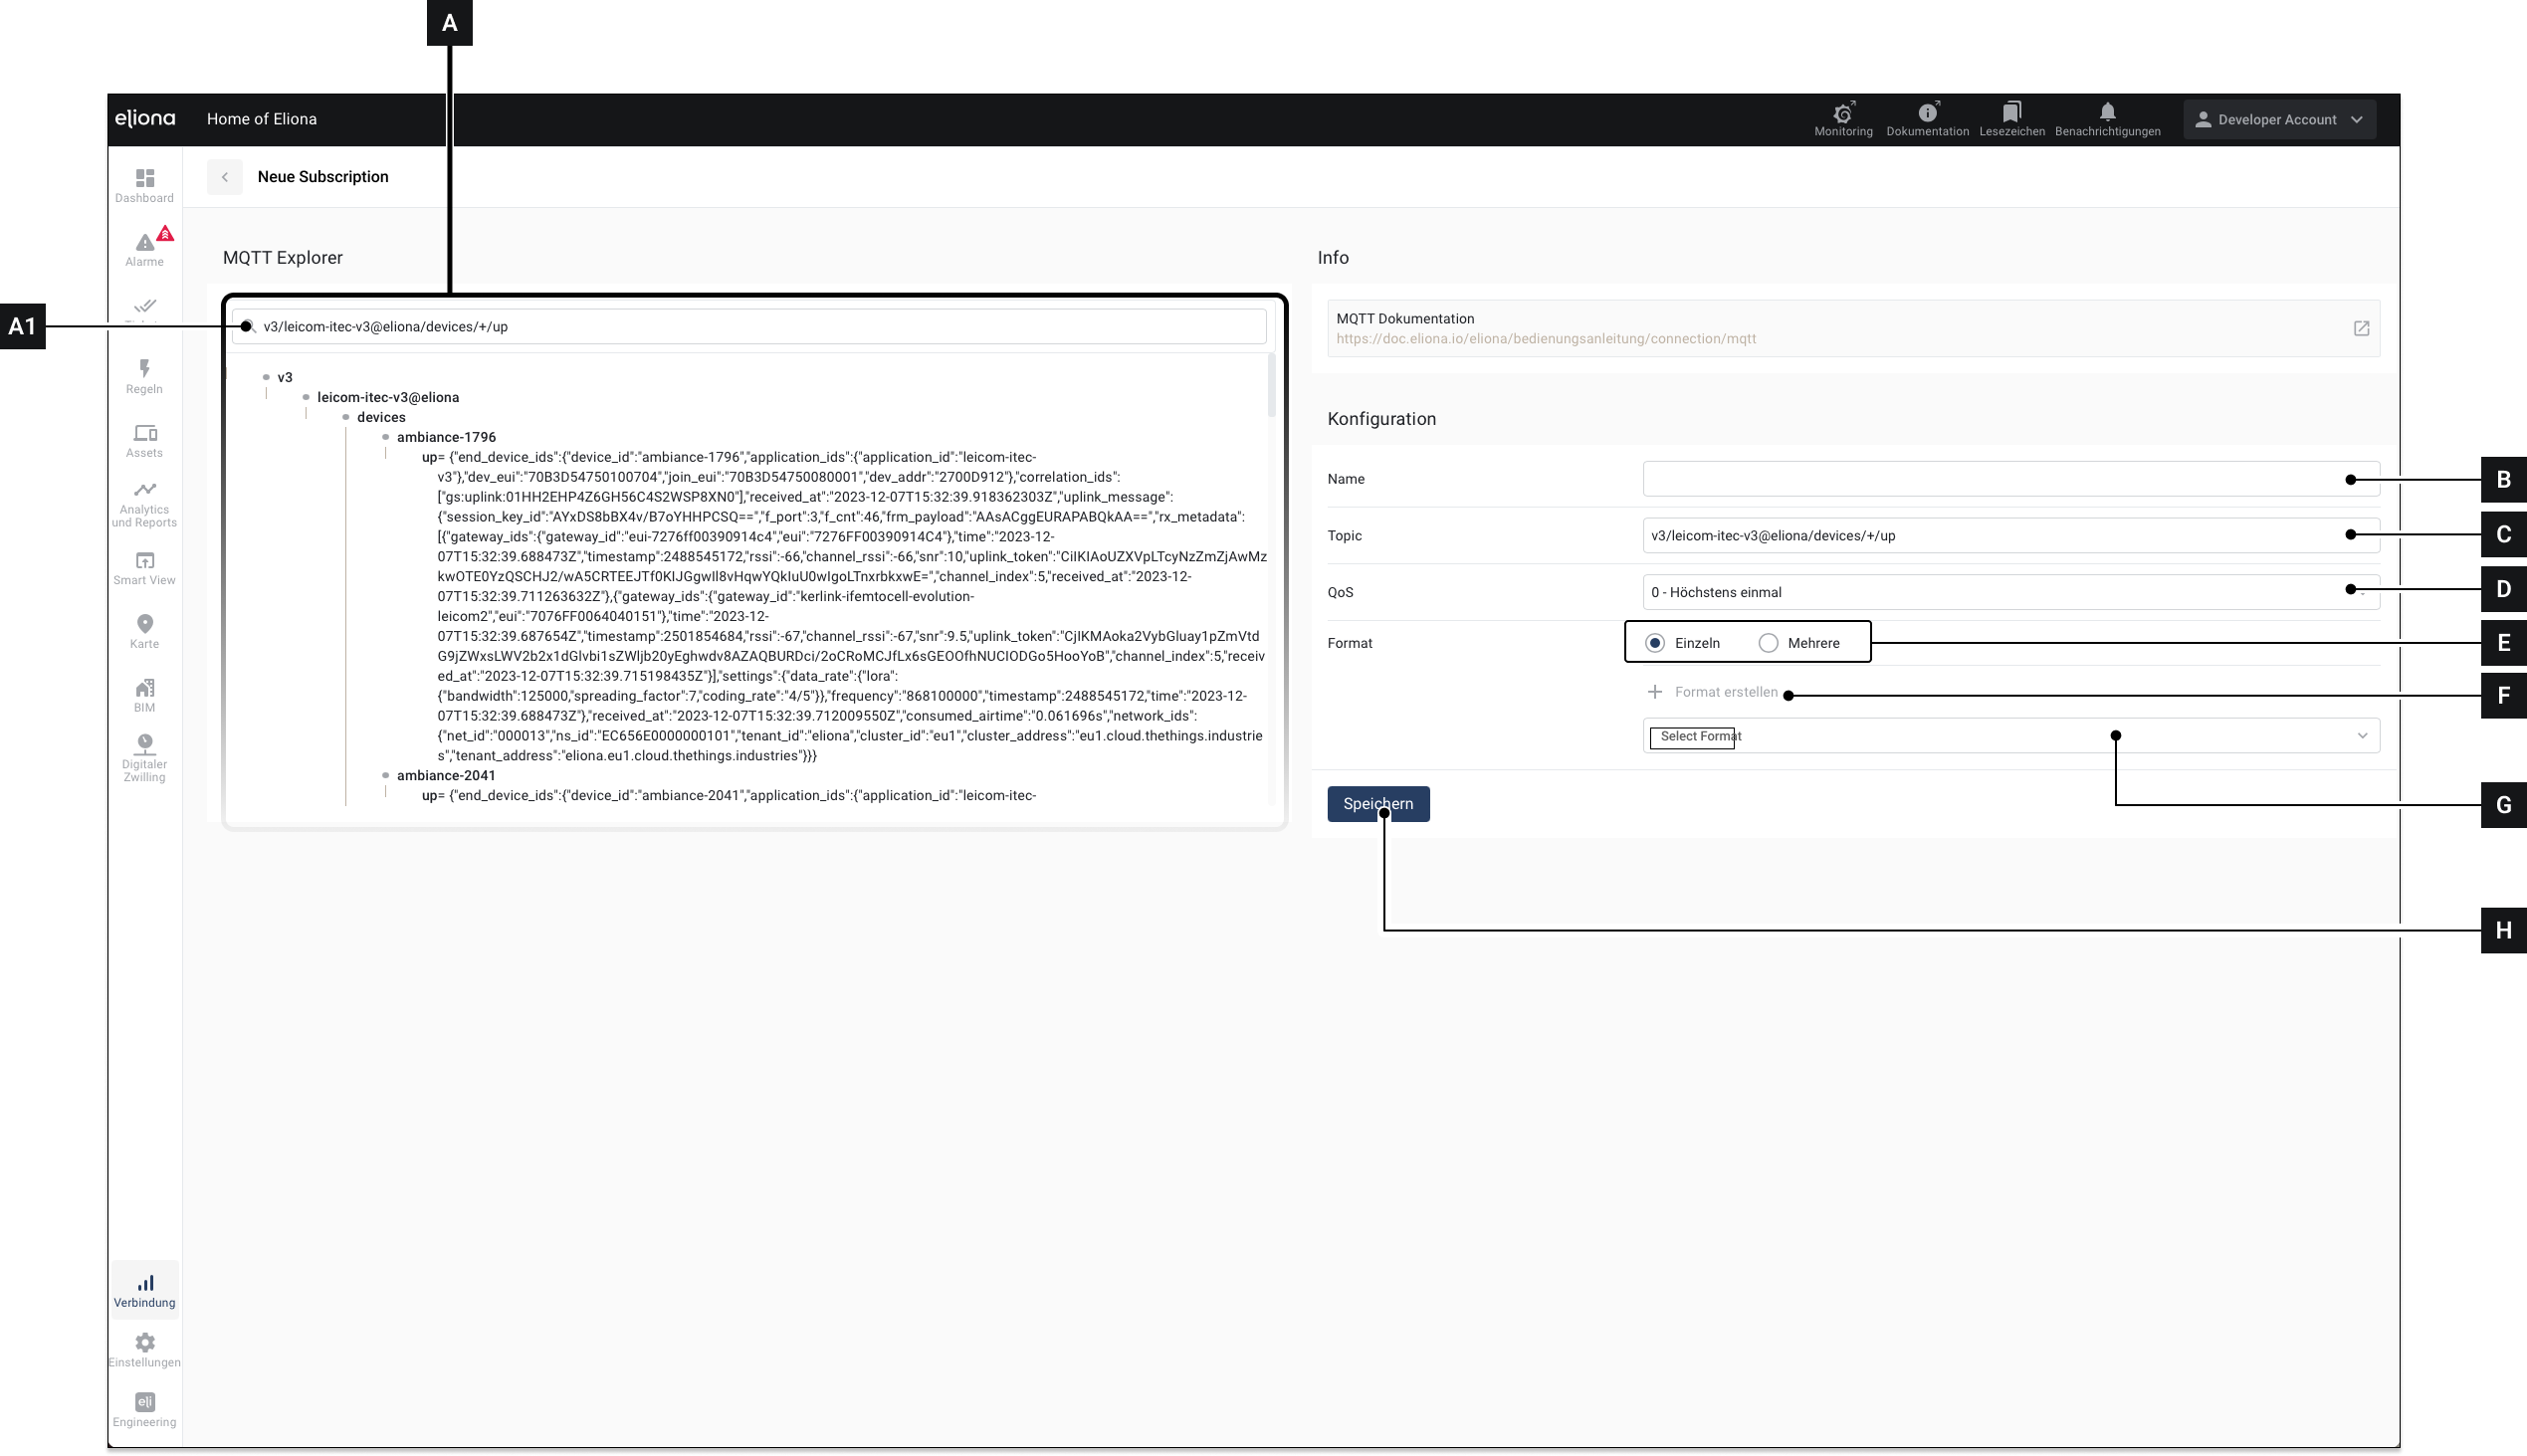
Fig. 1 – Create a new subscription</p></figcaption></figure></div>

<table data-full-width="true"><thead><tr><th width="74.73332722981769">Symbol</th><th width="218">Description</th><th>Details</th></tr></thead><tbody><tr><td><strong>[A]</strong></td><td>Topic preview</td><td>In this section, you see a preview of the incoming data</td></tr><tr><td><strong>[A1]</strong></td><td>Input for the topic preview</td><td>Enter an MQTT topic here. Its data appears in the preview.<br><br>Important: In this field, you do <strong>NOT</strong> enter the topic to which you want to create a subscription – this is done in <strong>[C]</strong></td></tr><tr><td><strong>[B]</strong></td><td>Name</td><td>Give the subscription a name. The subscription is displayed in the subscription list (in the broker details) under this name</td></tr><tr><td><strong>[C]</strong></td><td>Topic</td><td>Enter the MQTT topic here to which you want to create a subscription.</td></tr><tr><td><strong>[D]</strong></td><td>QoS (Quality of Service)</td><td>Select a value. The QoS indicates the level of message delivery between the MQTT broker and the connected clients
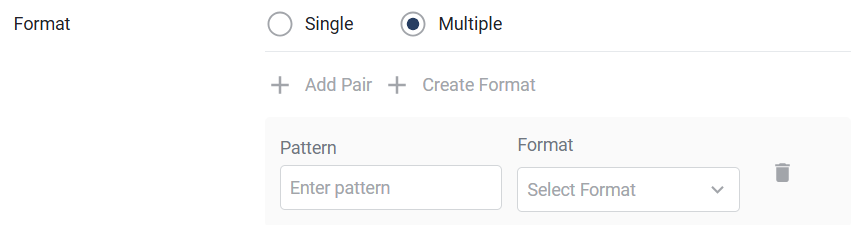
</td></tr><tr><td><strong>[E]</strong></td><td>One or more formats</td><td>Choose whether a single format or multiple formats should be applied to the incoming data. <a href="#one-or-more-formats">-> One or more formats</a></td></tr><tr><td><strong>[F]</strong></td><td>Create format</td><td>If you want to define a new format, click here. The window <a href="../../data-processing-function-formats/configure-a-format">↗ Configure Format</a> opens</td></tr><tr><td><strong>[G]</strong></td><td>Select existing format</td><td>Alternatively to <strong>[F]</strong>, you can also select an existing format</td></tr><tr><td><strong>[H]</strong></td><td>Save</td><td>Click to save the subscription</td></tr></tbody></table>

## One or more formats

<figure><img src="https://3489494878-files.gitbook.io/~/files/v0/b/gitbook-x-prod.appspot.com/o/spaces%2F9GvUpaatBiReR43XFSMg%2Fuploads%2F7YprOR3PyNGgSlgKW5Od%2Fimage.png?alt=media&#x26;token=1ebc7f1f-3fa6-4298-b536-07be18c5be60" alt=""><figcaption></figcaption></figure>

Choose whether a single format or multiple formats should be applied to the incoming data.

◈ If you select *Single*, the same format is used for all incoming data.

◈ If you select *Multiple*, you can differentiate the processing of the data – depending on the *topic*. This means: Within a subscription, different topics can be processed with different formats. For this, you use **patterns** to determine which data belongs to which format.

**Example:**

You subscribe to the topic `levels/+`. There are two actual topics:

* `levels/level1` → this data should be processed with **Decoder A**
* `levels/level2` → this data should be processed with **Decoder B**

Then in multiple mode, you enter two pairs:

| Pattern         | Format    |
| --------------- | --------- |
| `levels/level1` | Decoder A |
| `levels/level2` | Decoder B |

▷ This way, the data is automatically decoded with the correct format depending on the topic.
